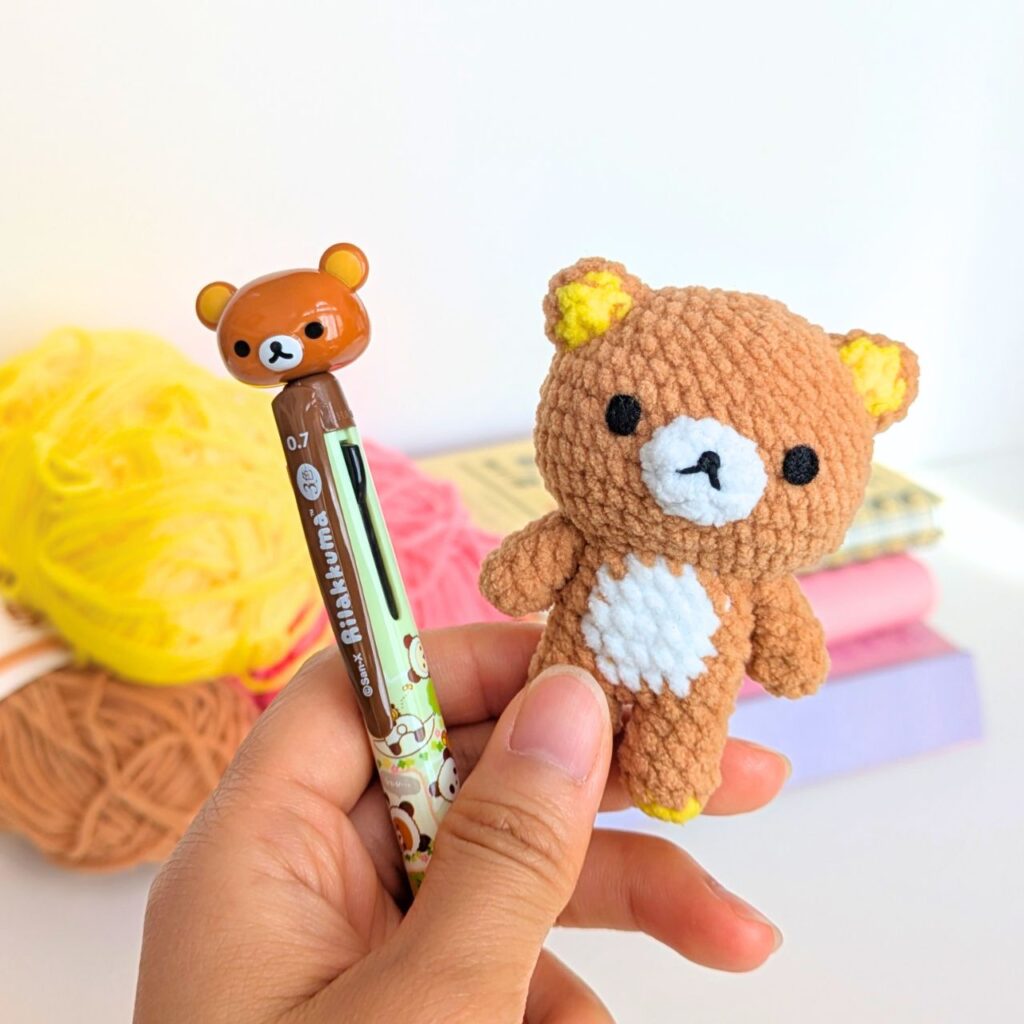
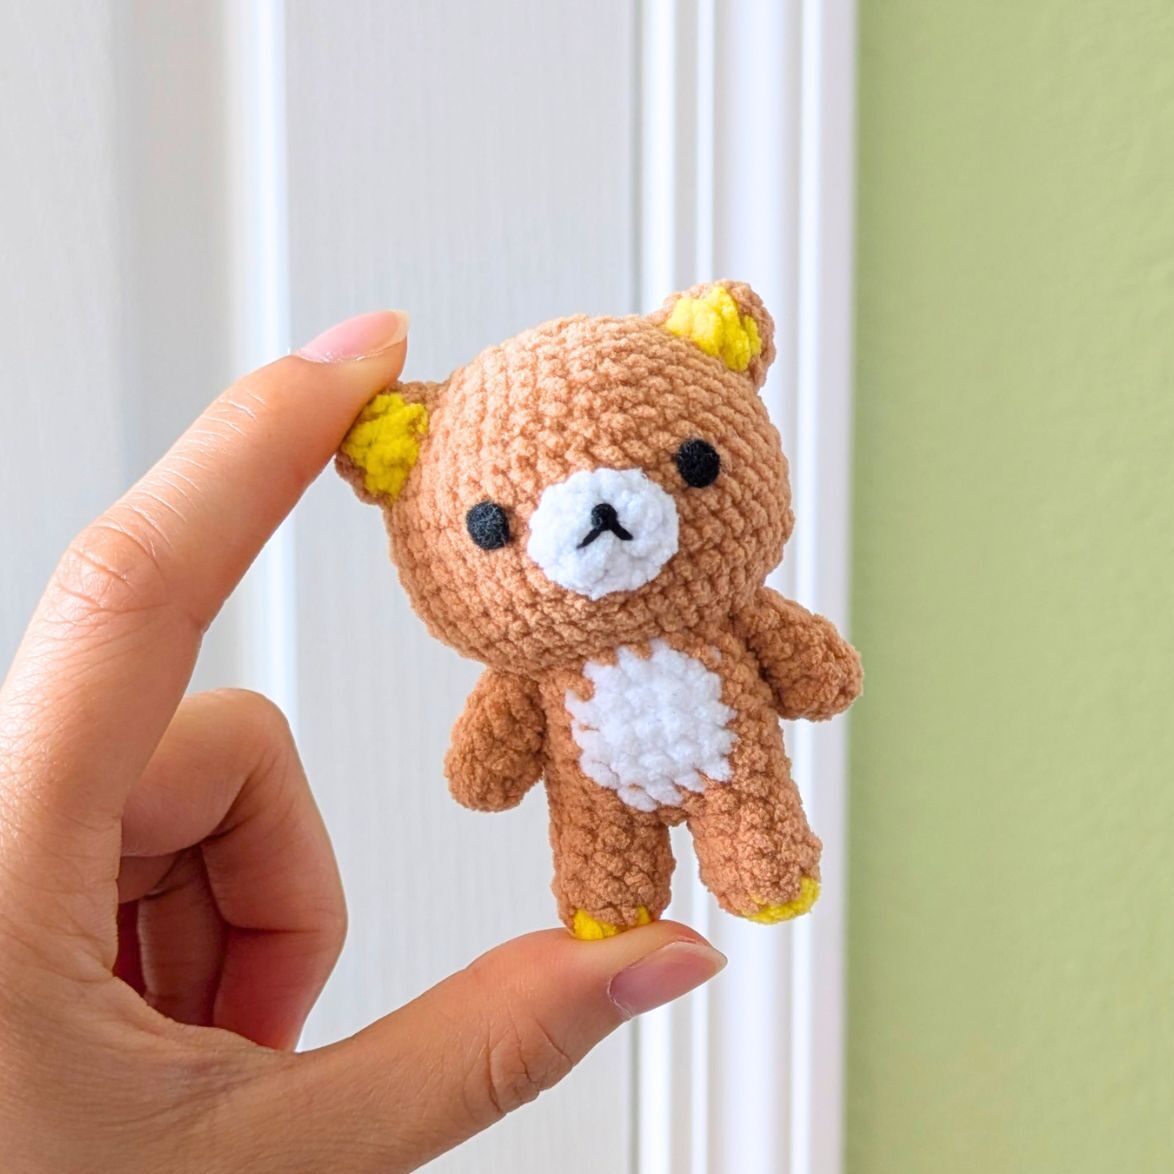
With just a few changes, I turned the Ryan pattern from last month into Rilakkuma from Sanrio! Symmetry matters a bit more here, so I altered the pattern to Joined Rounds. Enjoy this crochet Rilakkuma pattern!
Materials
What I used in ()
- Crochet hook (2.5 mm)
- Yarn in Main Color (brown 3 mm chenille yarn)
- Yarn in Secondary Color (yellow 3 mm chenille yarn)
- Yarn in white for the belly (3mm chenille yarn)
- Black felt for the eyes and nose
- Black embroidery thread
- Stitch marker or a piece of yarn
- Stuffing
- Tapestry needle
- Sewing needle
- Scissors
Abbreviations (US terms)
- MR – magic ring
- sc – single crochet
- hdc – half double crochet
- bo# – bobble stitch (the number indicates the amount of double crochets that make up the bo)
- inc – increase (2 sc into one stitch)
- sc2tog – single crochet 2 stitches together
- dec – decrease/ invisible decrease
- cc – color change
- FLO – front loops only
- ch – chain
- slst – slip stitch
- st(s) – stitch(es)
- b/w – between
- FO – fasten off (cut the yarn and pull through)
- x – times (indicates the number of times to repeat)
- [] – repeat steps between brackets for the specified number of times
- () – crochet the group of stitches all in the same stitch
- (#) – the number of stitches you should have at the end of the round
Notes
- This pattern is Low Sew and crocheted in Joined Rounds.
- I crocheted using the Yarn Under Yarn Over (YUYO) technique for tighter stitches.
Sizing
Approx. finished measurements using a 2.5 mm hook and 3 mm chenille yarn:
- Height: 3”
- Width: 2”
Disclaimer:
Please do not copy, redistribute, or resell this pattern in any way. You can sell the finished products and a mention as the pattern creator is appreciated!

If you have any questions, feel free to leave a comment here or on my socials :)
Rilakkuma Crochet Pattern
- We will be crocheting in Joined Rounds unless otherwise stated.
- This means at the end of every round, we will slst into the the first st of the previous round to join the round and then ch1 to start the next round.
- Pull both the slst and ch1 tight to shrink their size.
- The first st of the round will also be the same st that we slst into.
- Do not include the slst and ch1 in your stitch count at the end of the round.
- Click the drop-down menus for photos! (I reused some photos from a previous pattern, but the techniques are the same.)
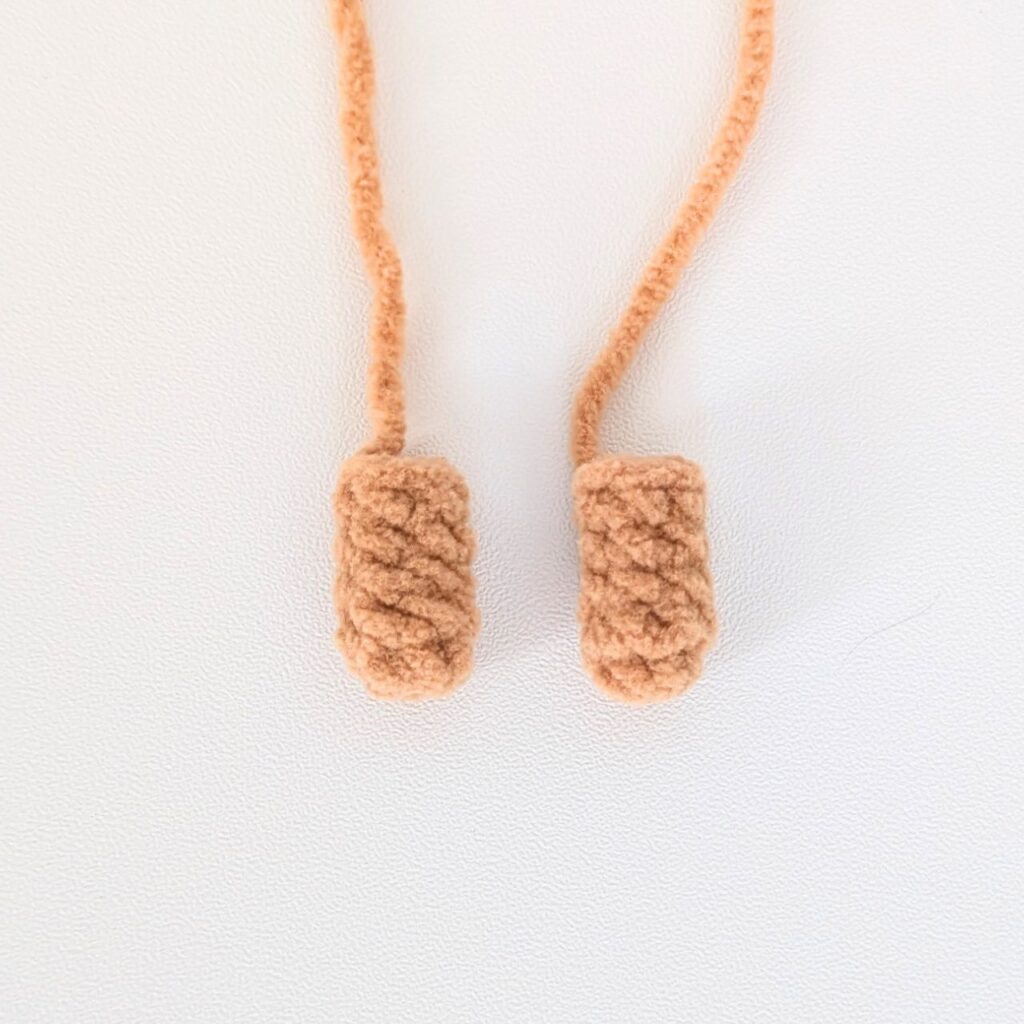
Arms (Make 2)
With Main Color yarn:
R1: MR 6sc, slst to join (6)
R2-R5: ch1, 6sc, slst to join (6) (4 rounds)
FO, leaving a long enough tail for sewing the arms to the side. Set aside.
Arms
Legs (Make 2)
R1: In the Secondary Color yarn, make a MR with 6sc. Do not slst to join the round, instead FO. (6)
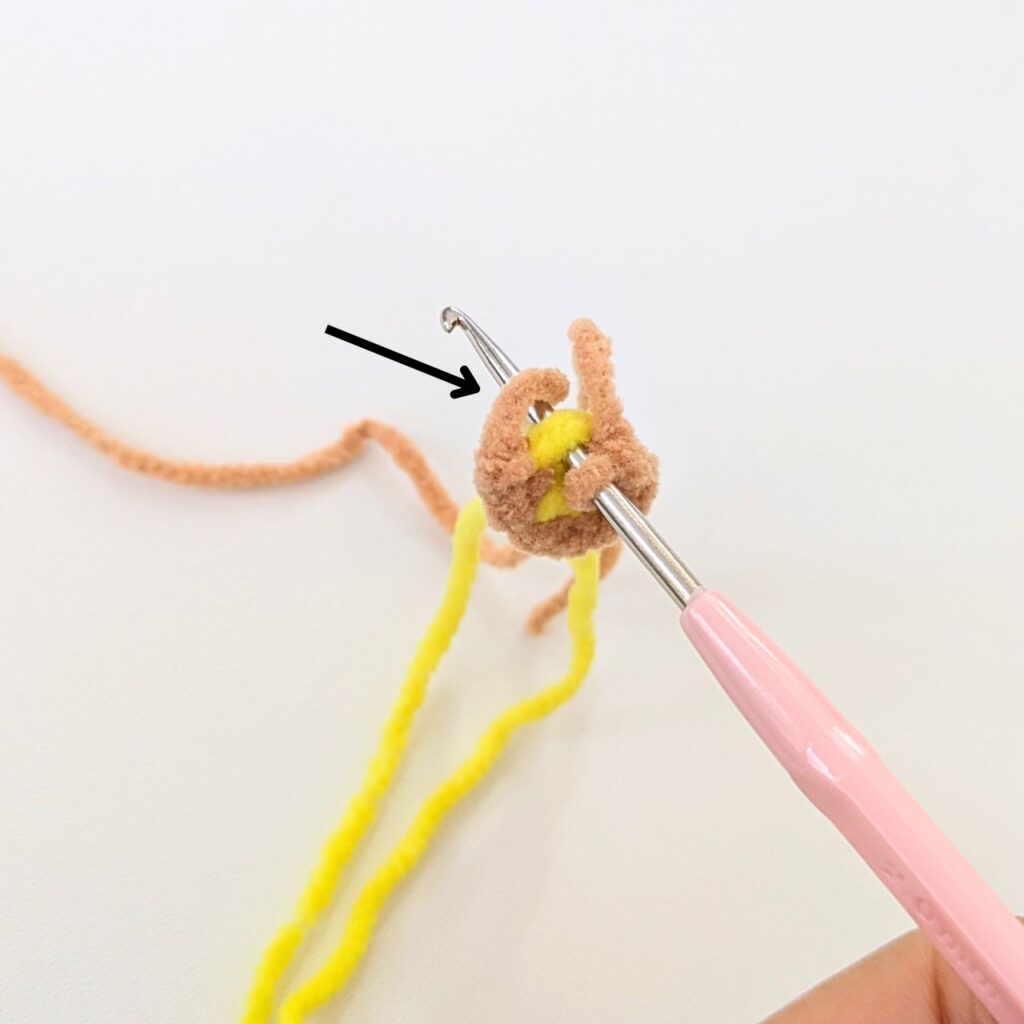
R2: In the Main Color yarn, make a slip knot. Then insert your hook into the last st of the MR and make an inc.
R2 – Starting the round
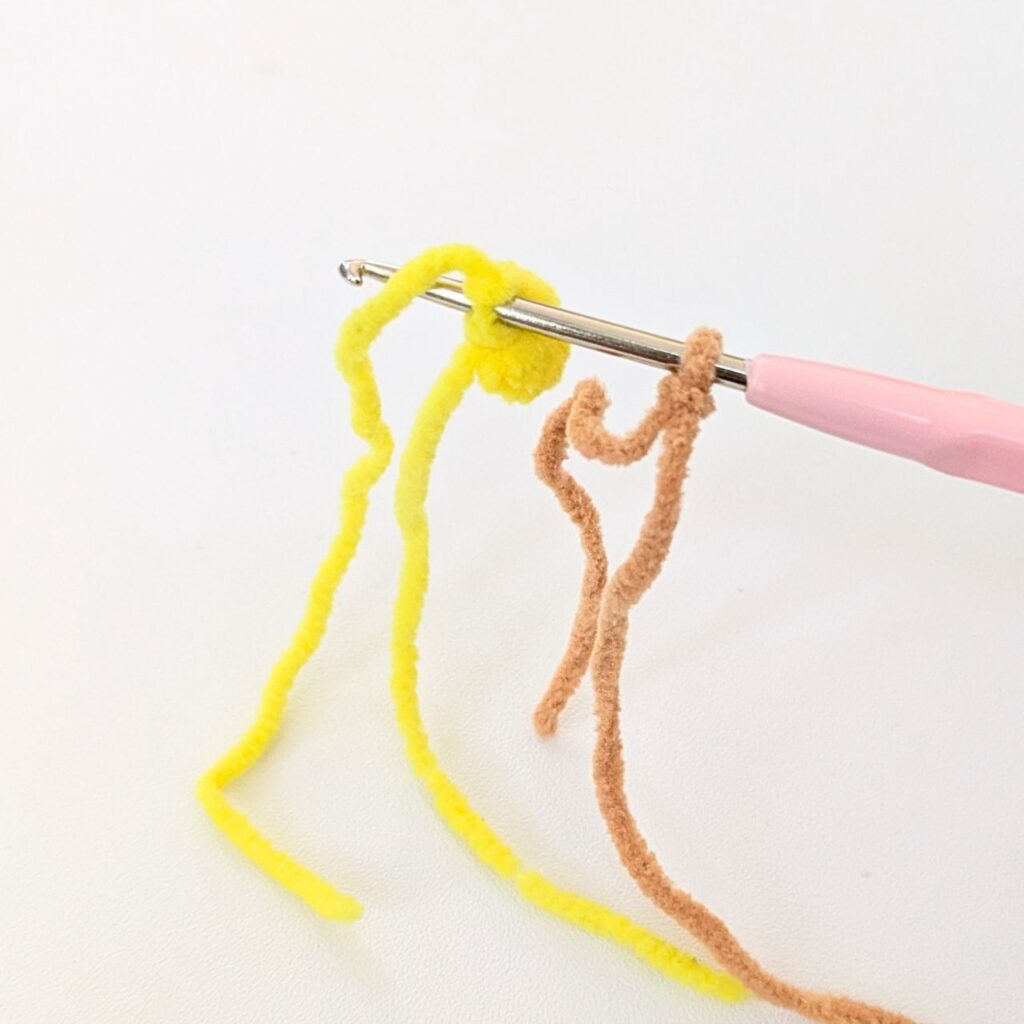
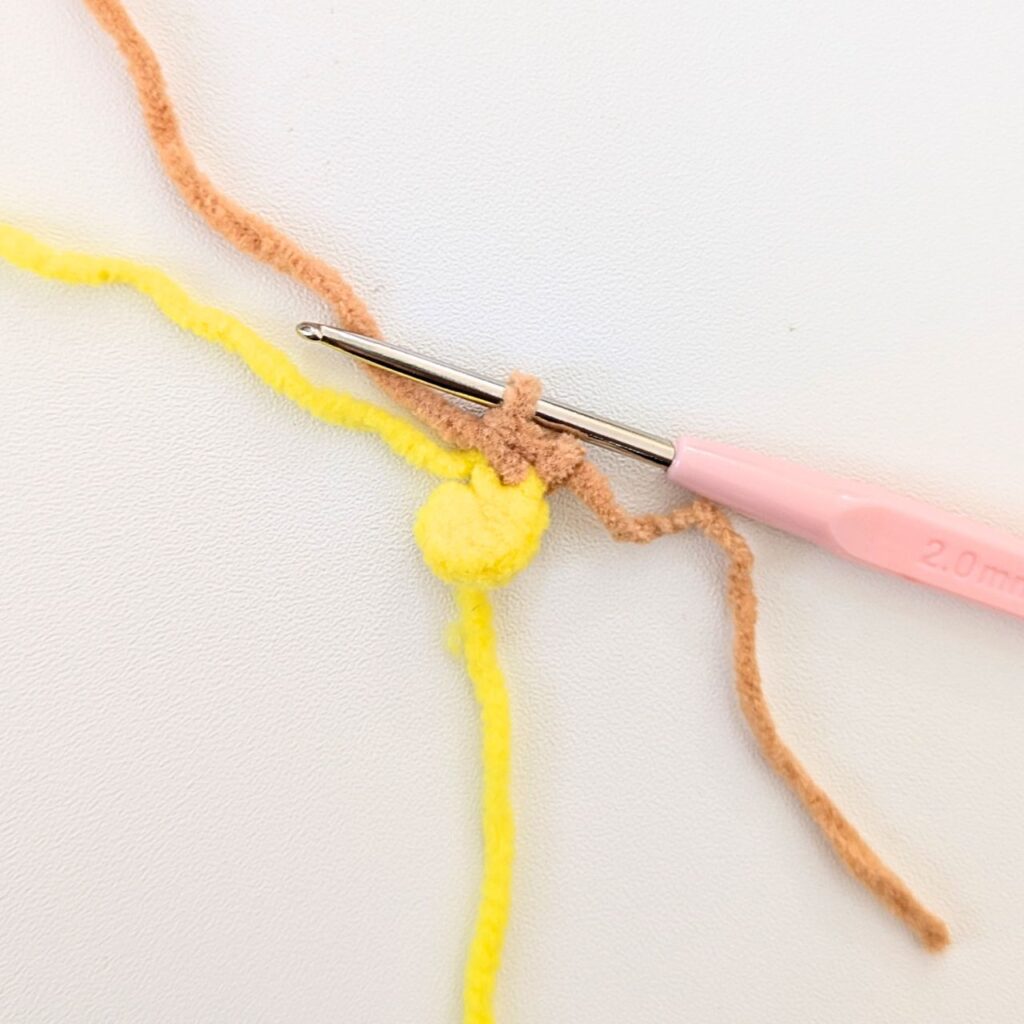
Follow that with 1sc in each of the next 2 sts while crocheting over the tail from the FO we did previously. Pull the tail to close any gaps. Repeat the pattern [inc, 2sc] once more and during the last sc, crochet over the tail of the slip knot. Pull the tail to close any gaps. Slst to join the round. (8)
R2 – Crocheting over the tails
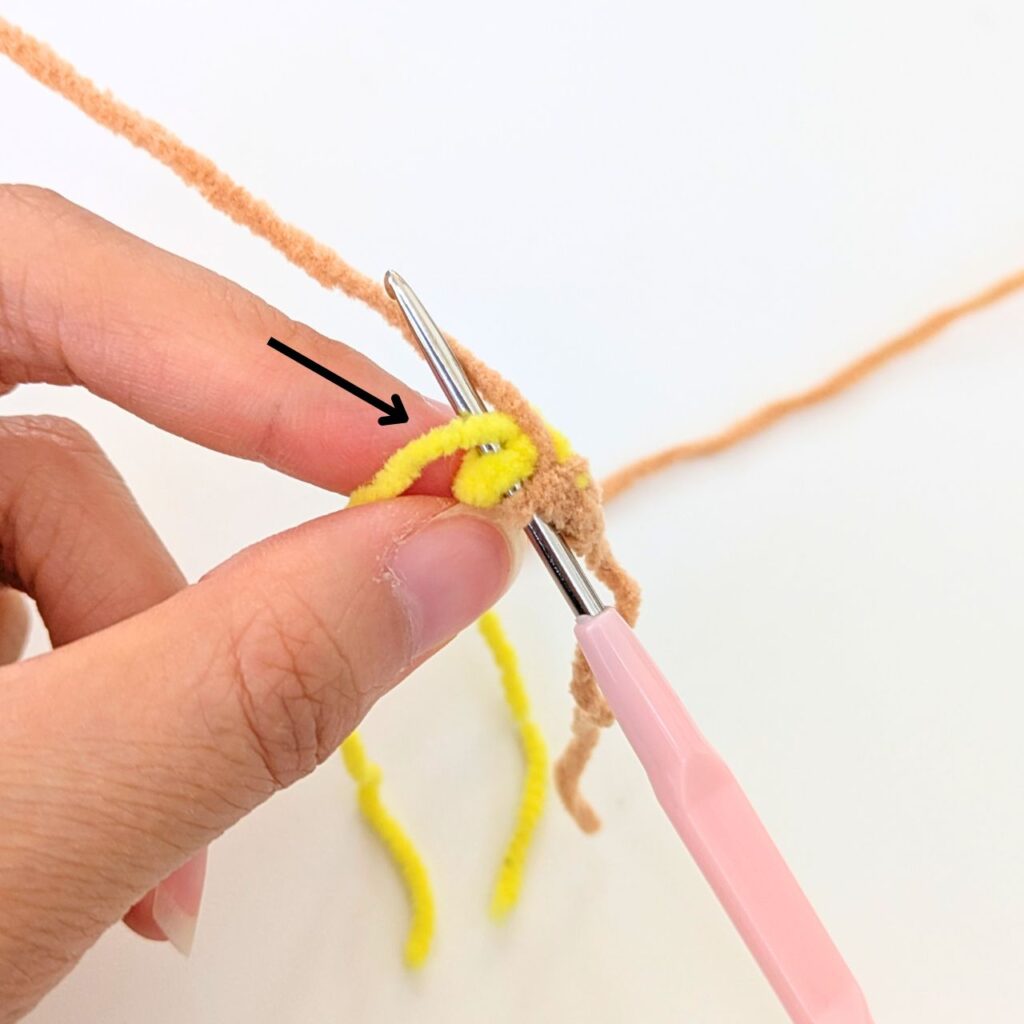
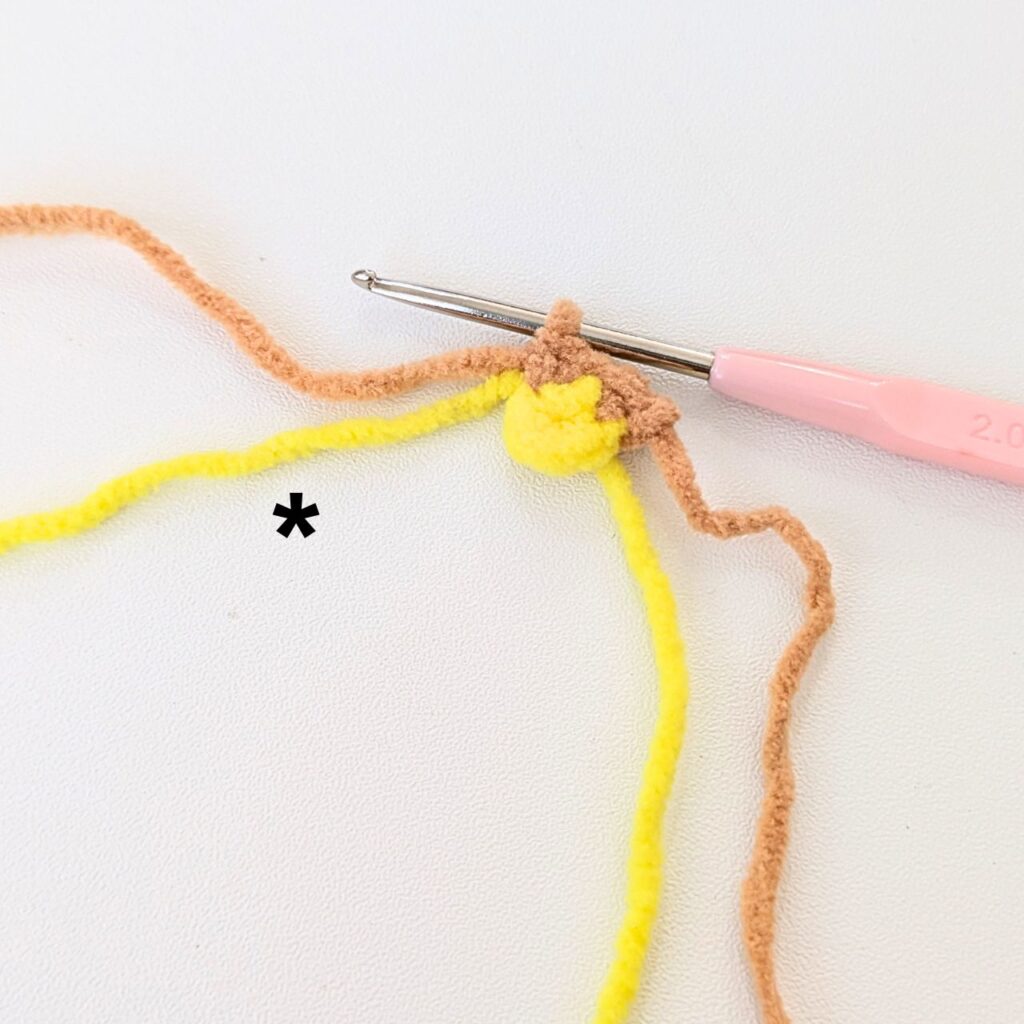
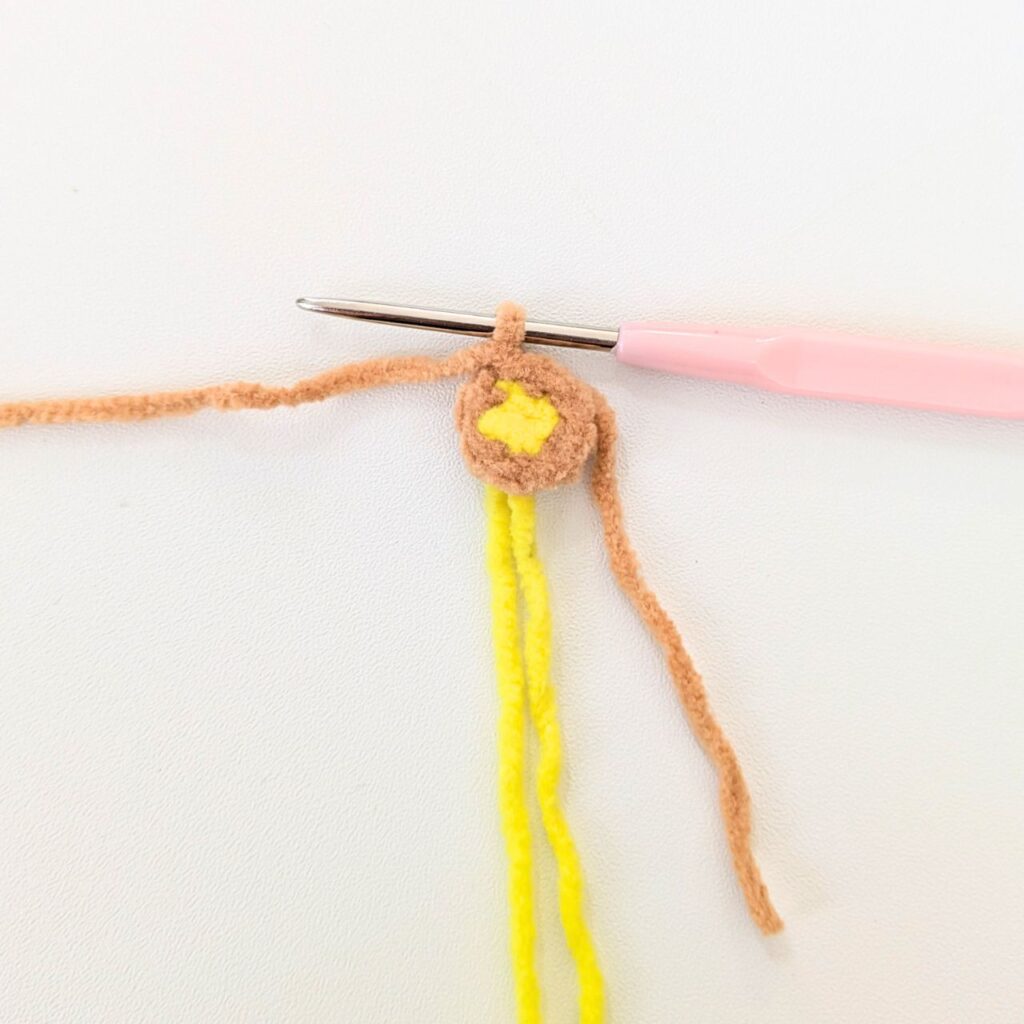
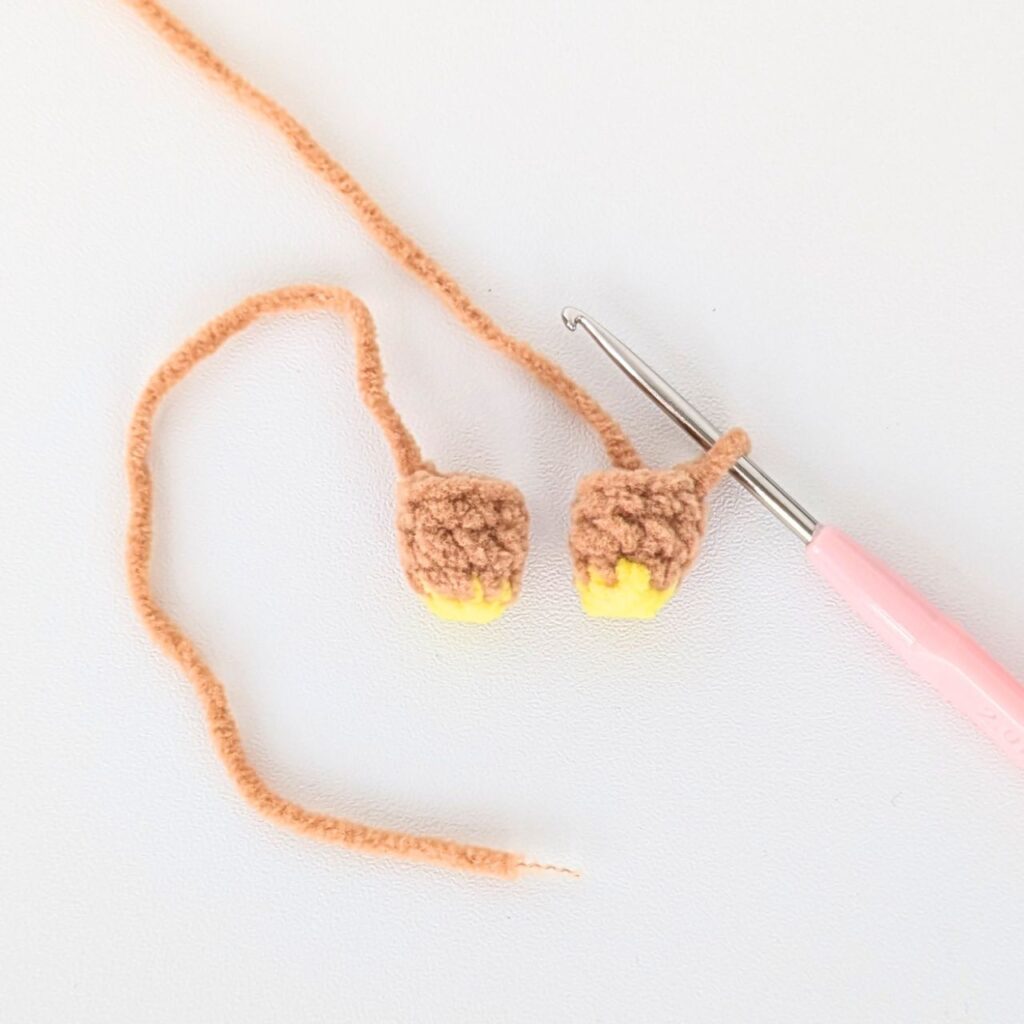
R3-R4: ch1, 8sc, slst to join (8)
FO the 1st leg, but DO NOT FO the 2nd leg.
Legs
Body
R5: Continuing on from Leg 2, ch1, sc 8, slst to join. Then ch 1. Take Leg 1 and insert your hook into the first st and crochet a sc in that st. Follow that with 1sc in each of the next 6 sts.
Connecting the legs
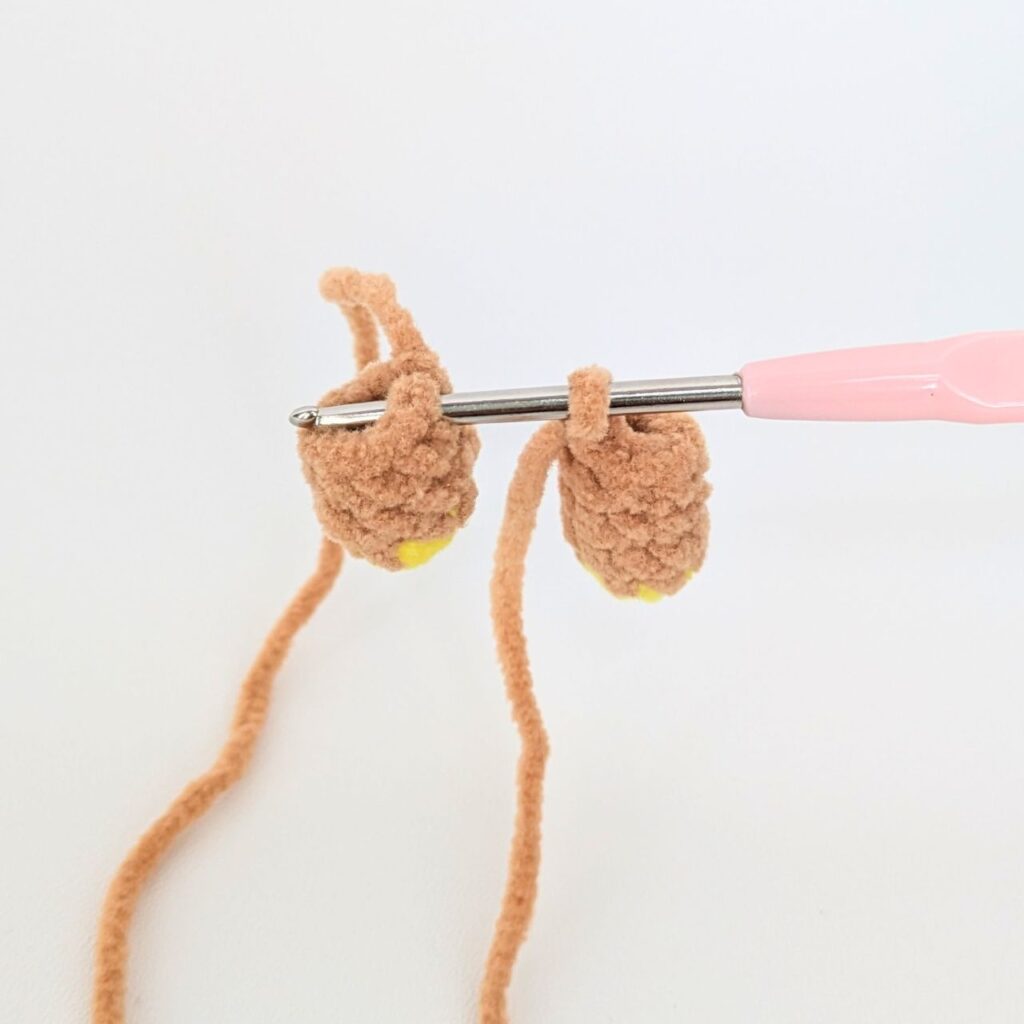
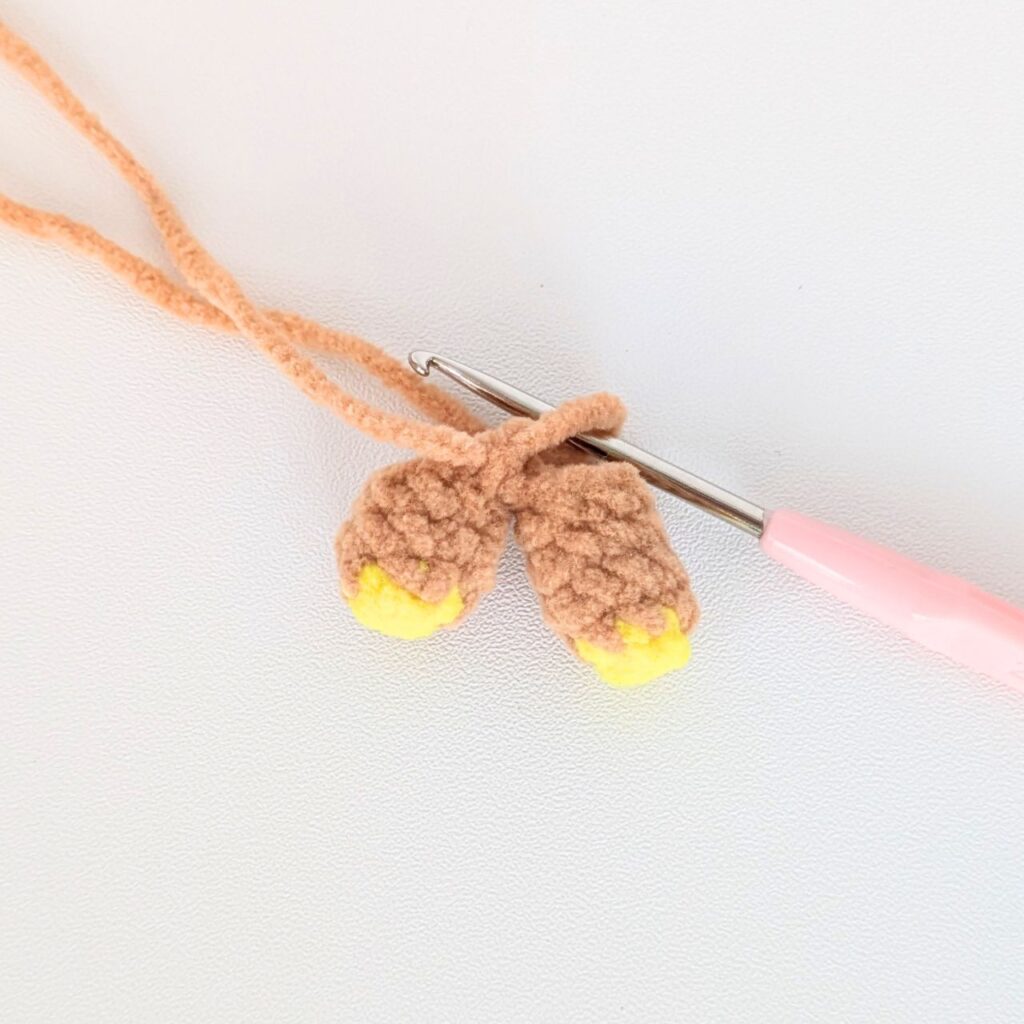
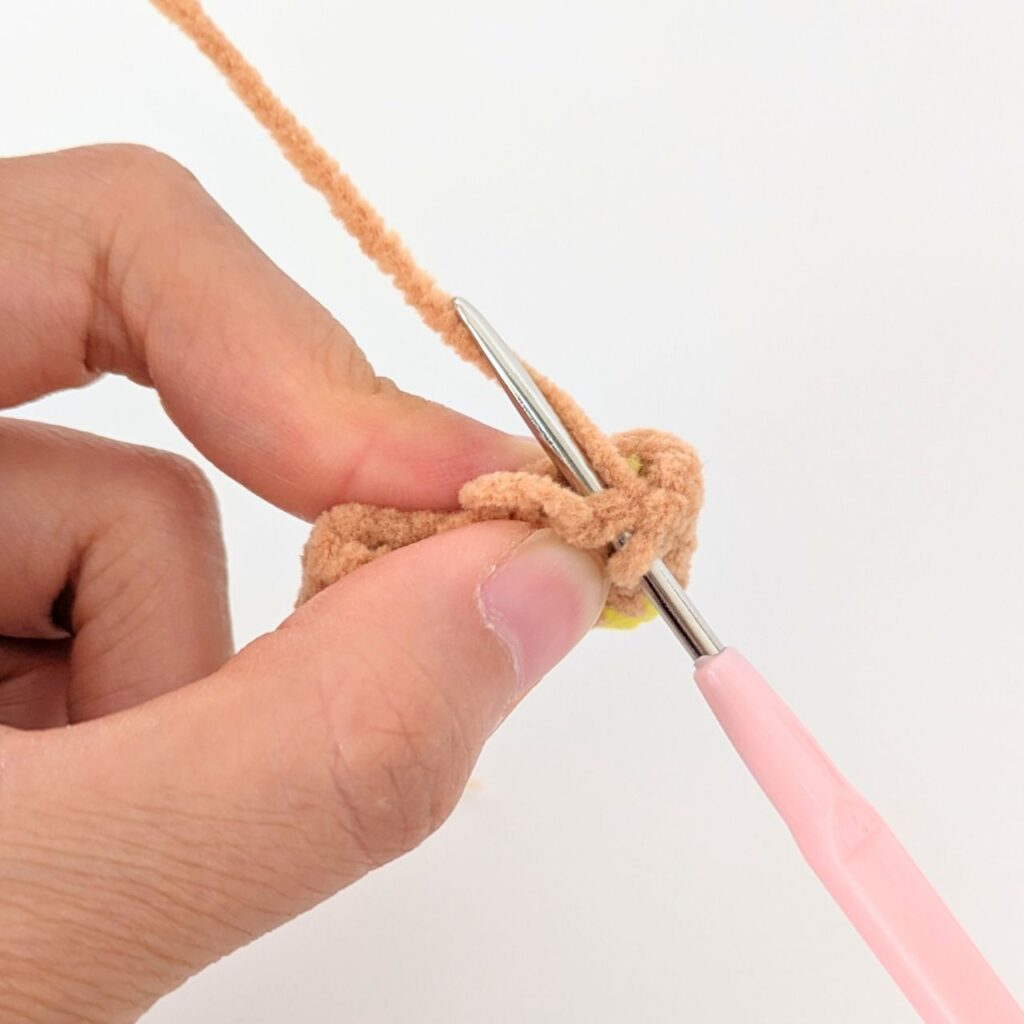
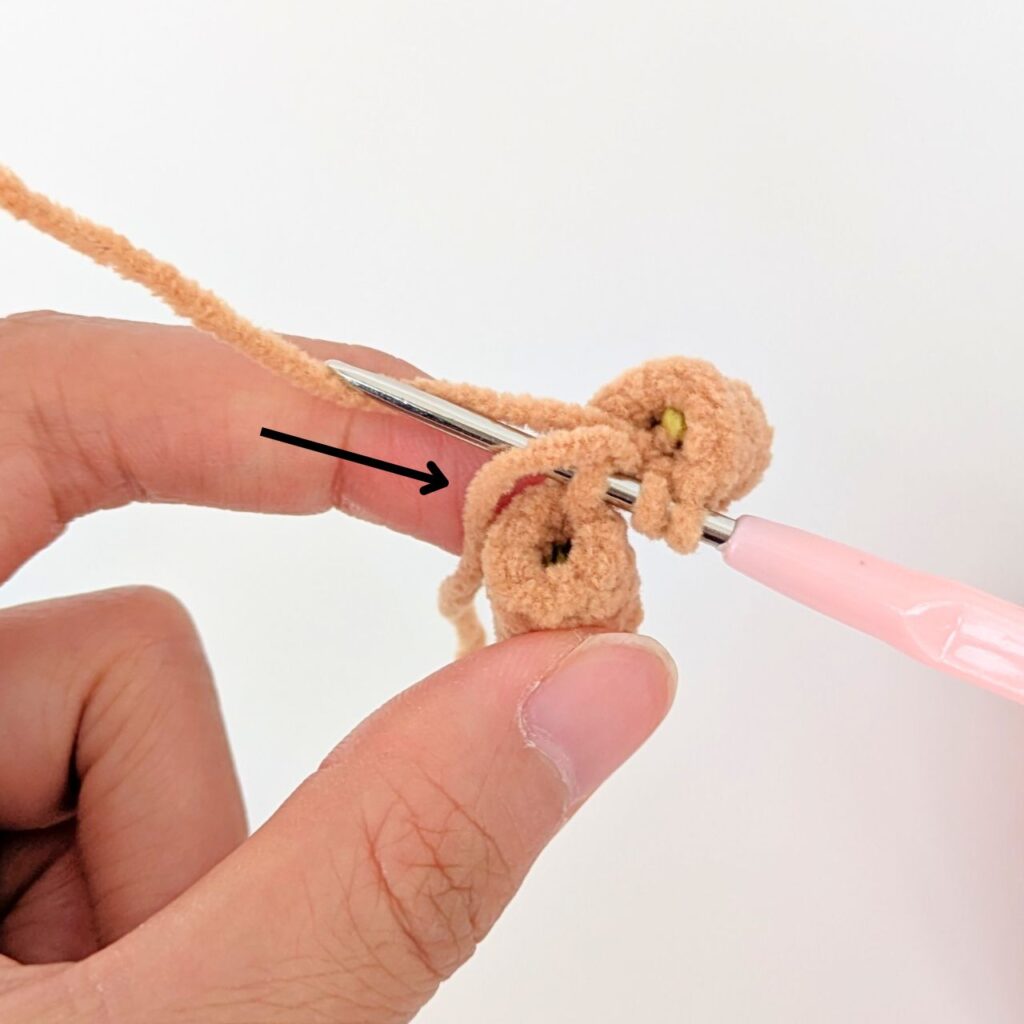
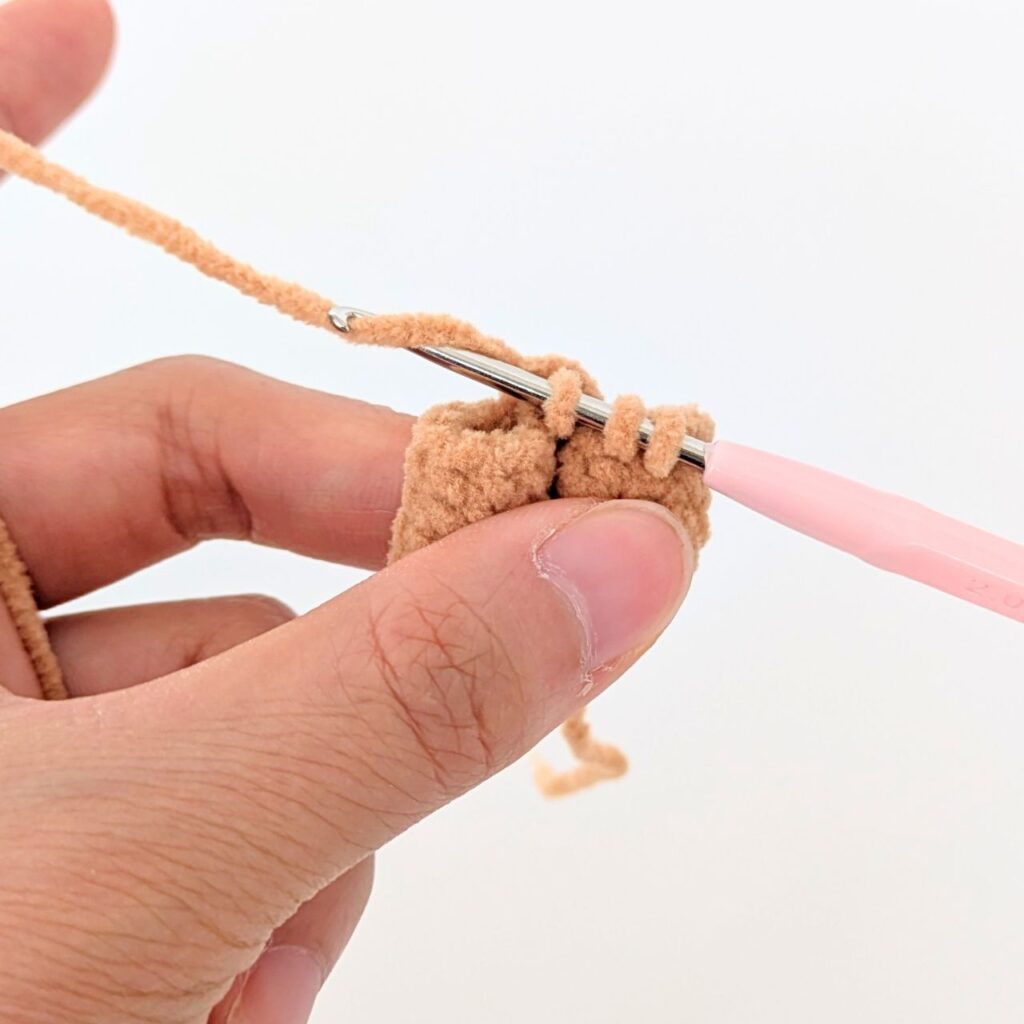
For these last 2 sts, crochet over the tail of Leg 1. Sc the last st of Leg 1 and the back bump of the chain together (sc2tog). Hdc into the same back bump. Pull the tail. Do not slst to join for this round. (18)
How to sc2tog while crocheting over the tail
(sc2tog, hdc) diagram
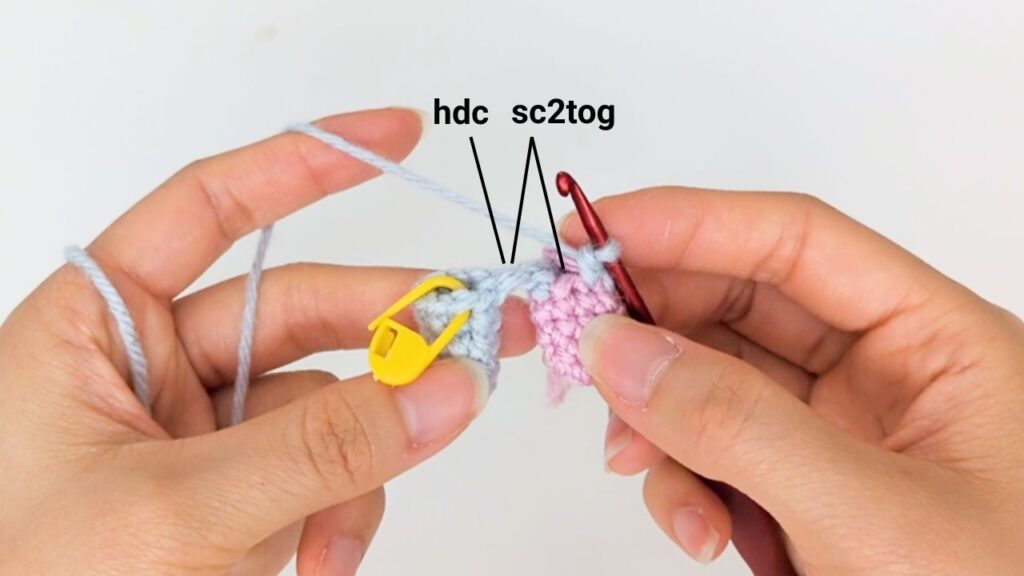
R6: Do not ch1 or slst to join for this round. 8sc, (skip over the slst if you see it), hdc into the front of the ch, 8sc, inc (19)
R7: Move the stitch marker back one st and mark that as the beginning of the round (if you are marking the end of your rounds instead, still move the stitch marker back one st and that st will be the new end of your round).
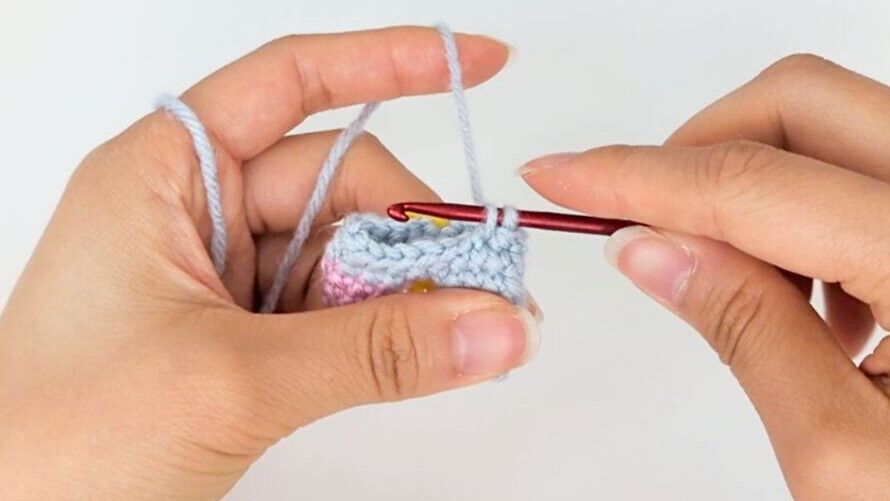
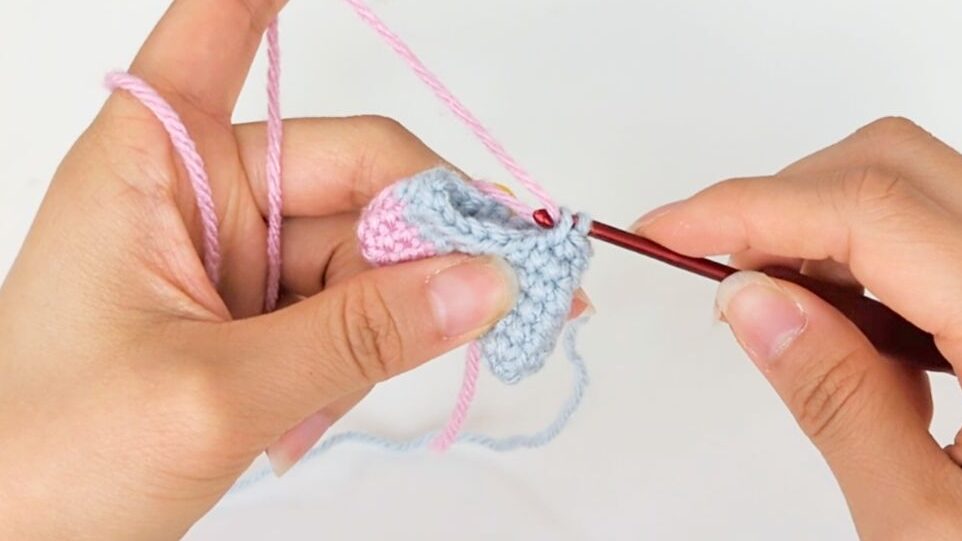
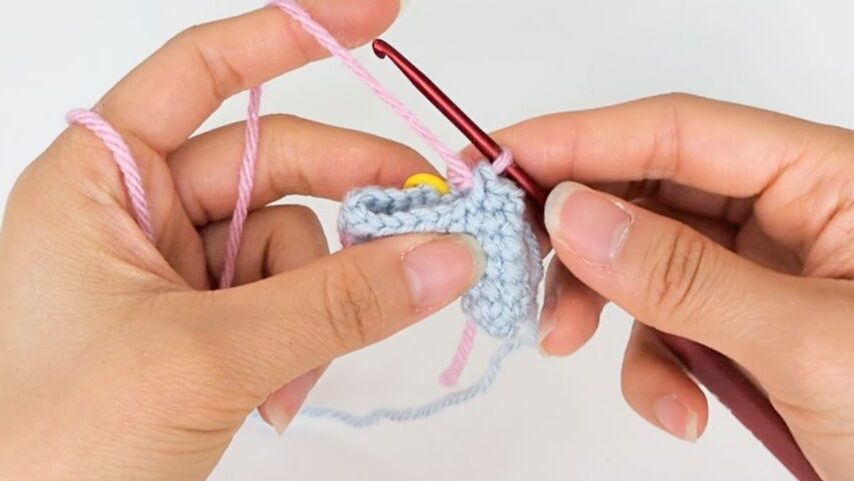
Then, 6sc, cc to white 4sc, cc back to Main Color 8sc, slst to join (19)
How to cc
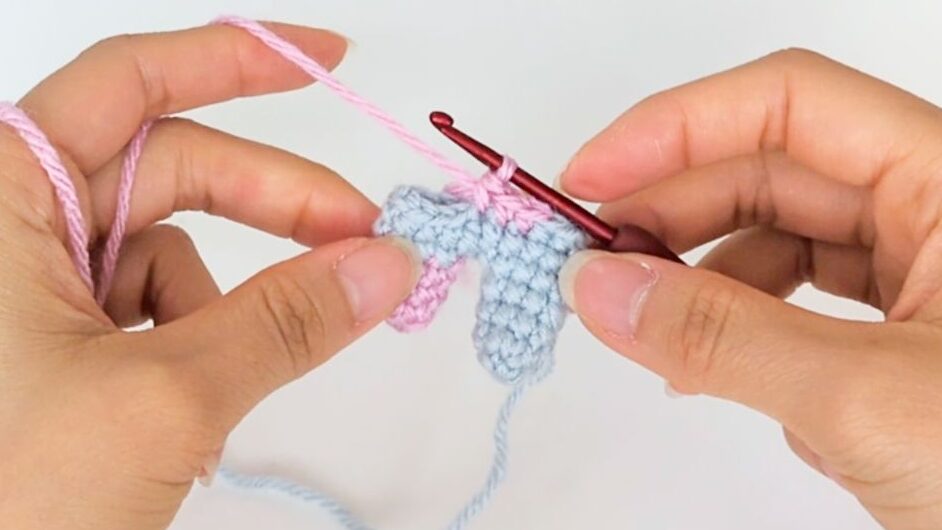
R7 – Progress photo
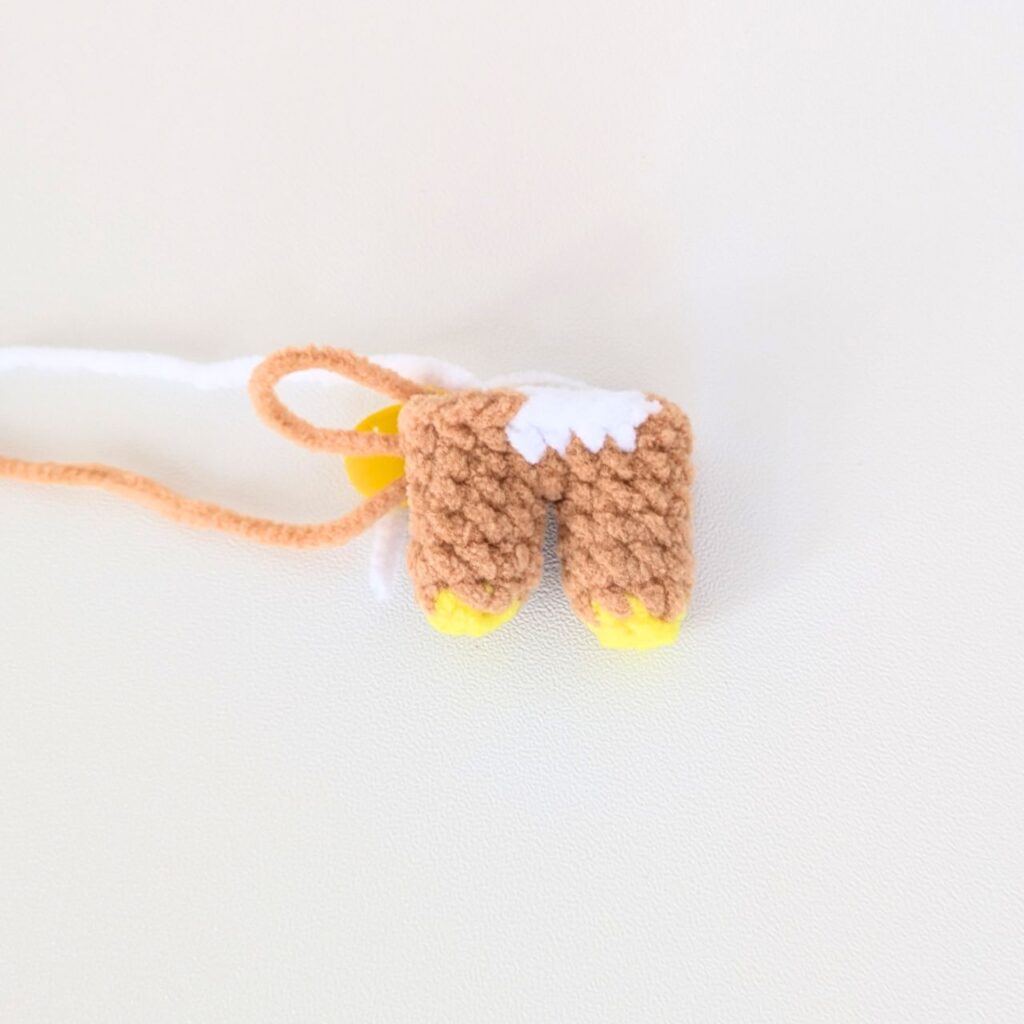
[ Note: When you finish R7, you may notice that at the beginning of the round there are 7sc in the Main Color before the 4sc in white. This is correct since we moved the stitch marker back 1 st in the beginning of the round. So it becomes 1sc + the 6sc we crocheted = 7sc, which is then followed by 4sc in white, then 8sc in the Main Color. ]
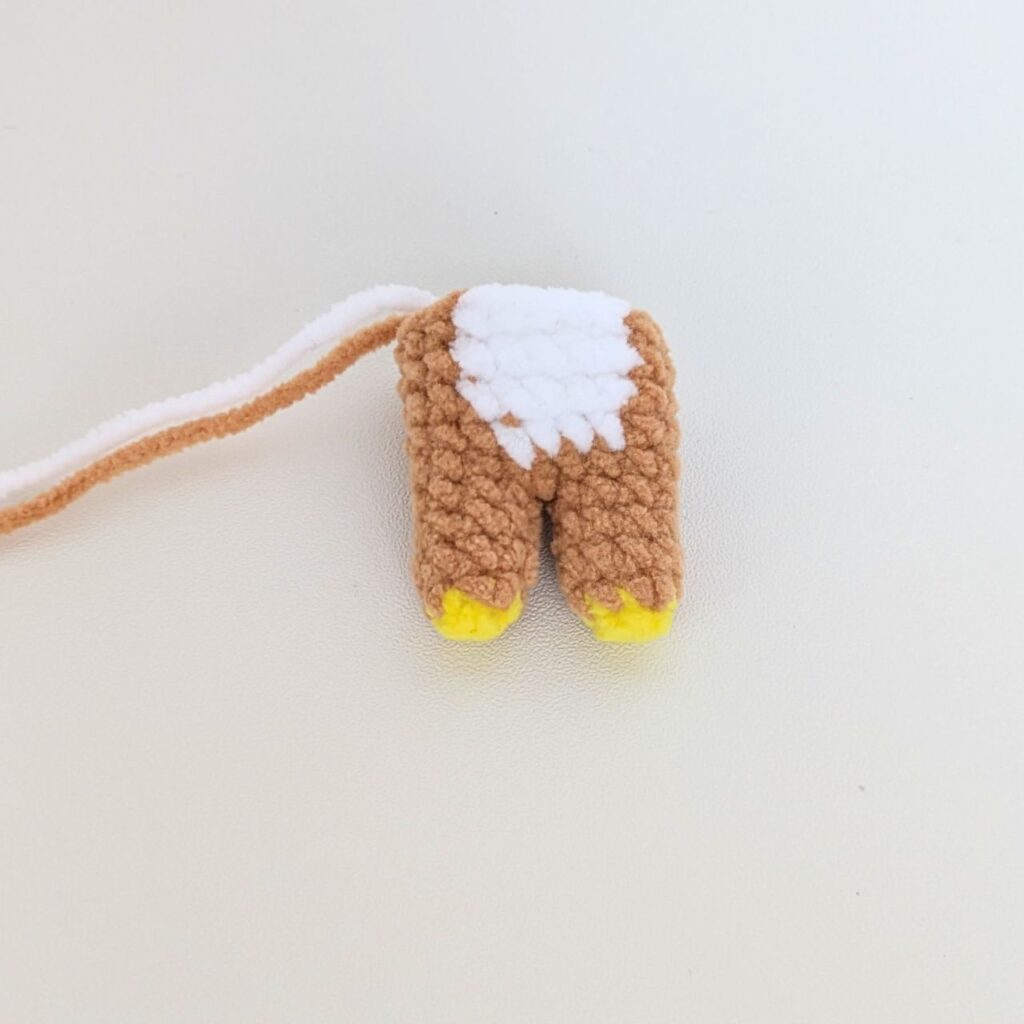
R8-R10: ch1, 7sc, cc to white 5sc, cc to Main Color 7sc, slst to join (19) (3 rounds)
R10 – Progress photo
R11: ch1, 3sc, connect arm with 3sc, 2sc, cc to white 3sc, cc to Main Color 2sc, connect arm with 3sc, 3sc, slst to join (19)
How to connect the arm
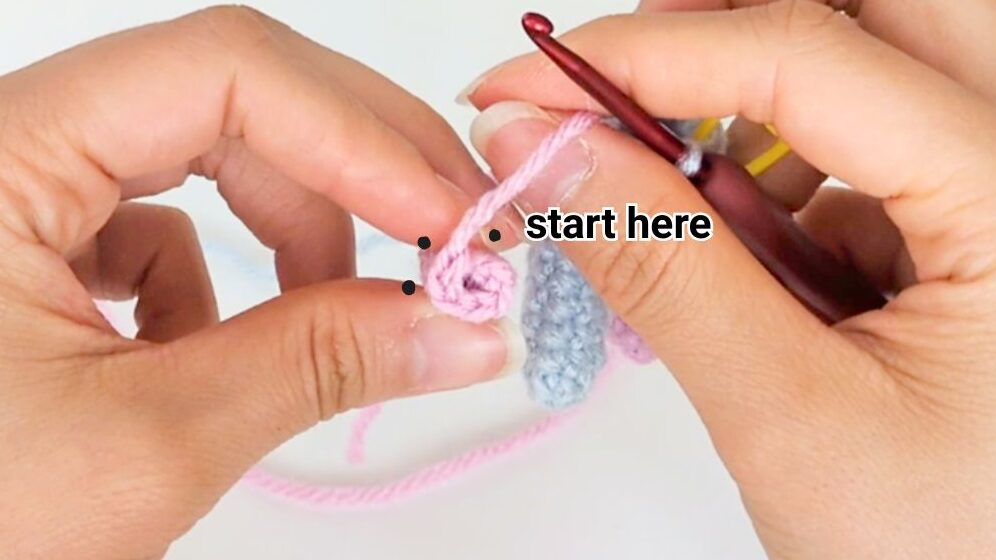
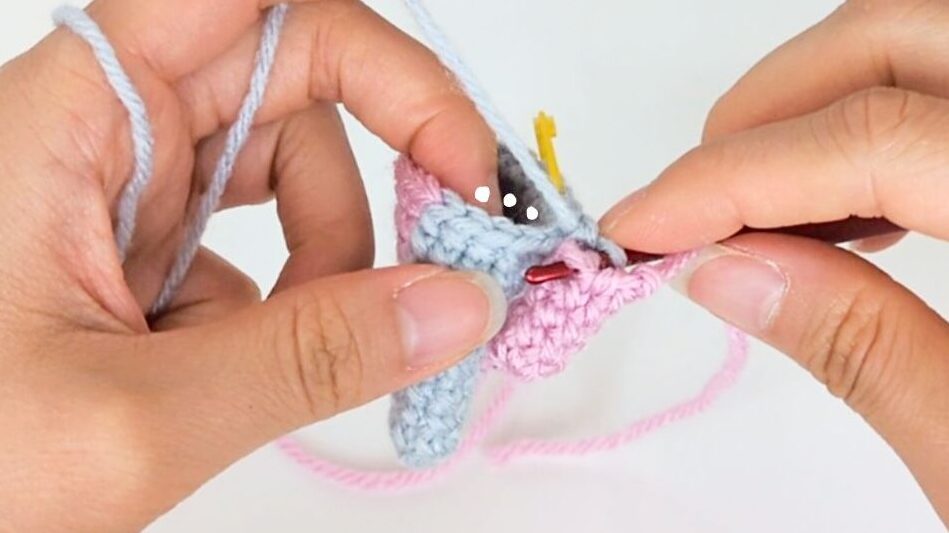
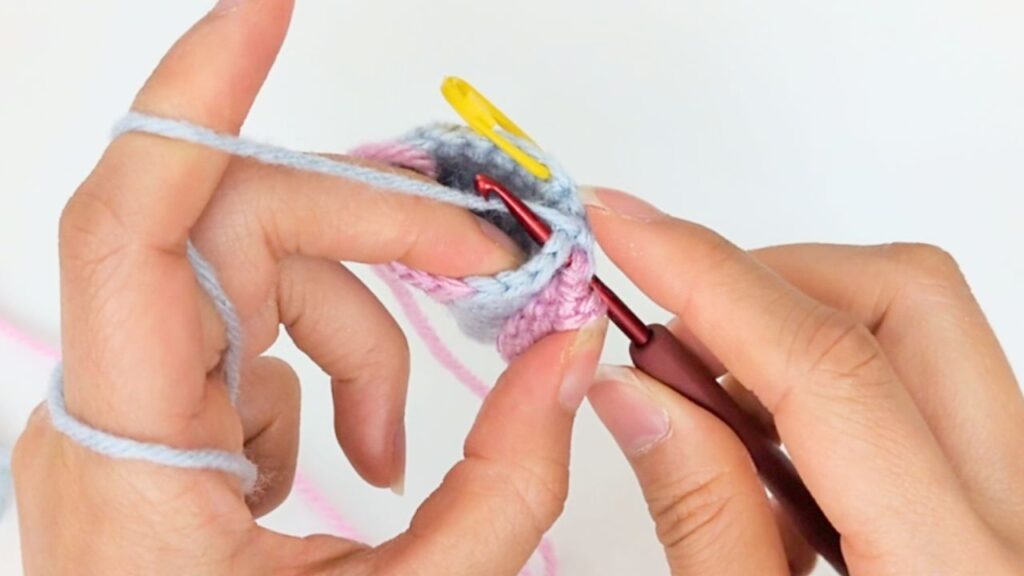
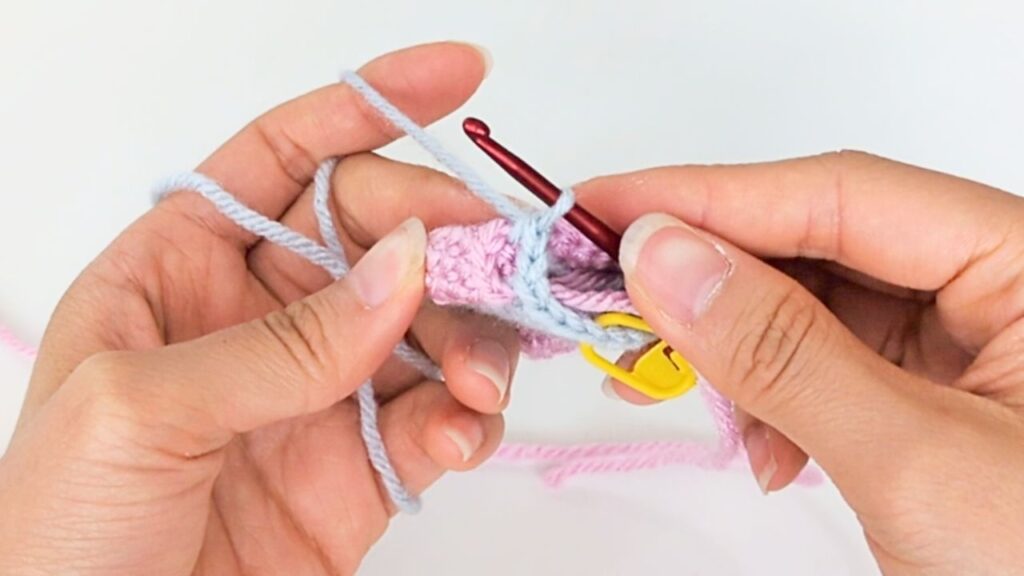
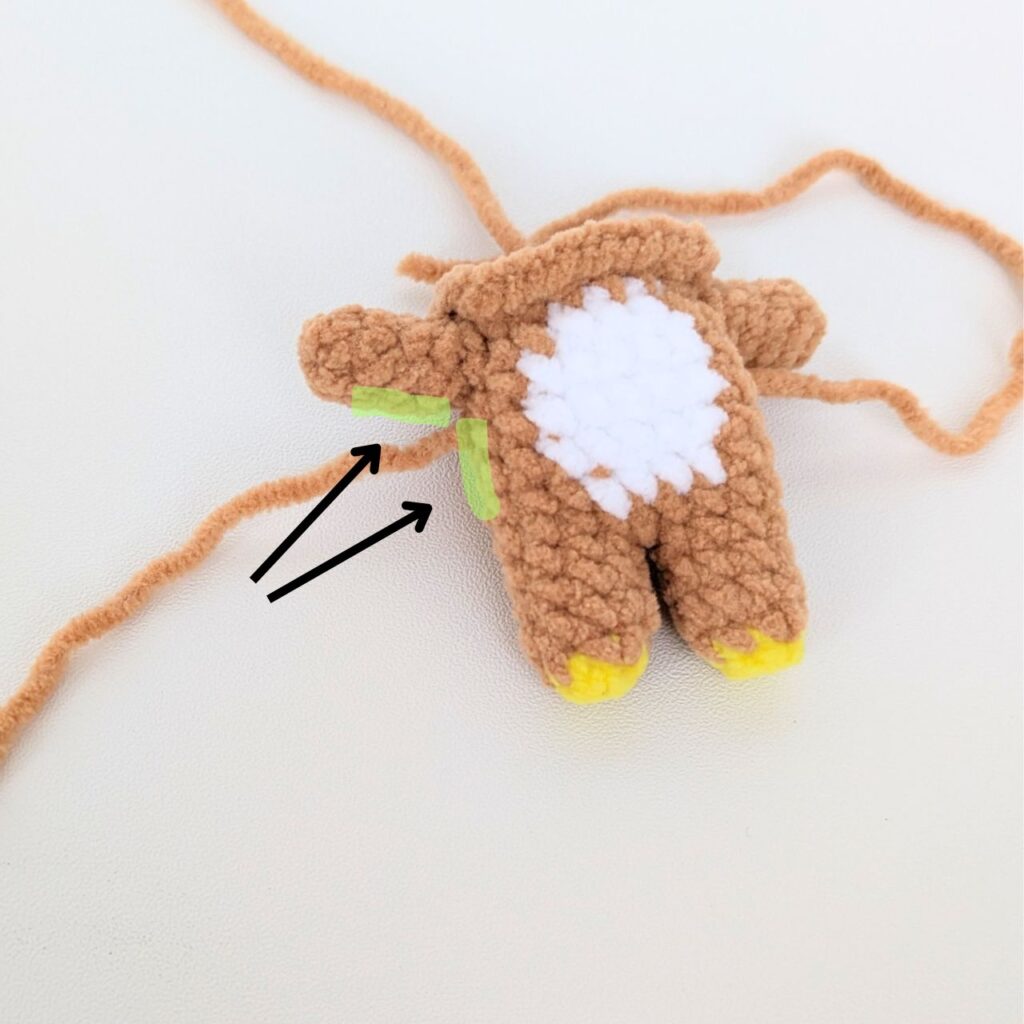
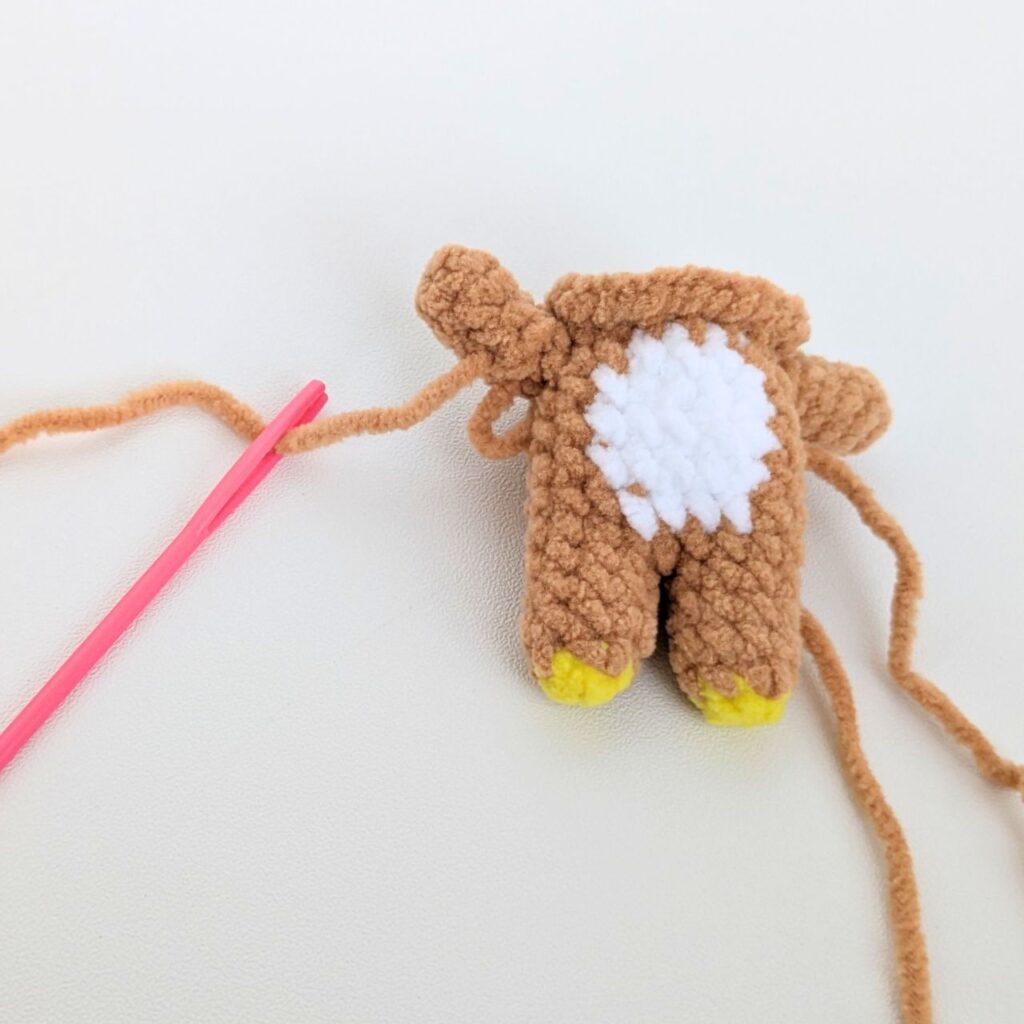
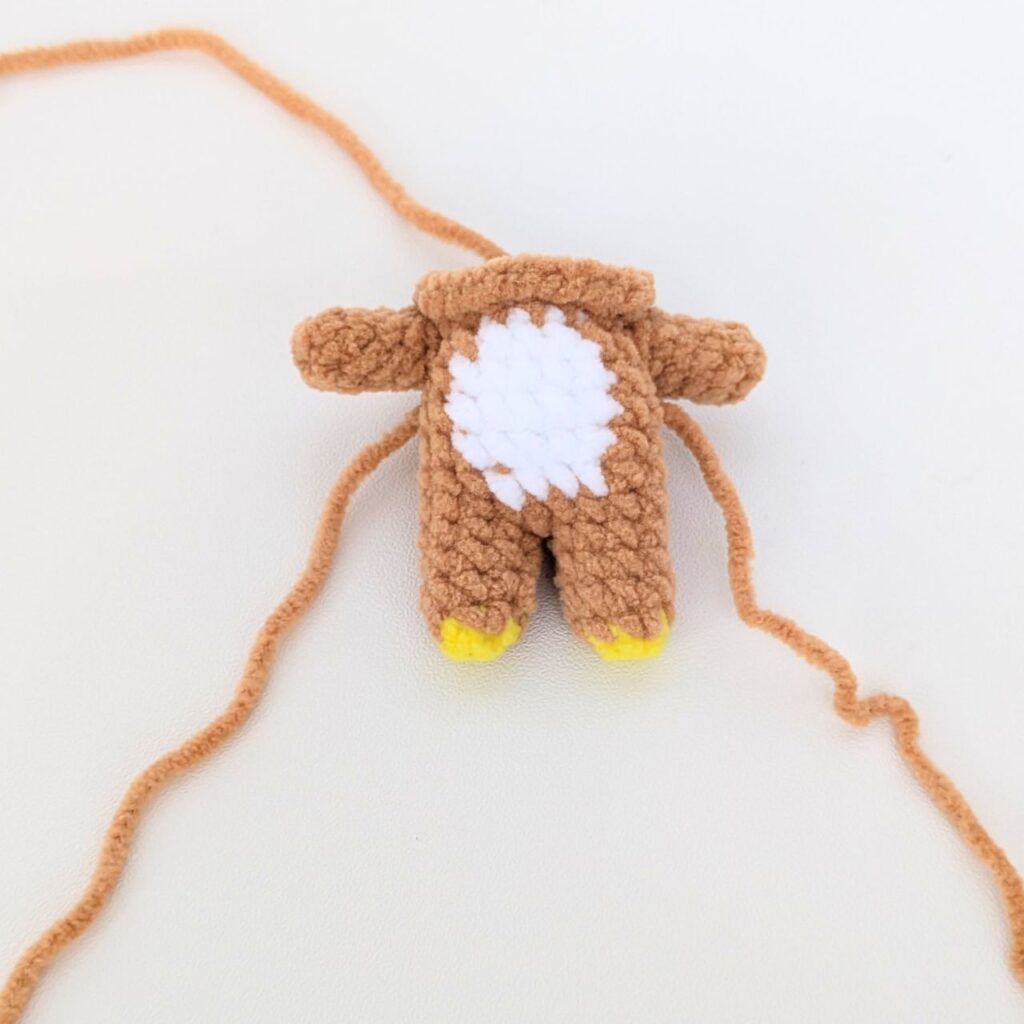
Thread the tail ends of the arm through the side of the body for sewing later
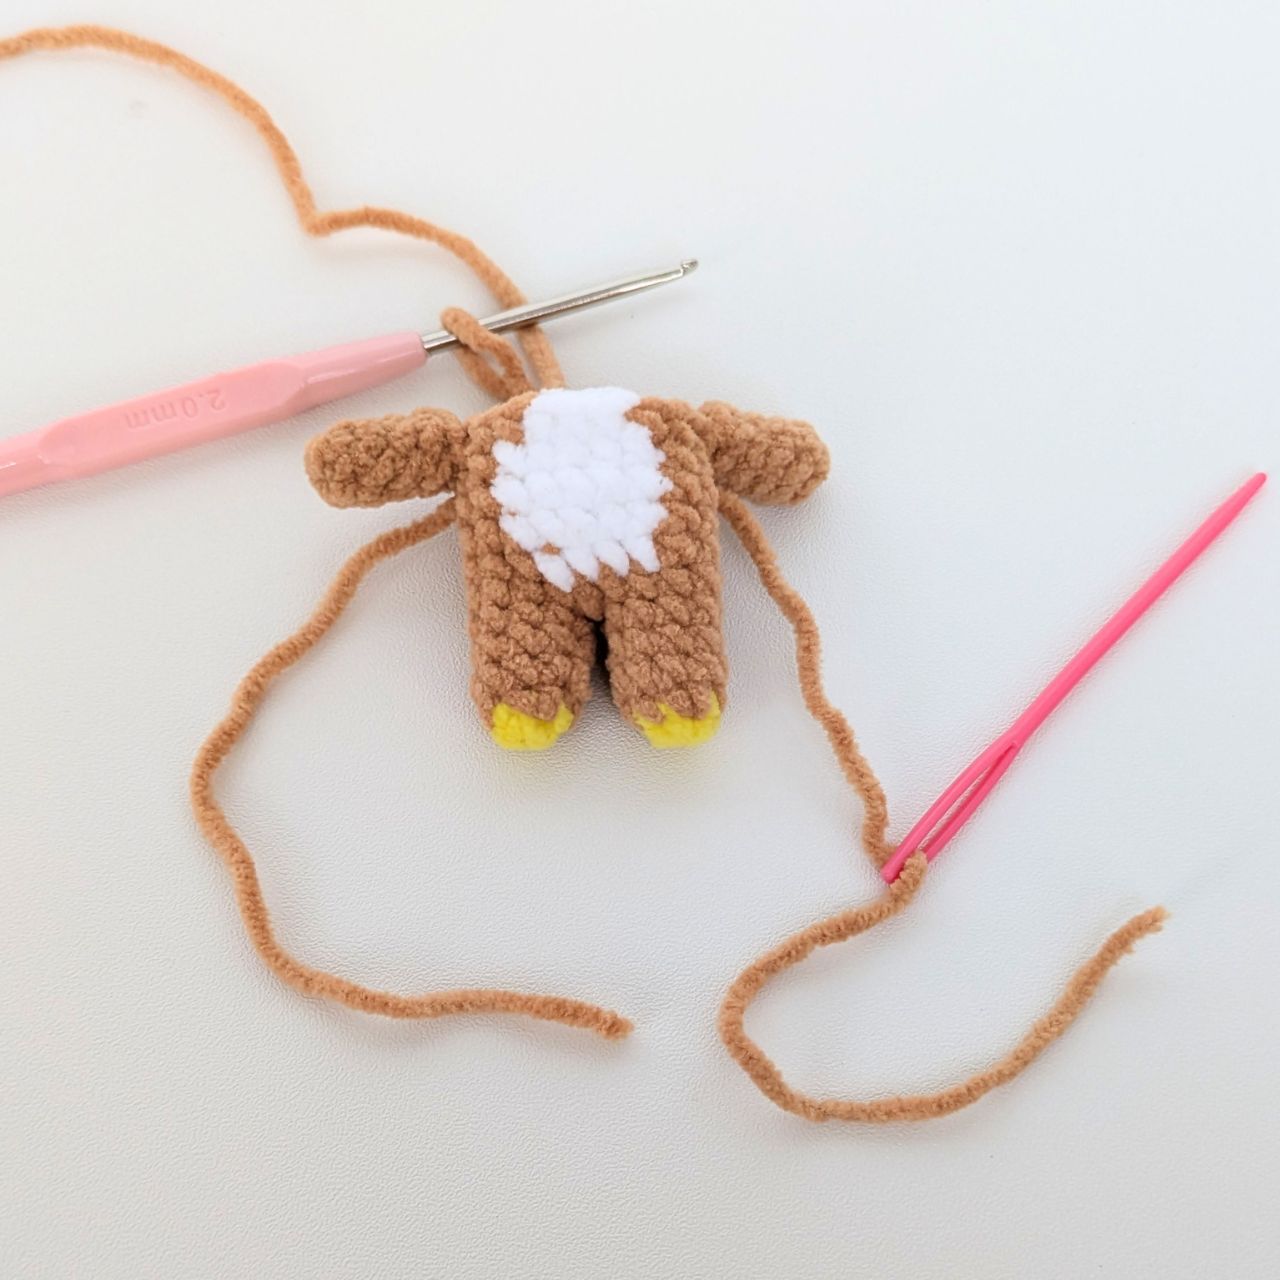
R12: ch1, 6sc, dec, 11sc, slst to join (18)
[ Breakdown of R12: ch1, 3sc, 3sc along the outside of the arm, dec, 5sc, 3sc along the outside of the arm, 3sc, slst to join (18) ]
Head
R13: ch1, FLO inc x18, slst to join (36) *The sts will get very crowded, so be careful not to accidentally skip a st.
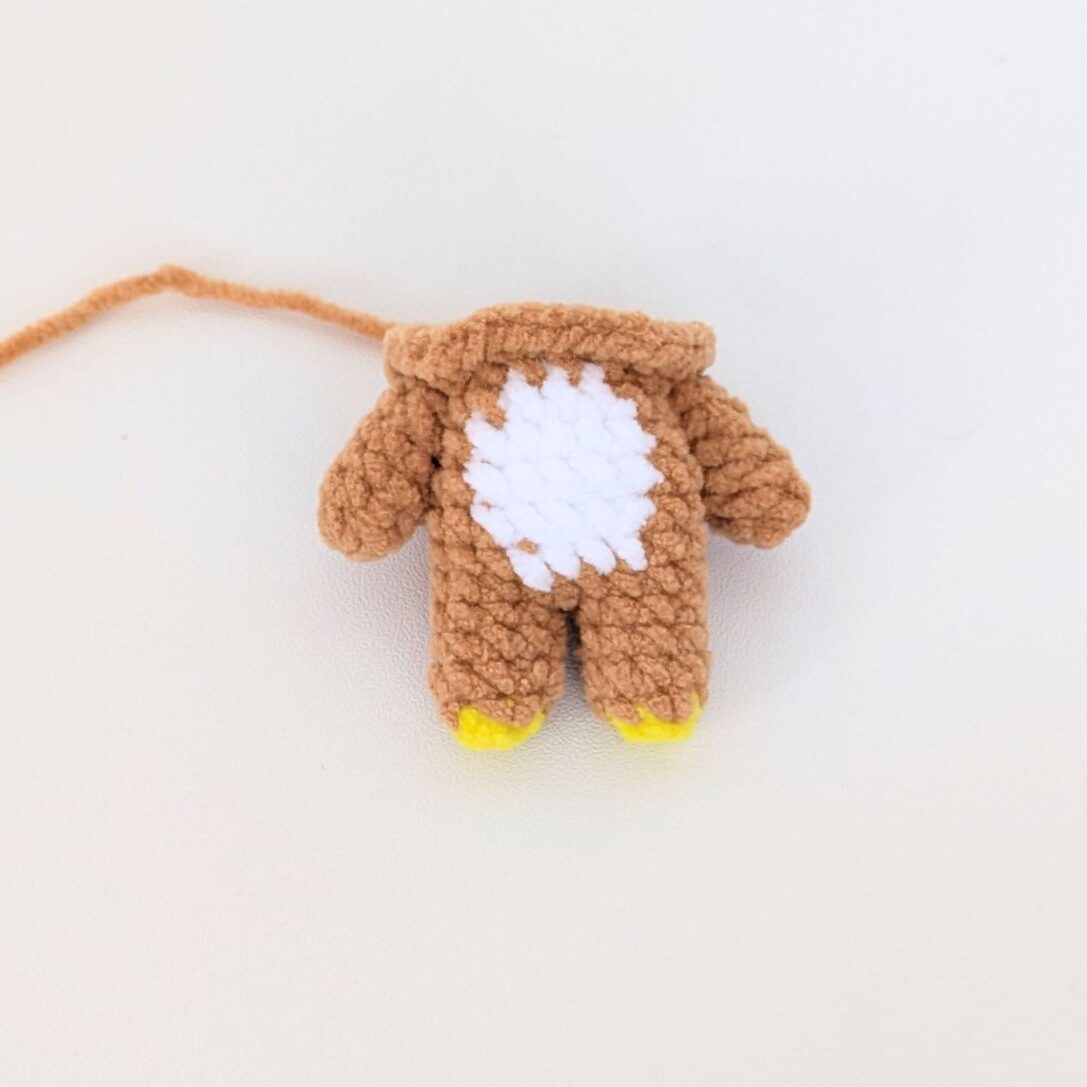
Use the tails to sew the arms to the side of the body
Stuff the body
R14: ch1, [8sc, inc] x4, slst to join (40) *The sts will be very crowded, so be careful not to accidentally skip a st.
R15-R19: ch1, 40sc, slst to join (40) (5 rounds)
R20: ch1, [8sc, dec] x4, slst to join (36)
R21: ch1, [4sc, dec] x6, slst to join (30)
R22: ch1, 30sc, slst to join (30)
R23: ch1, [3sc, dec] x6, slst to join (24)
R24: ch1, [2sc, dec] x6, slst to join (18)
Stuff
R25: ch1, [sc, dec] x6, slst to join (12)
R26: ch1, dec x6, slst to join (6)
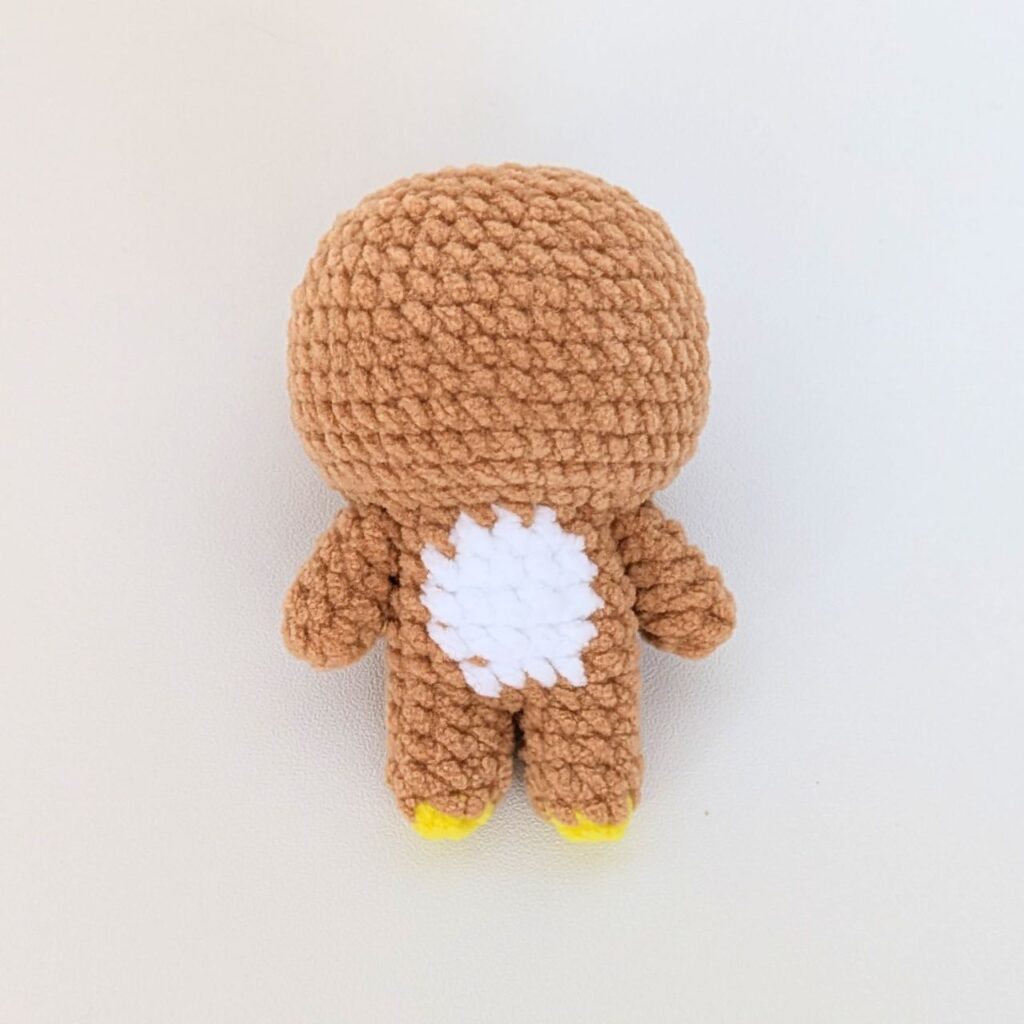
FO and sew the head close.
Progess photo
Ears
R1: MR 6sc, slst to join (6)
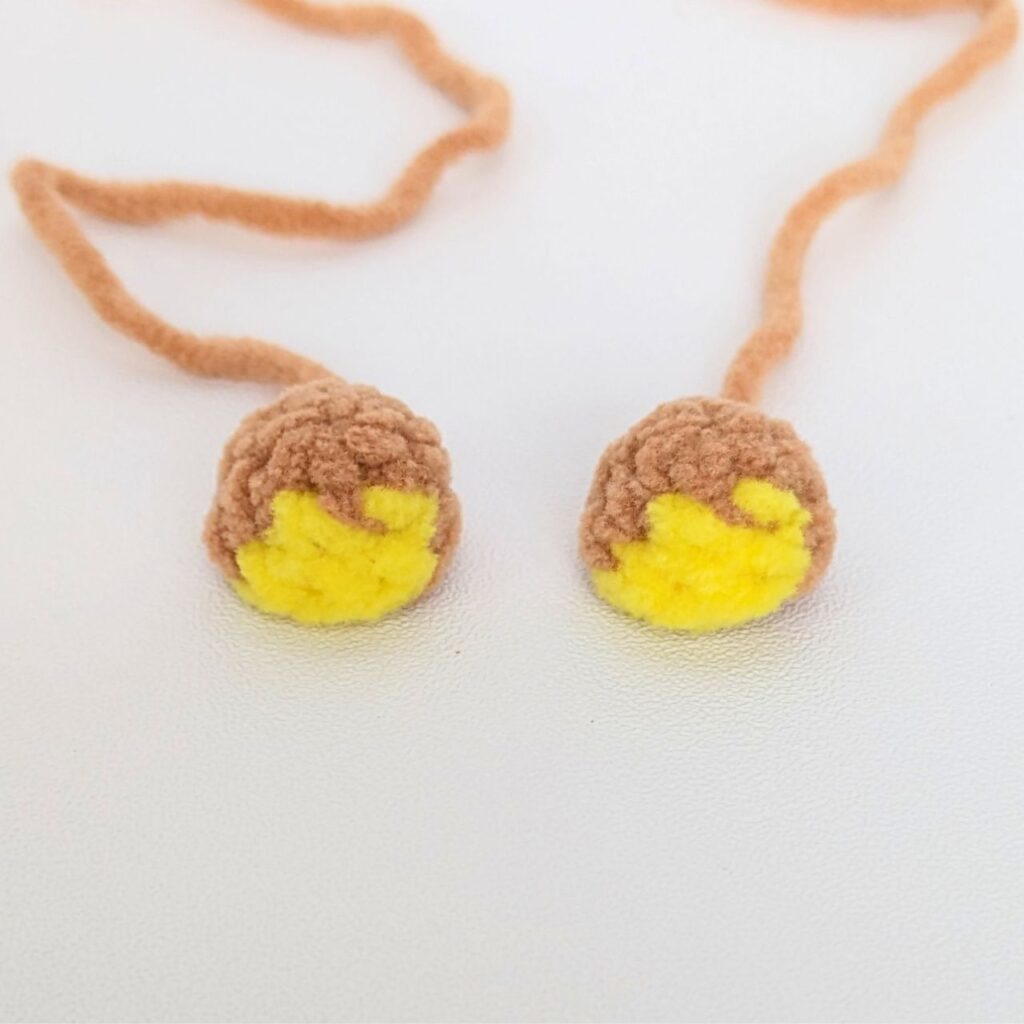
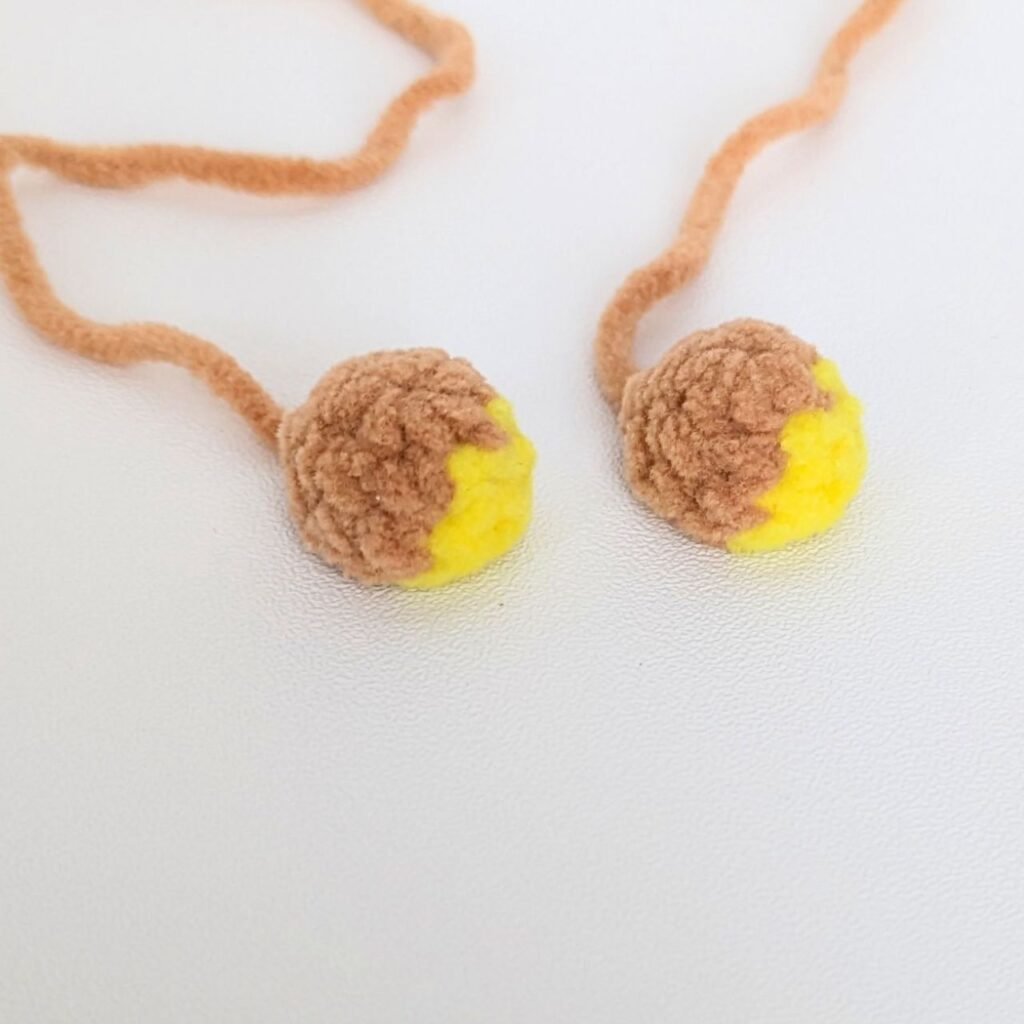
R2: ch1, inc, sc, cc to Secondary Color inc, sc, cc to Main Color inc, sc, slst to join (9)
R3: ch1, 3sc, cc to Secondary Color 3sc, cc to Main Color 3sc, slst to join (9)
FO, leaving a long enough tail for sewing. Set aside.
Ears
Face
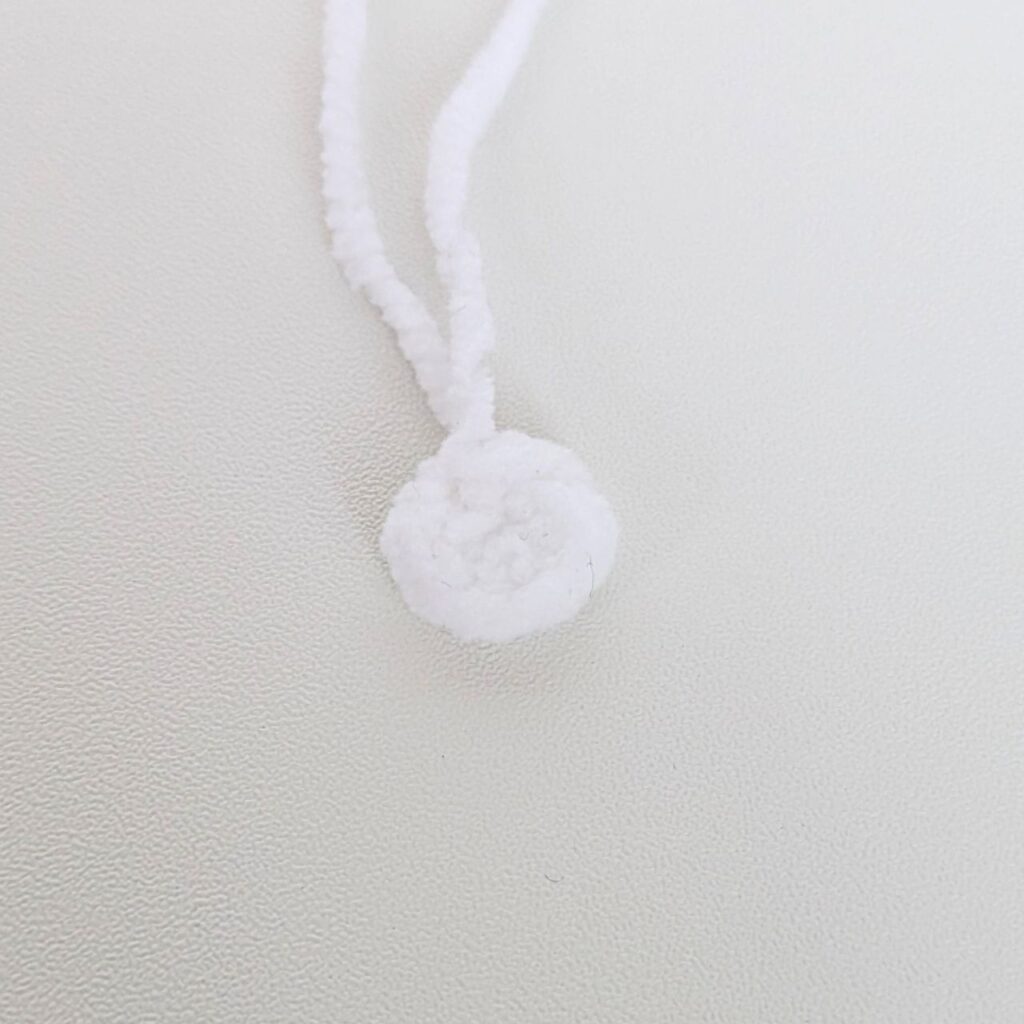
Muzzle: In a MR with white yarn: sc, 2hdc, sc, 2hdc.
Muzzle
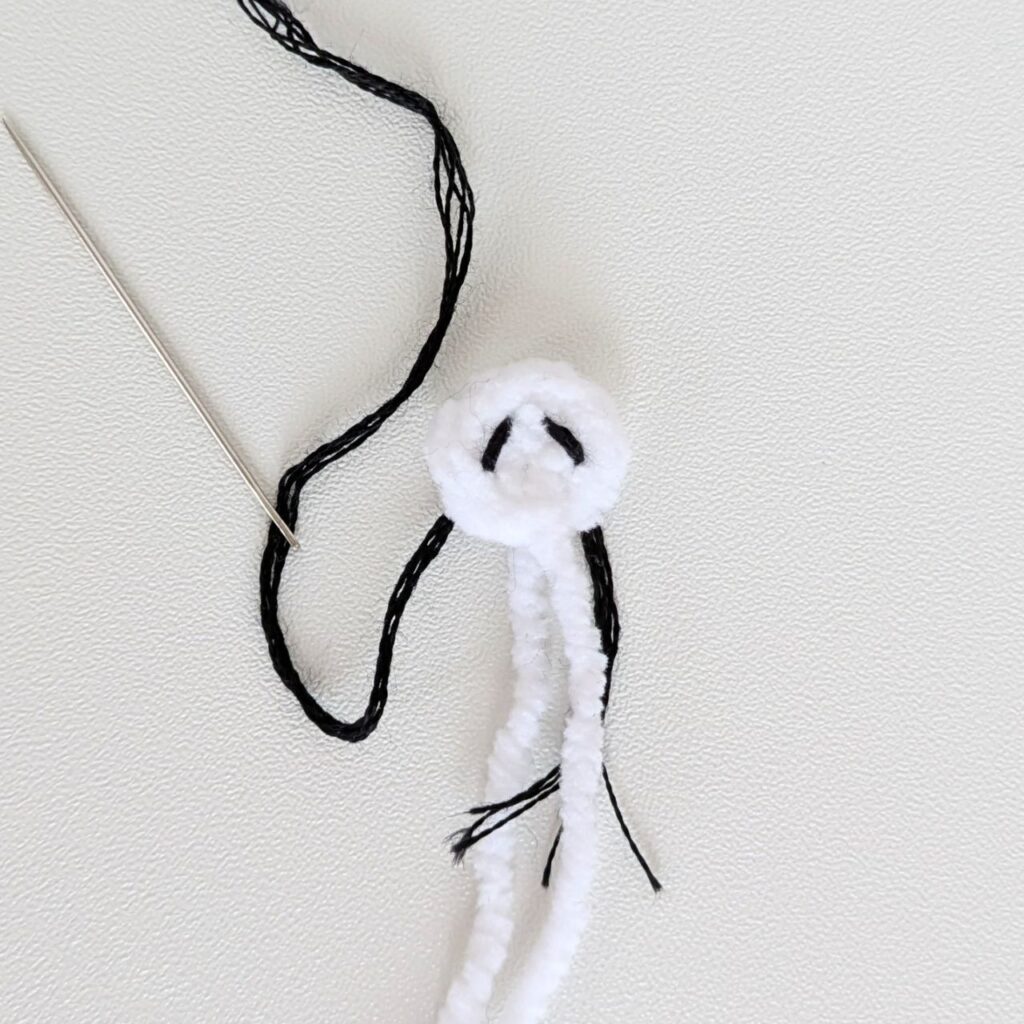
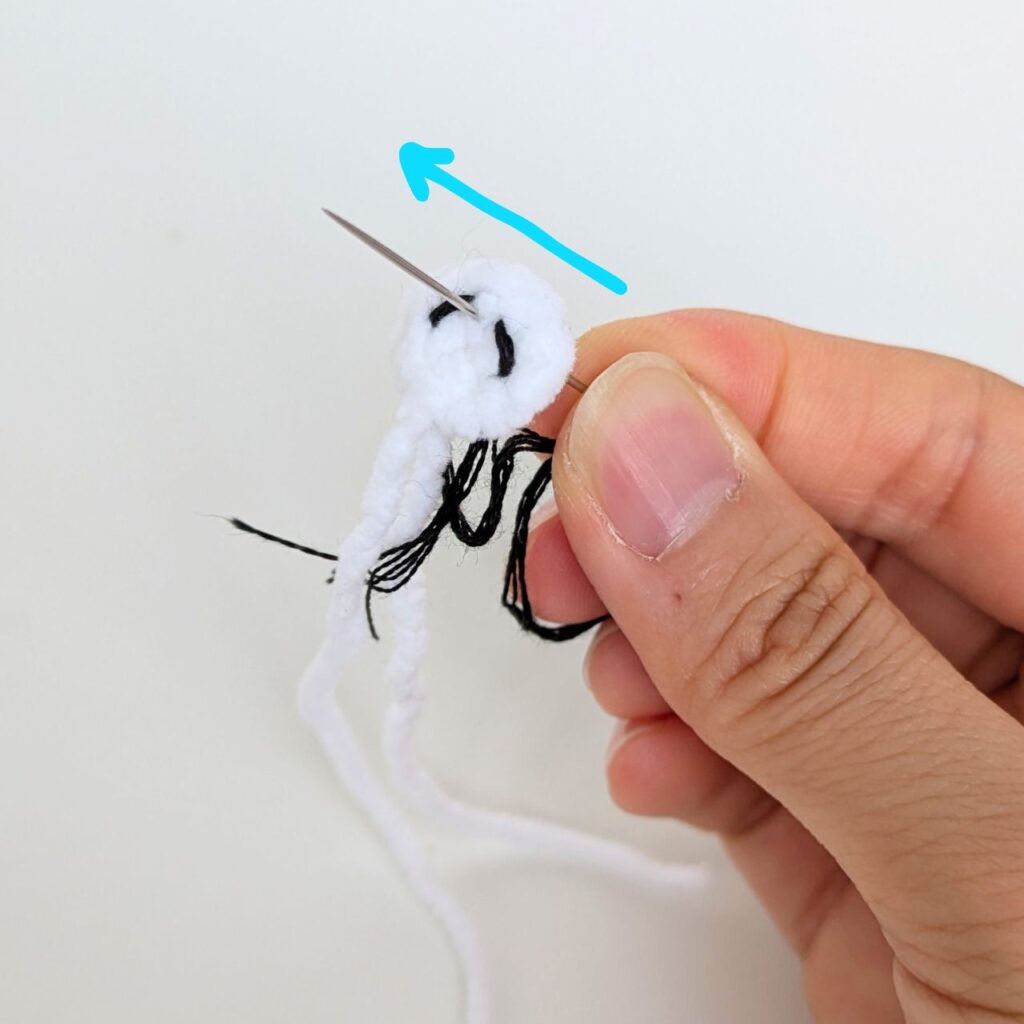
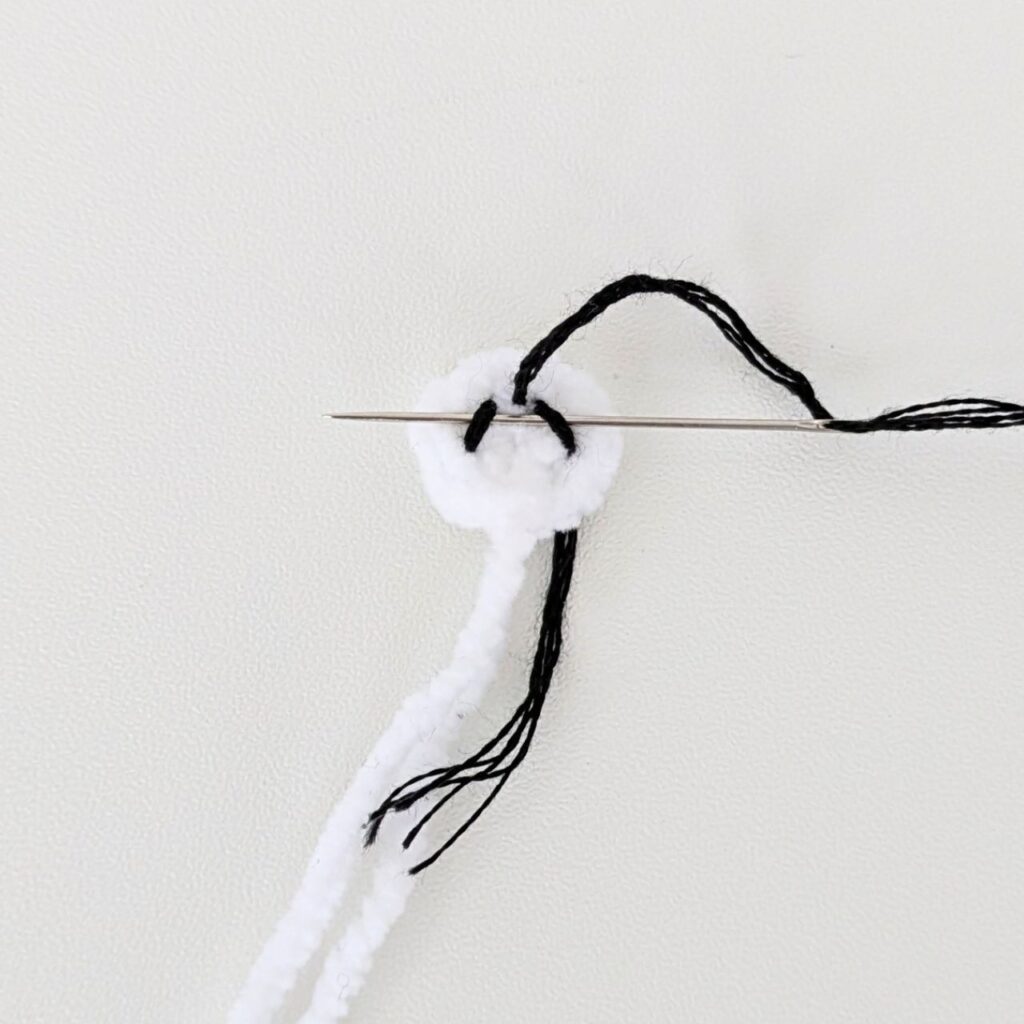
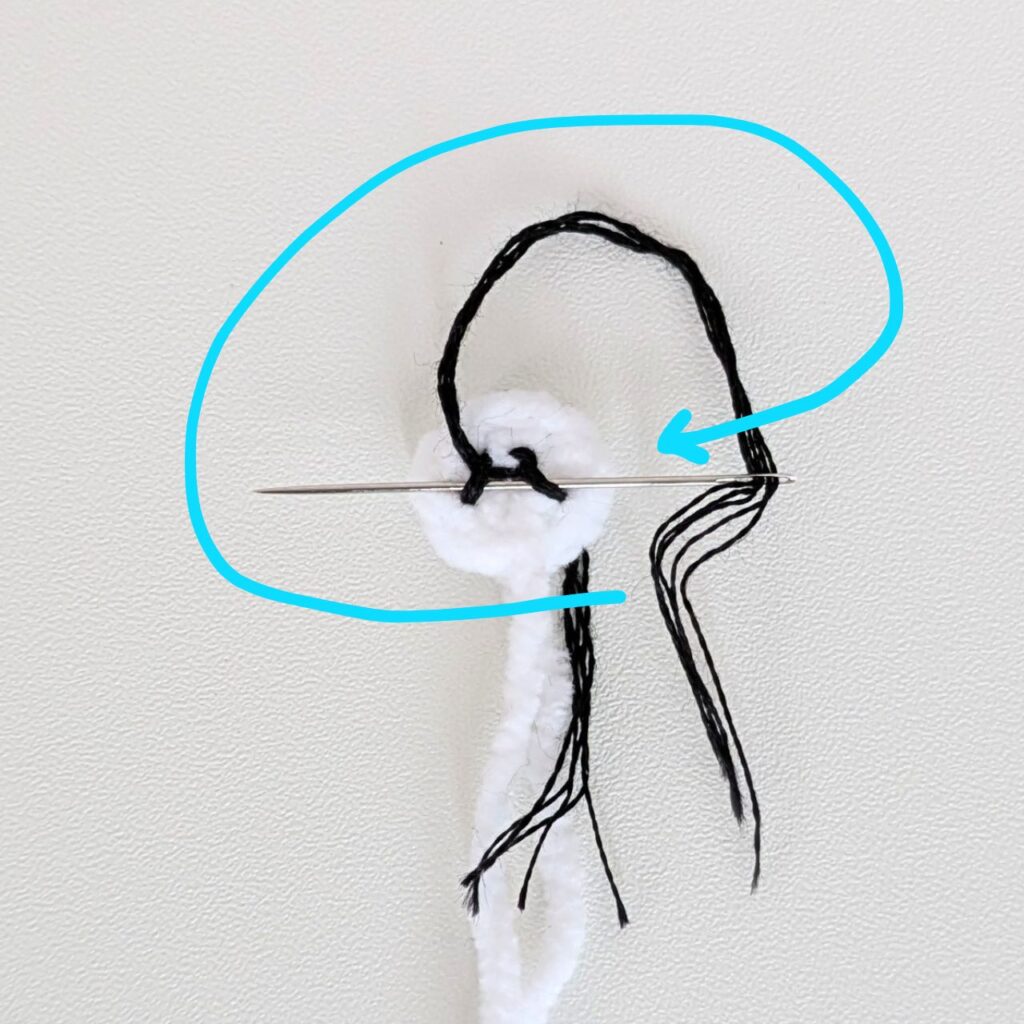
With black embroidery thread, sew on the nose and mouth.
How I embroider the nose and mouth
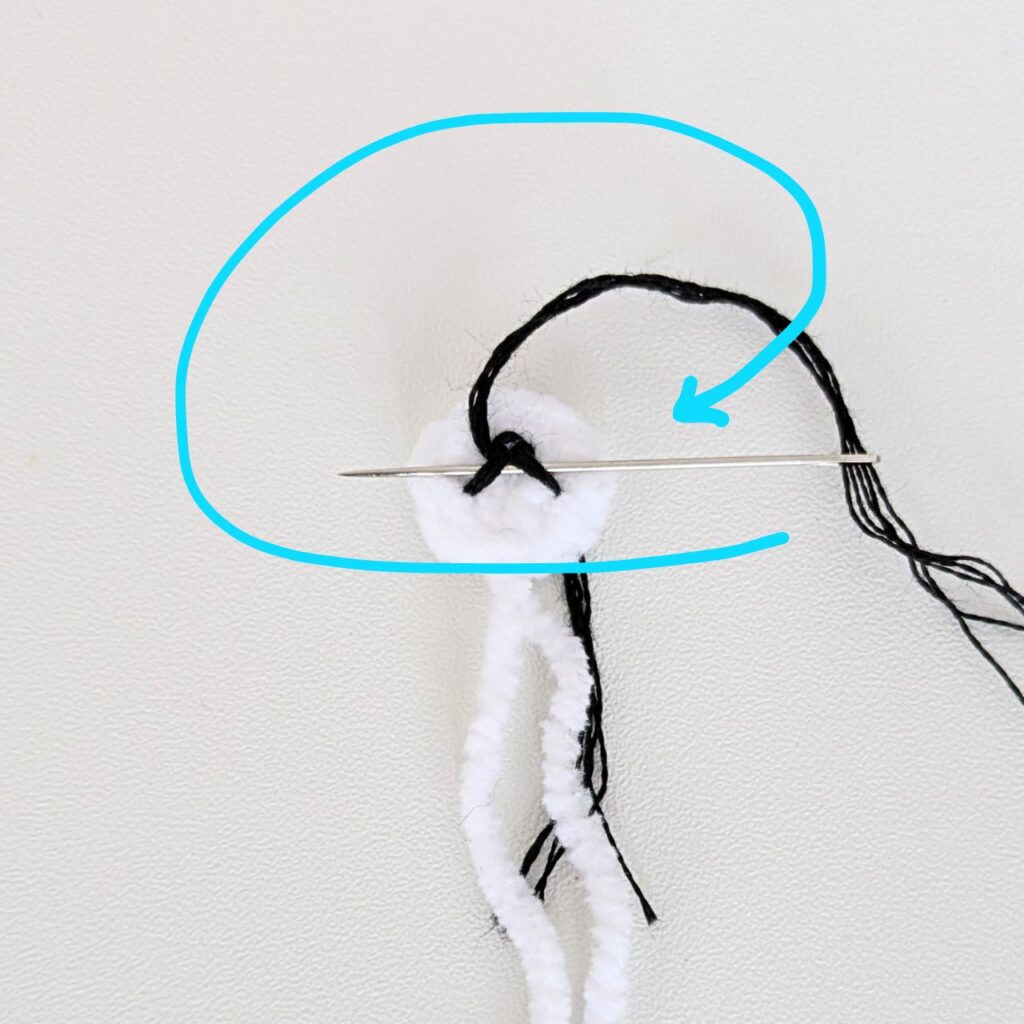
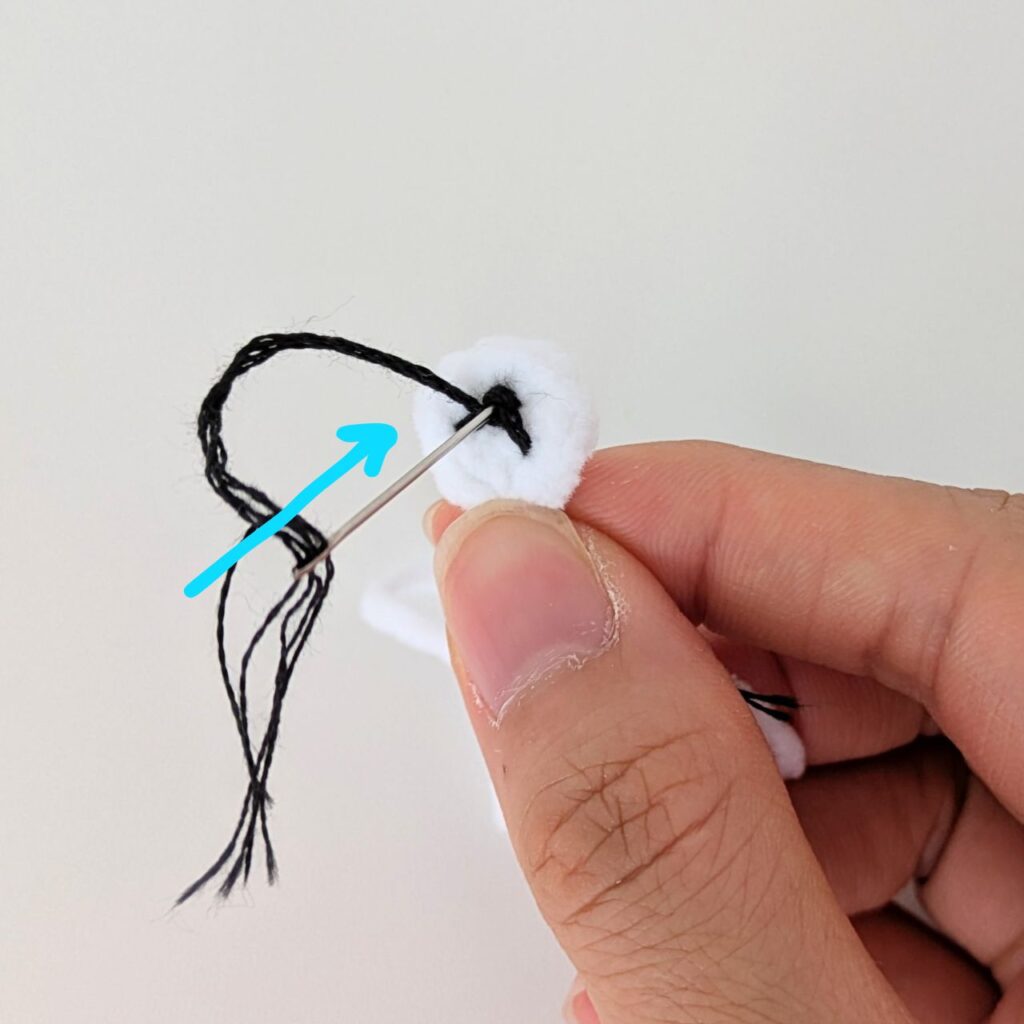
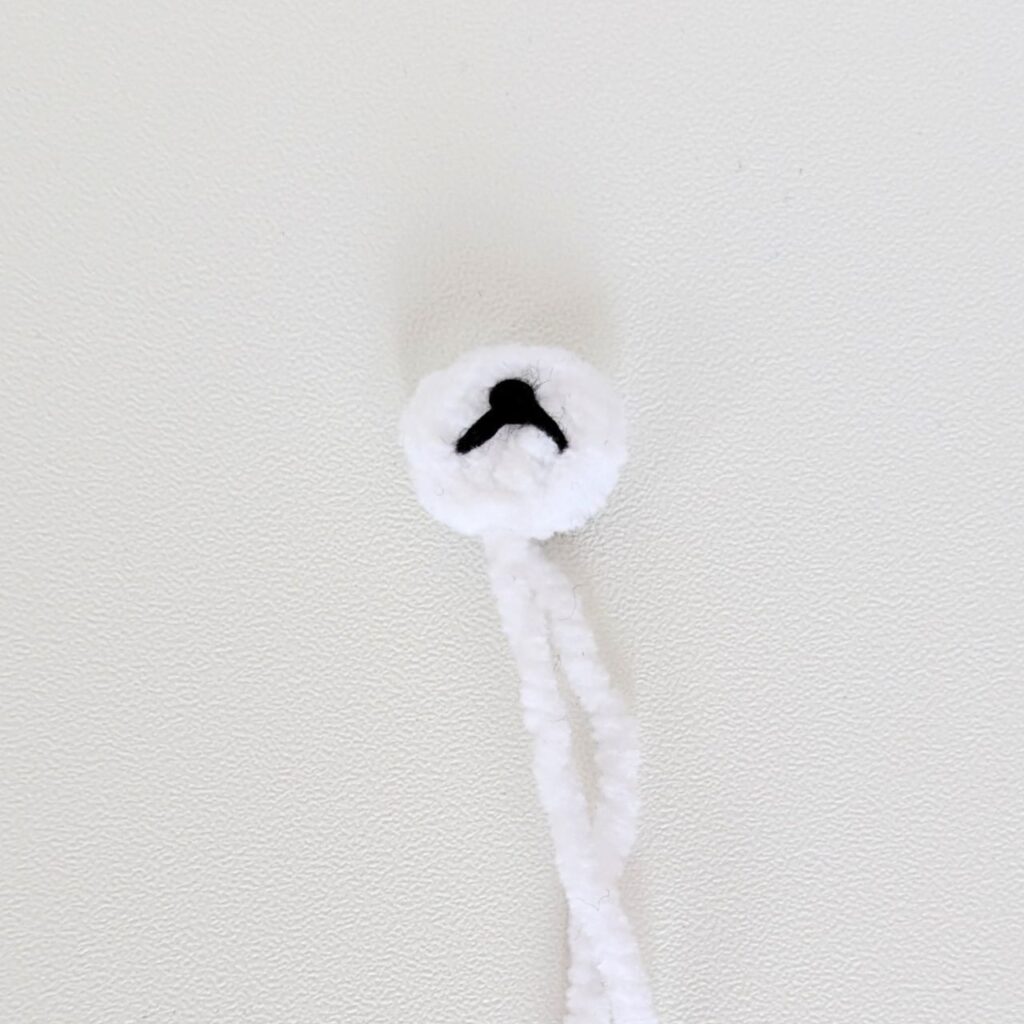
Eyes: Cut out 2 circles in black felt.
Sew
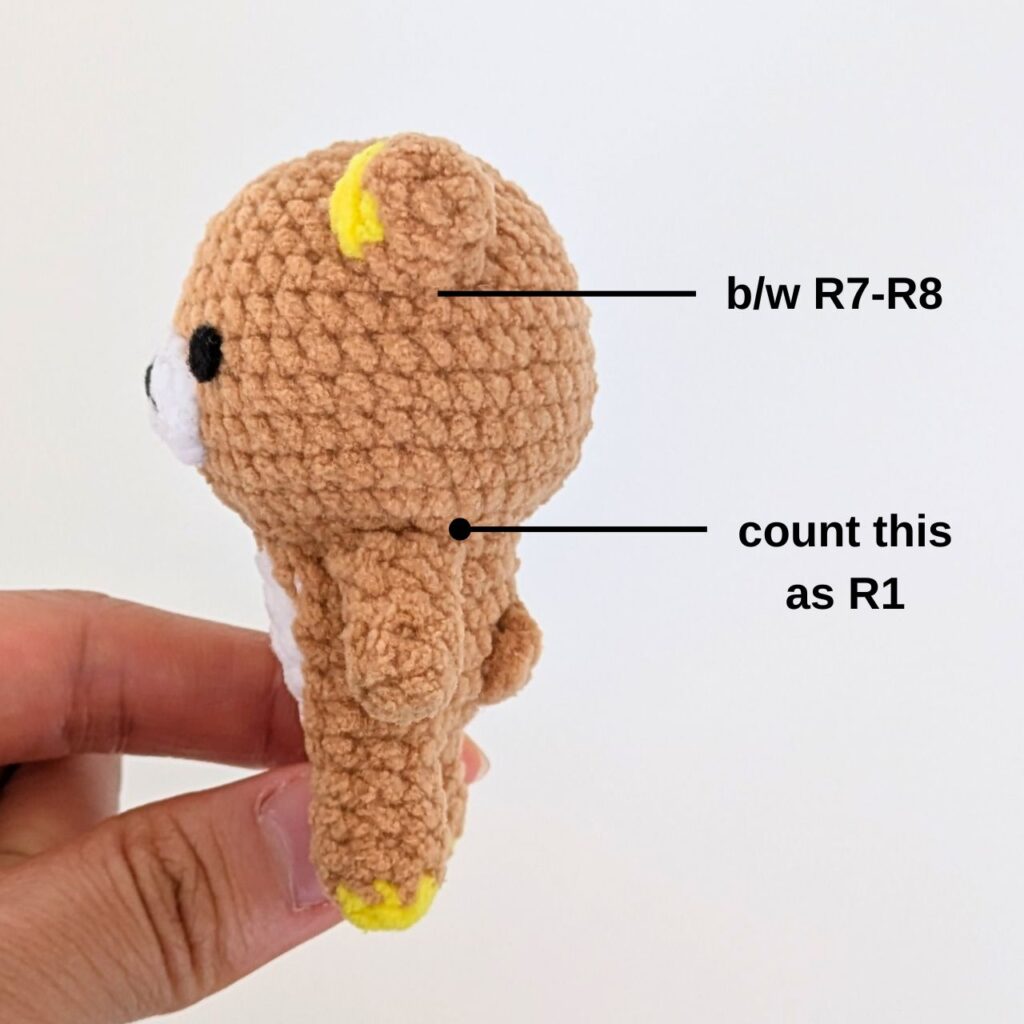
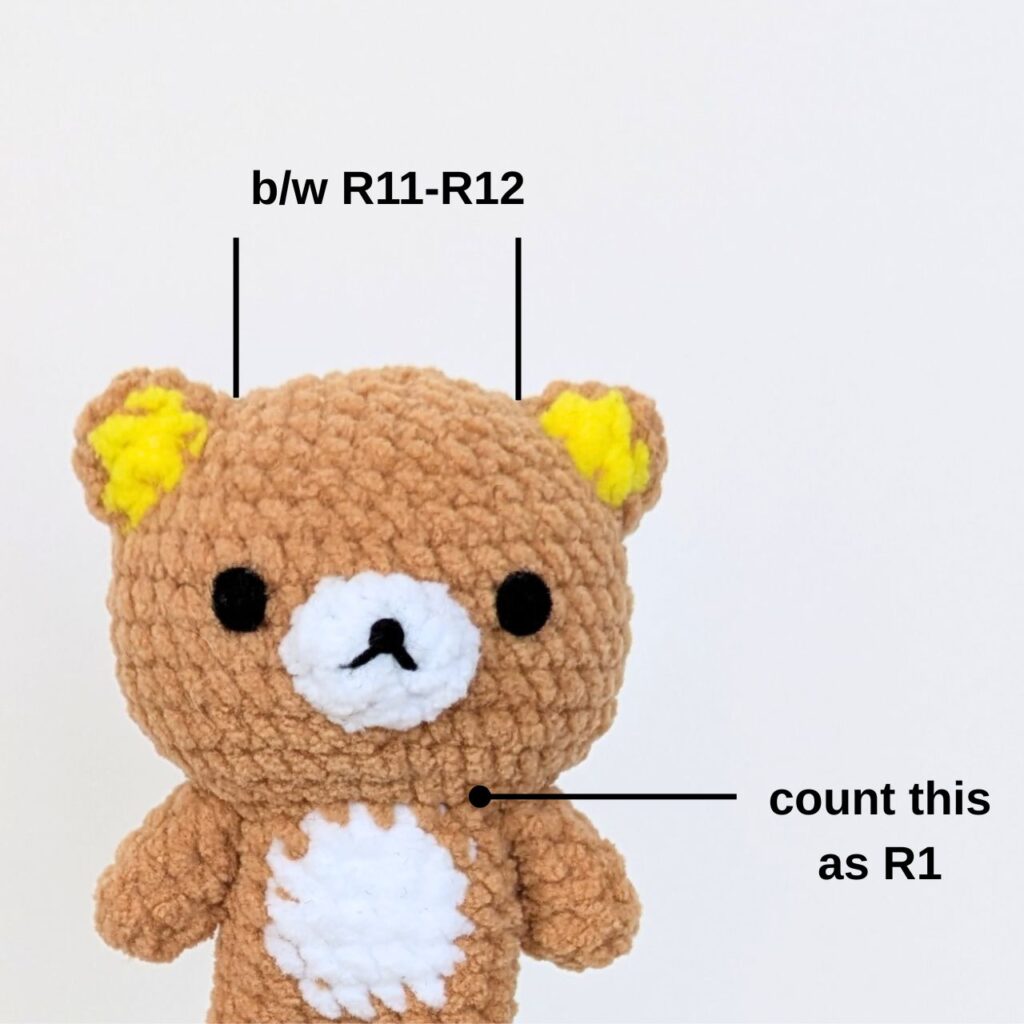
- Ears (count the rounds starting from the beginning of the head)
- Bottom edge reaches between R7-R8
- Top edge reaches between R11-R12
Ear placement
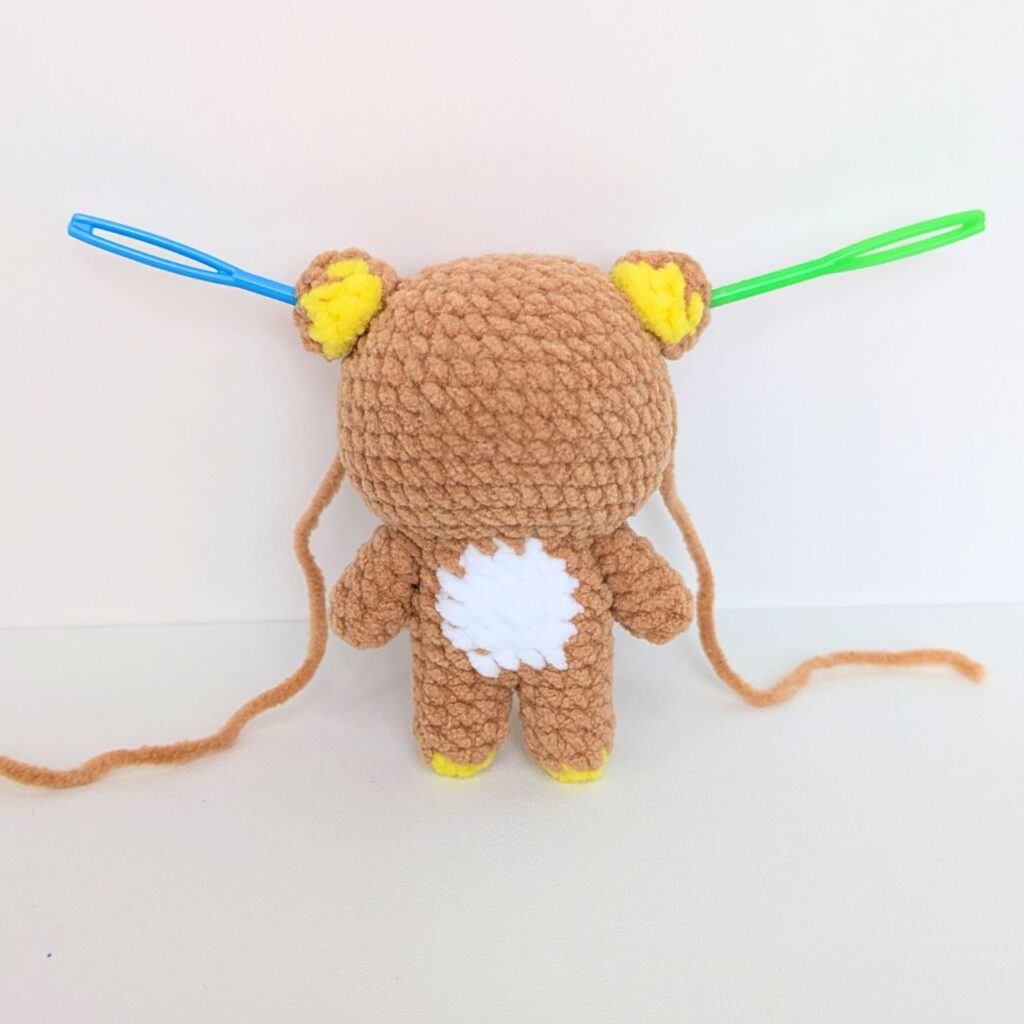
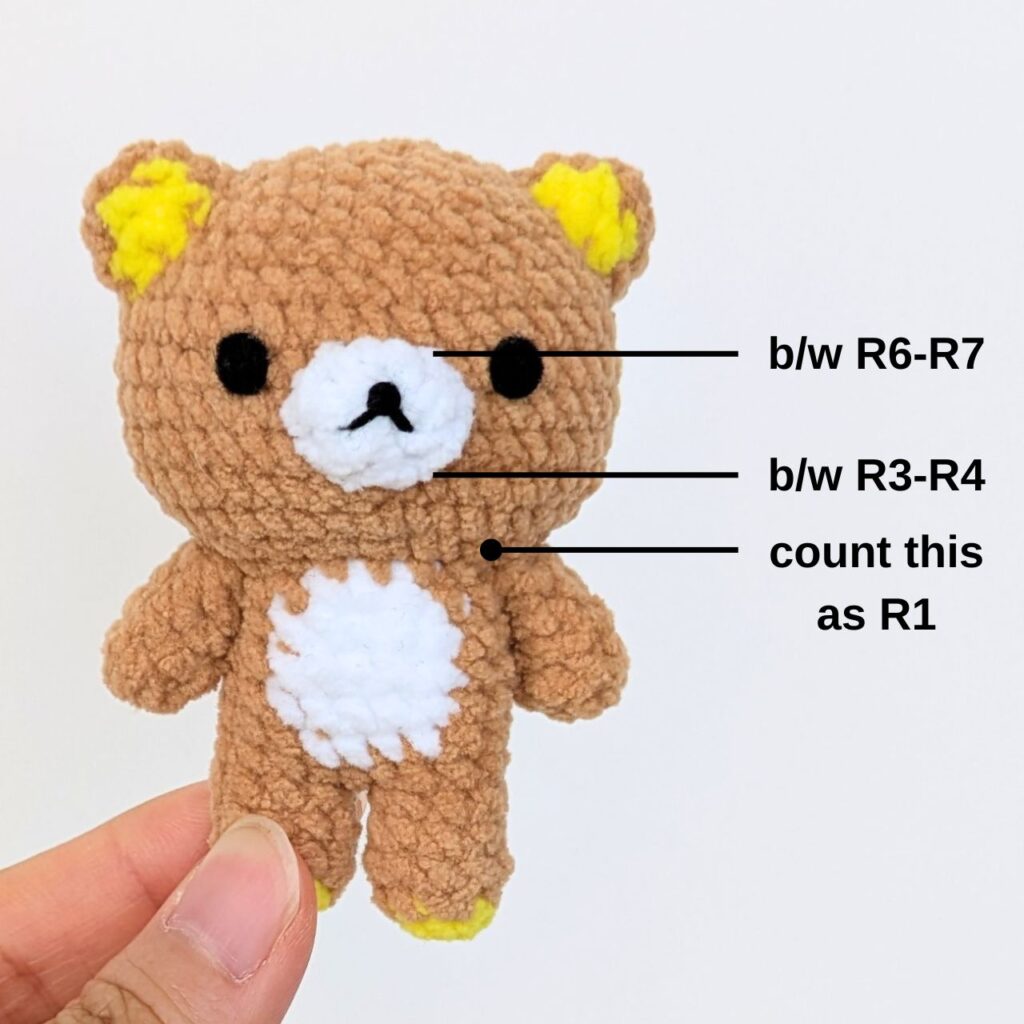
- Muzzle (count the rounds starting from the beginning of the head)
- Bottom edge reaches between R3-R4
- Top edge reaches between R6-R7
Muzzle placement
- Glue the eyes
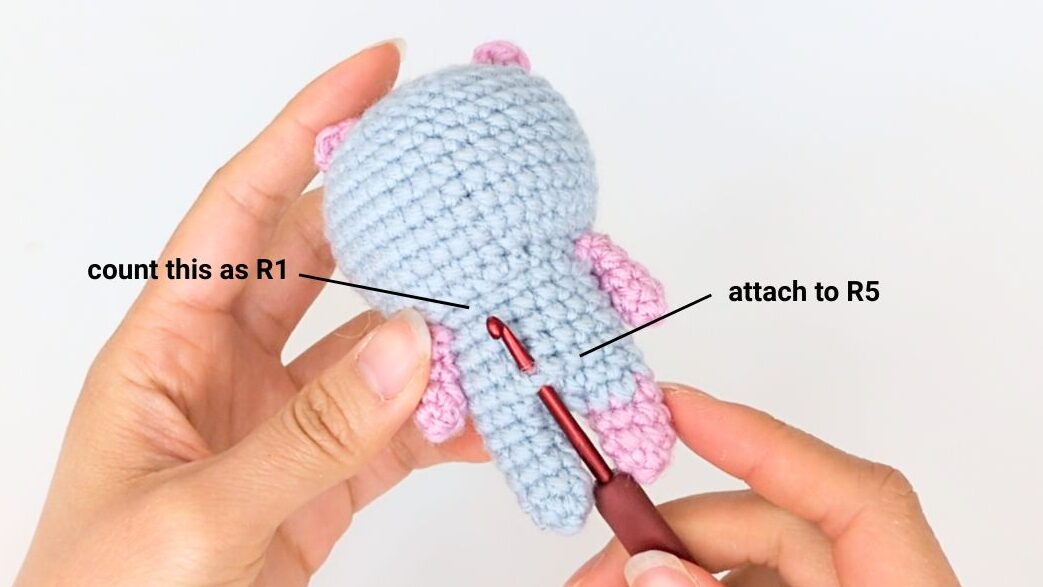
Tail
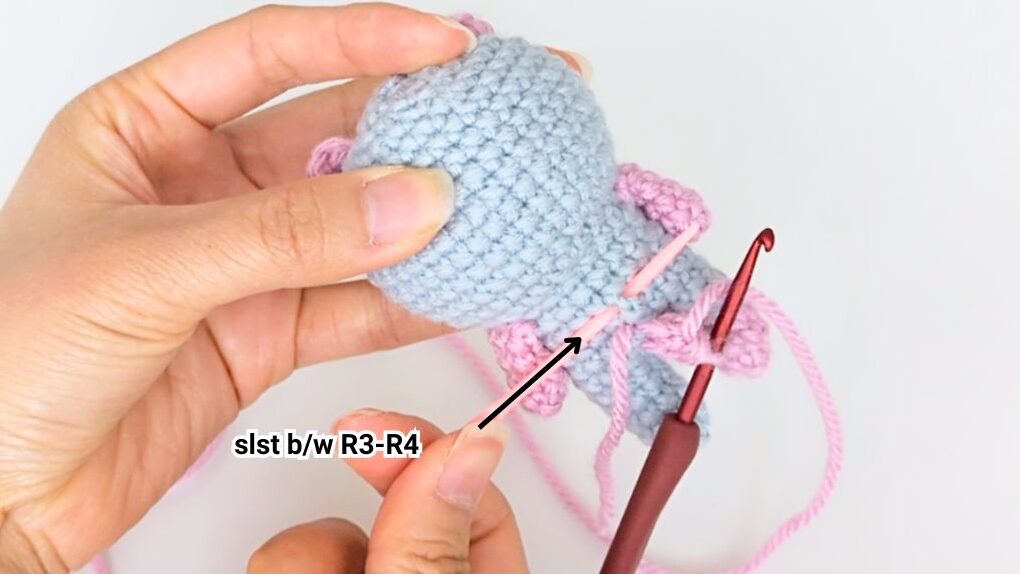
Counting down from the neck, attach the Main Color yarn to R5 with a ch 2, then bo3 (you will have 4 loops on your hook before you yarn over) into the back bump of the 1st ch. Then skip the round above (R4) and slst between R3-R4. FO and weave in the tails.
Tail
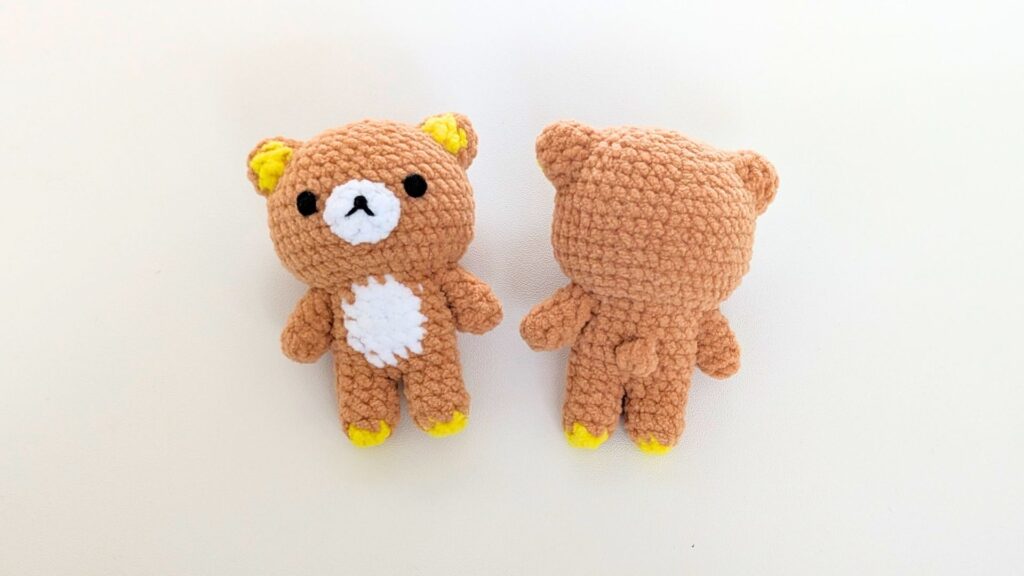
Congrats! You’re done! 🎉
I hope you enjoyed this crochet Rilakkuma pattern! If you have any questions, leave a comment below!
Share your makes with me on Instagram by tagging @mwwcrafts – I’d love to see them!
Leave a Reply