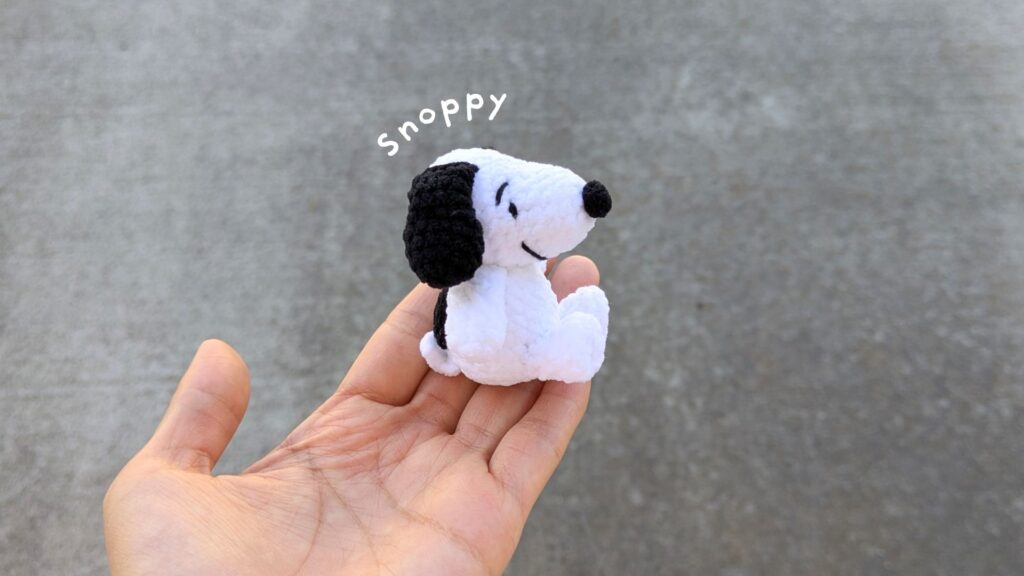
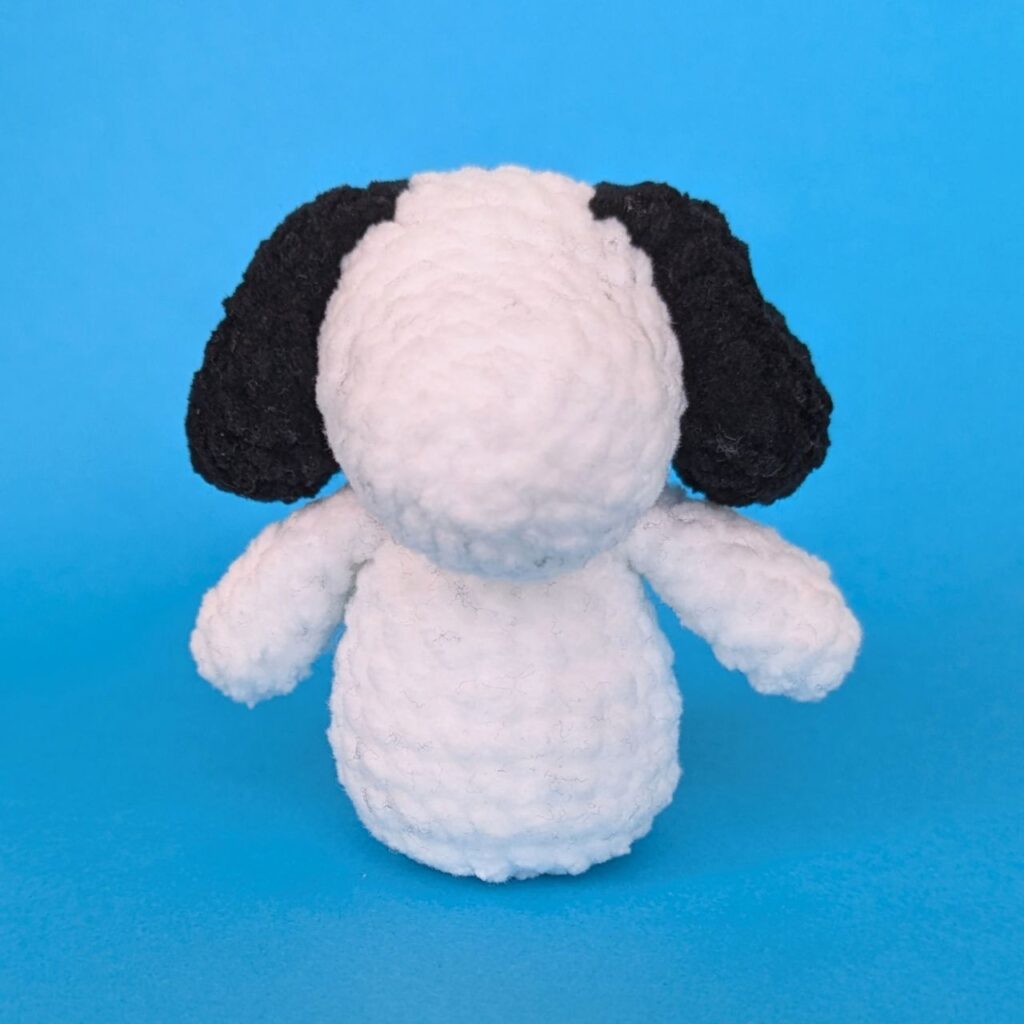
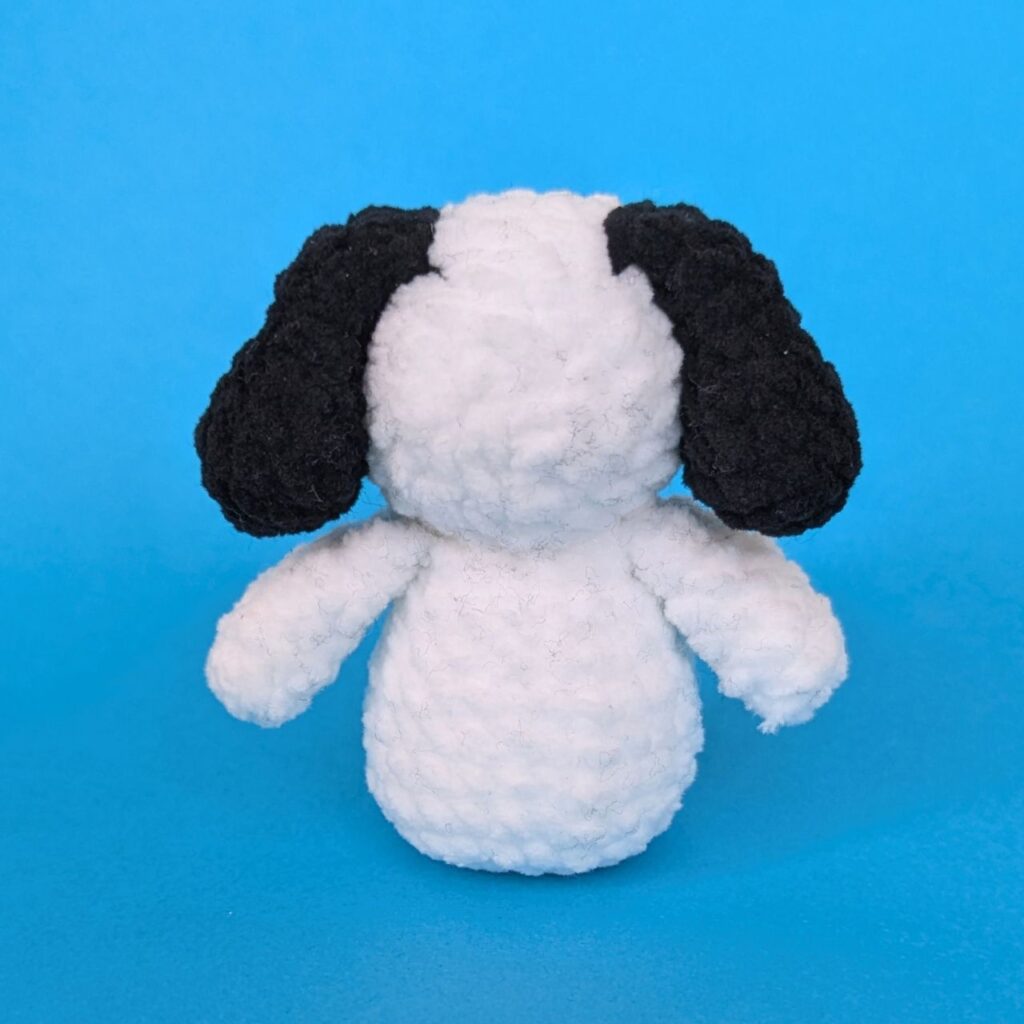
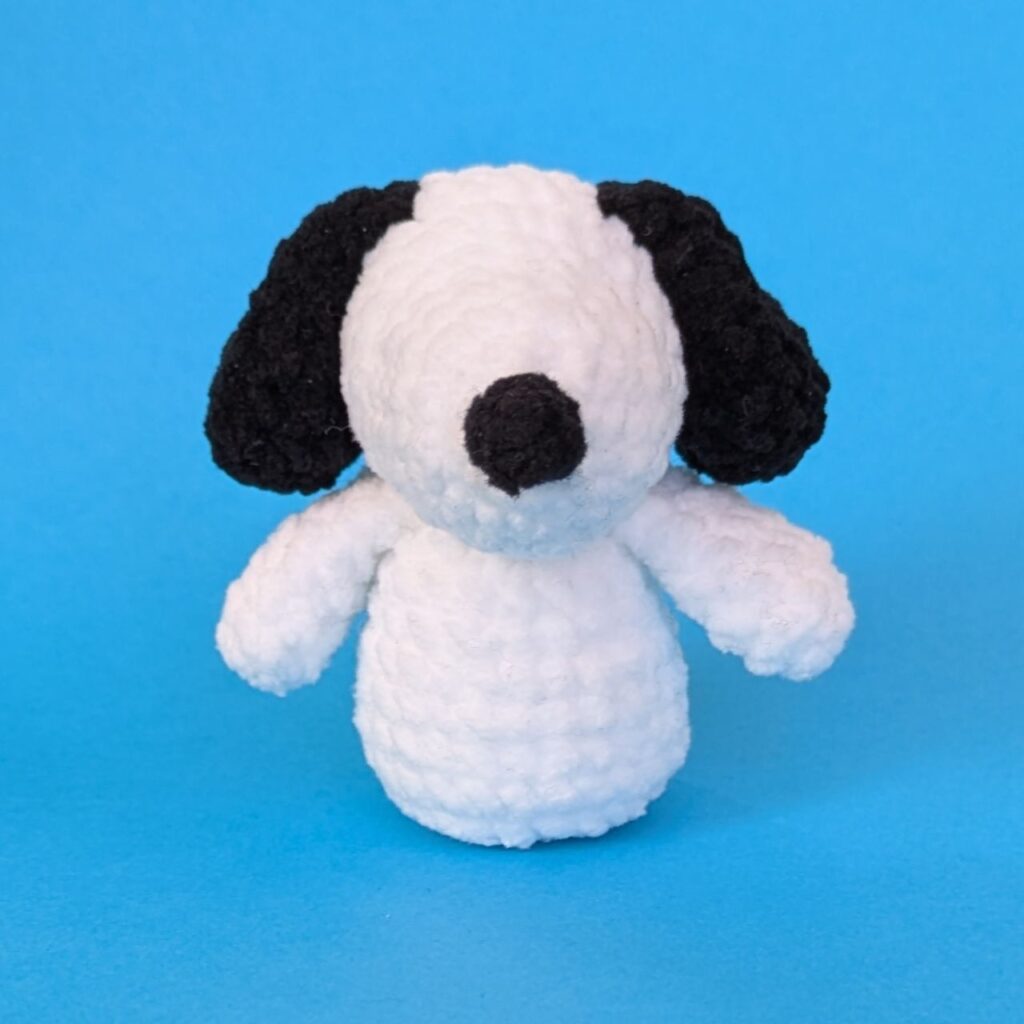
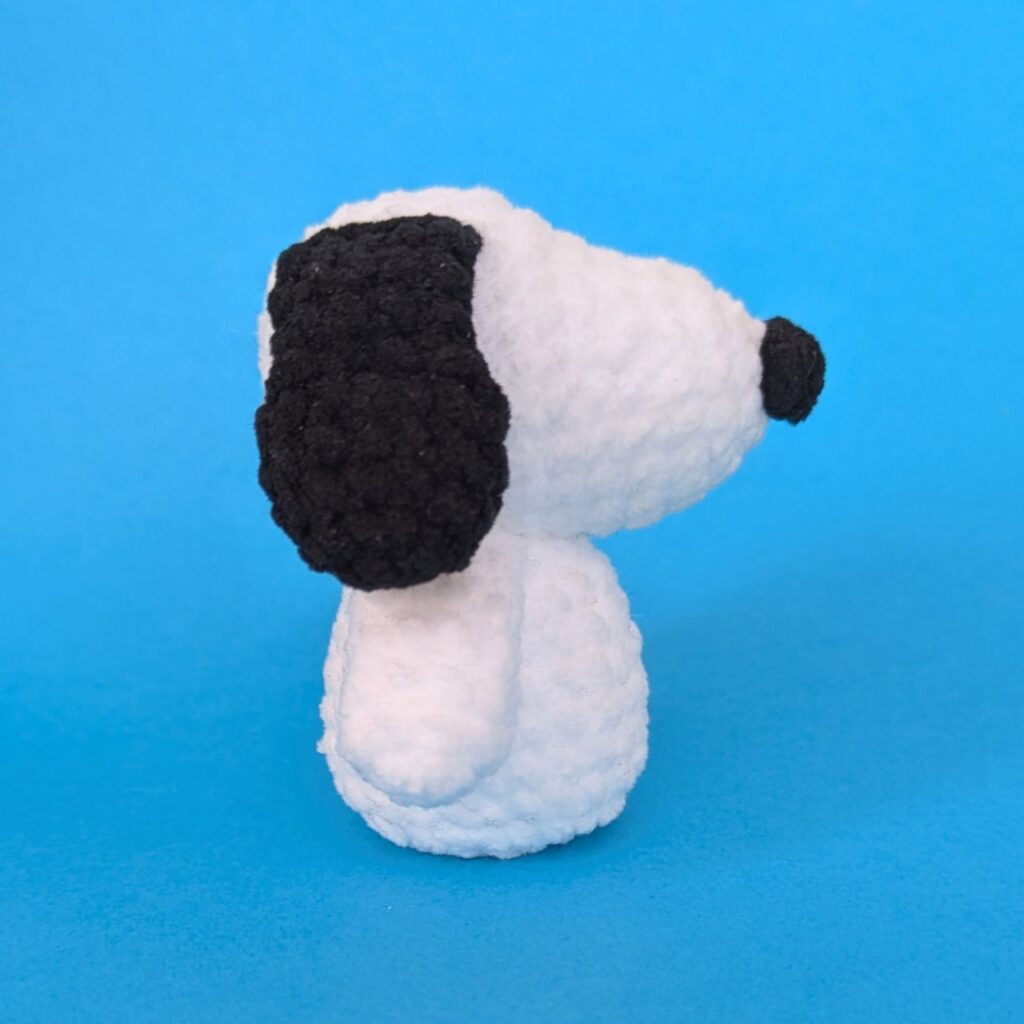
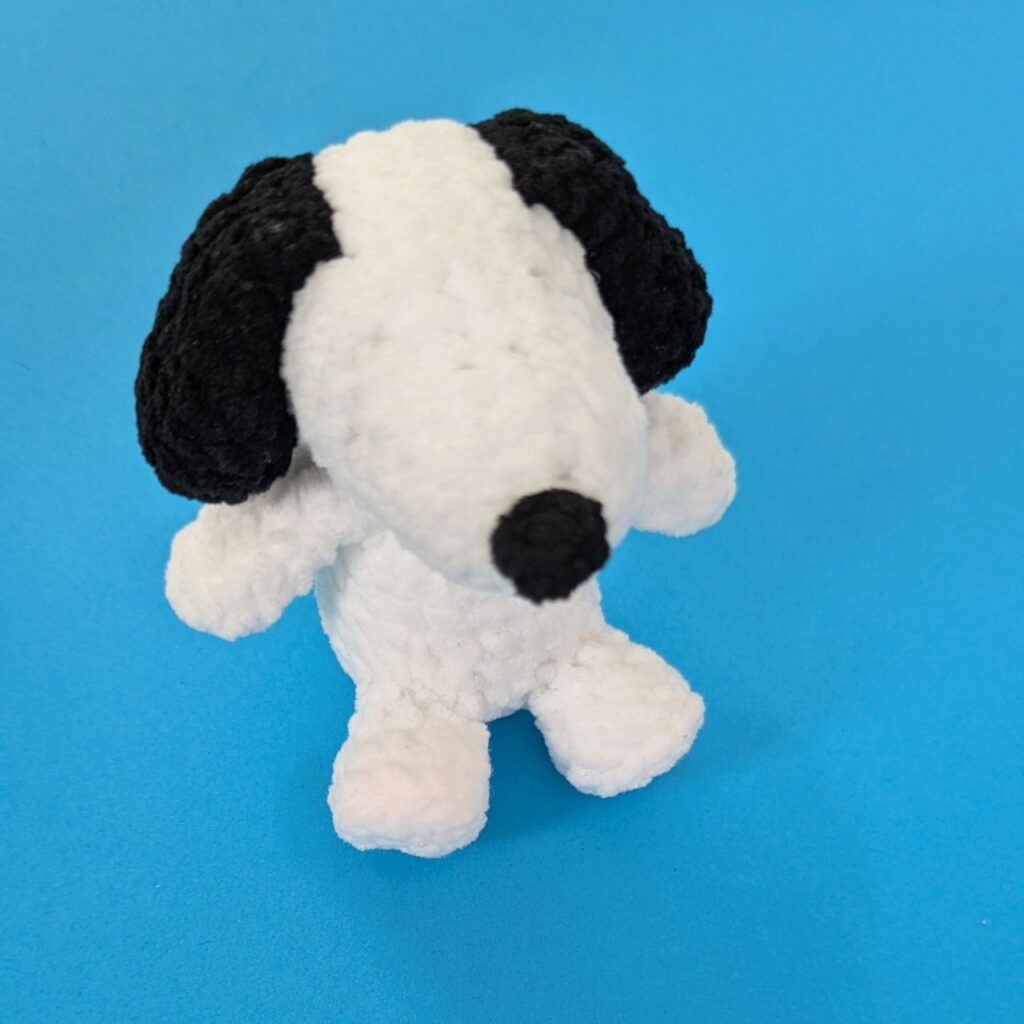
I’ve seen countless of Snoopy creations online, but never attempted one myself, so here it is! He sits and you can dress him up in little costumes for halloween. 🎃
Materials
What I used in ()
- Crochet hook (2.5 mm)
- White yarn (3 mm chenille yarn)
- Black yarn (3 mm chenille yarn)
- Black embroidery thread
- Stitch marker or a piece of yarn
- Stuffing
- Tapestry needle
- Sewing needle
- Scissors
Abbreviations (US terms)
- MR – magic ring
- sc – single crochet
- inc – increase (2 single crochets into one stitch)
- dec – decrease/ invisible decrease
- sc2tog – single crochet 2 stitches together (the same as a regular decrease)
- BLO – back loops only
- ch – chain
- slst – slip stitch
- st(s) – stitch(es)
- FO – fasten off (cut the yarn and pull through)
- x – times (indicates the number of times to repeat)
- […] – repeat steps between brackets for the specified number of times
- (…) – crochet the group of stitches all in the same stitch
- (#) – the number of stitches you should have at the end of the round
Notes
- This pattern is crocheted in Joined Rounds.
- I crocheted using the Yarn Under Yarn Over (YUYO) technique for tighter stitches.
Sizing
Approx. finished measurements using a 2.5 mm hook and 3 mm chenille yarn:
- Height: 2.5”
- Width: 2”
Disclaimer:
Please do not copy, redistribute, or resell this pattern in any way. You can sell the finished products and a mention as the pattern creator is appreciated!

If you have any questions, feel free to leave a comment here or on my socials :)
Sitting Snoopy Crochet Pattern
- We will be crocheting in Joined Rounds unless otherwise stated.
- This means at the end of every round, we will slst into the the first stitch of the previous round to join the round and then ch1 to start the next round.
- Pull both the slst and ch1 tight to shrink their size.
- The first stitch of the round will also be the same stitch that we slip stitched into.
- Do not include the slst and ch1 in your stitch count at the end of the round.
- Click the drop-down menus for photos!
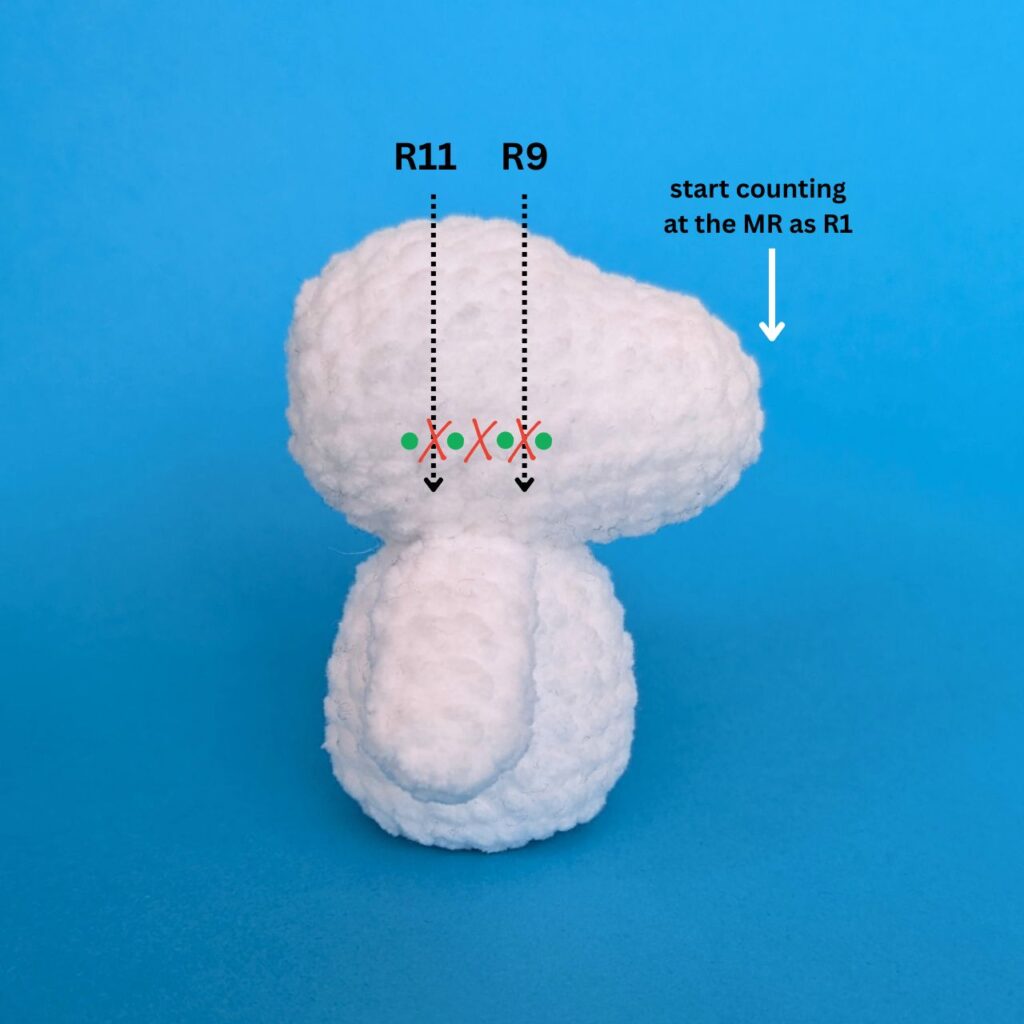
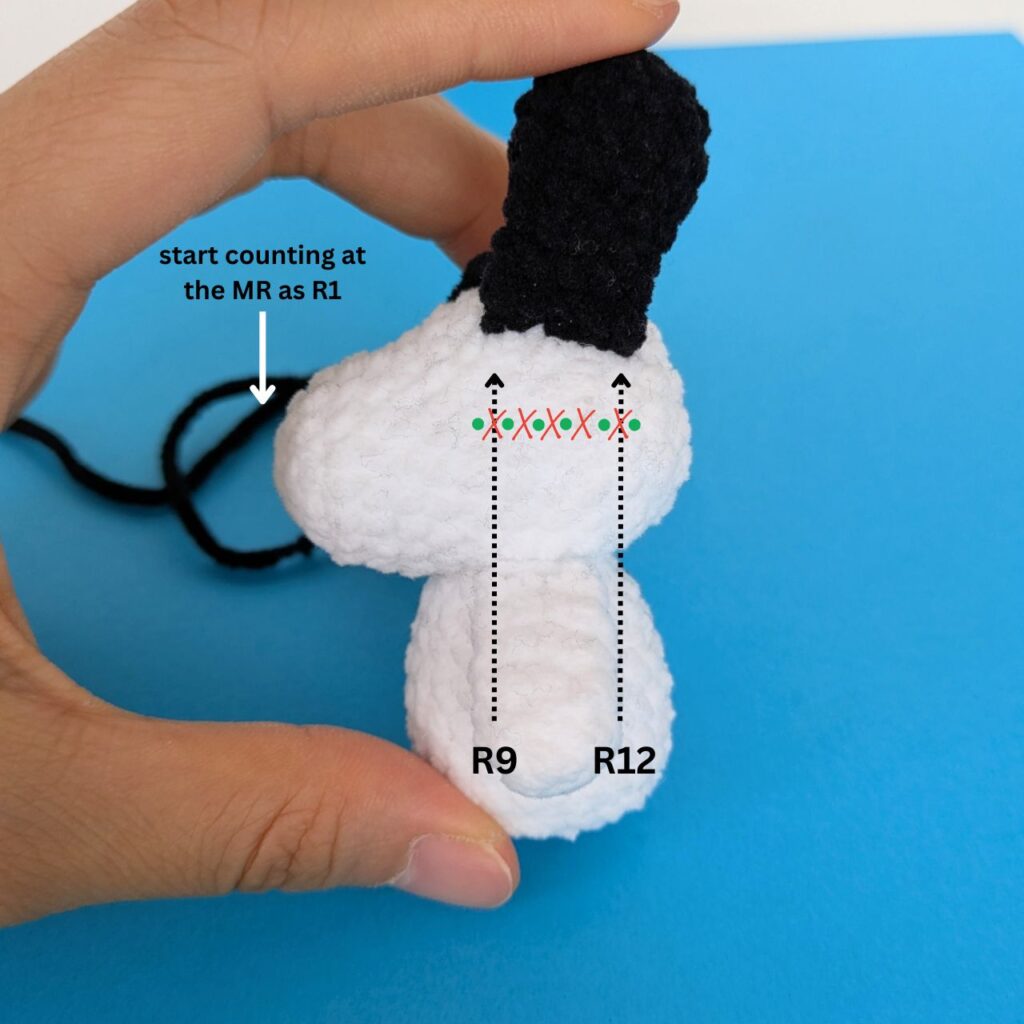
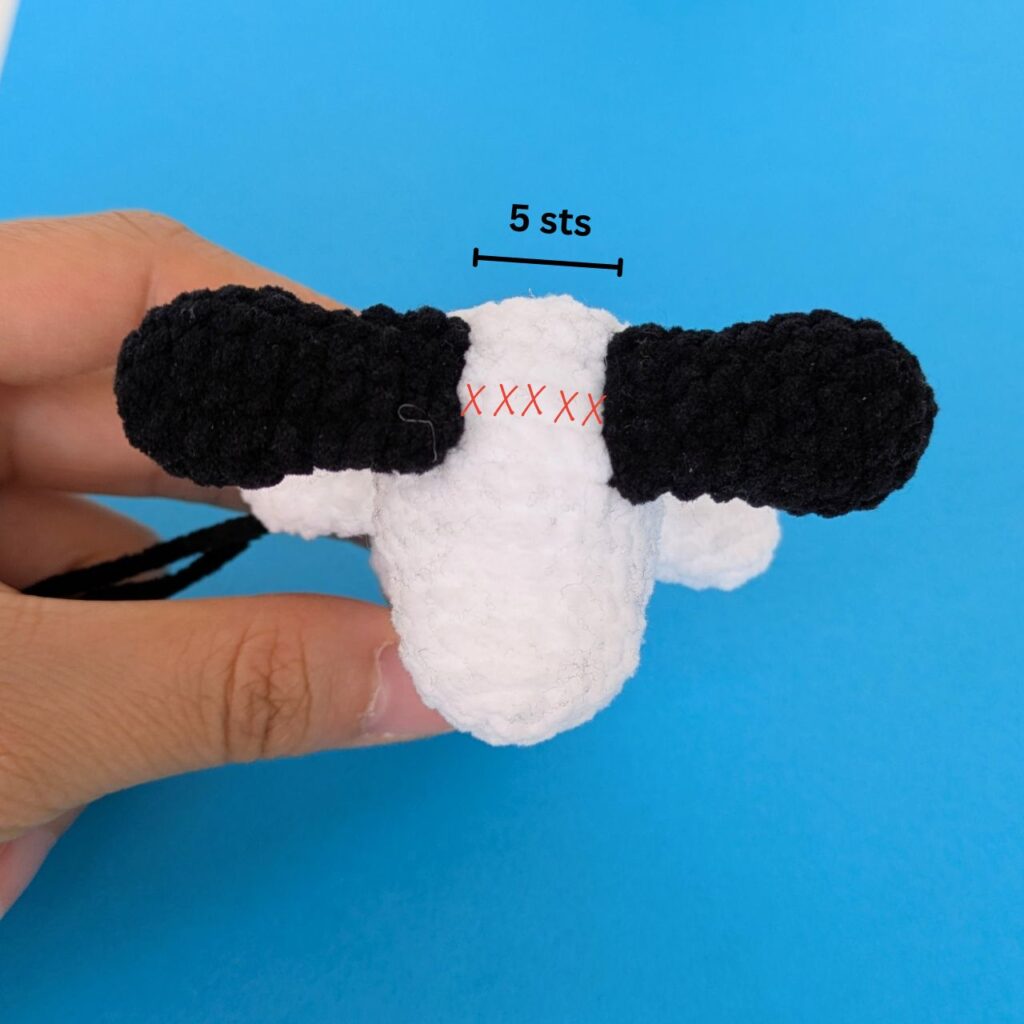
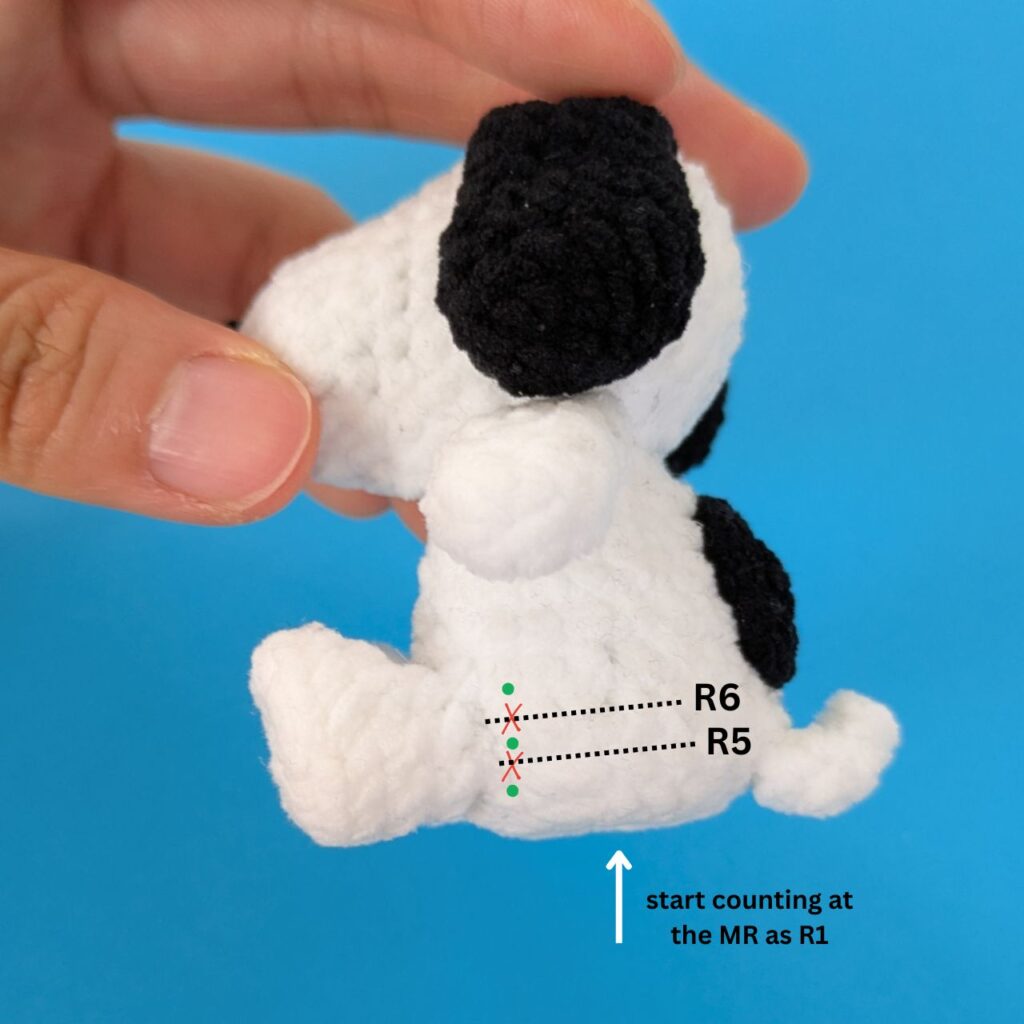
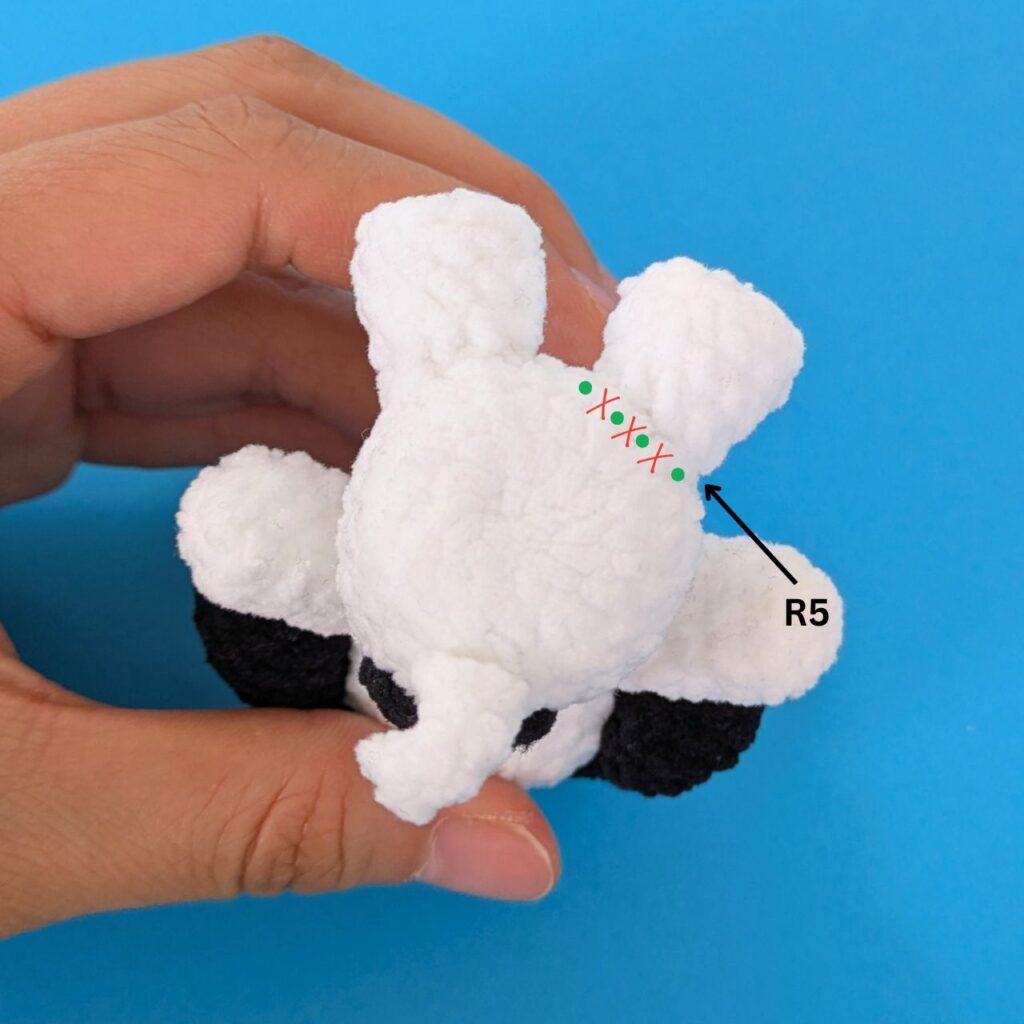
- Some of the sewing guides have red X’s and green dots to show the spaces I sewed along.
- Red X = individual stitches
- Green dot = the space between the stitches
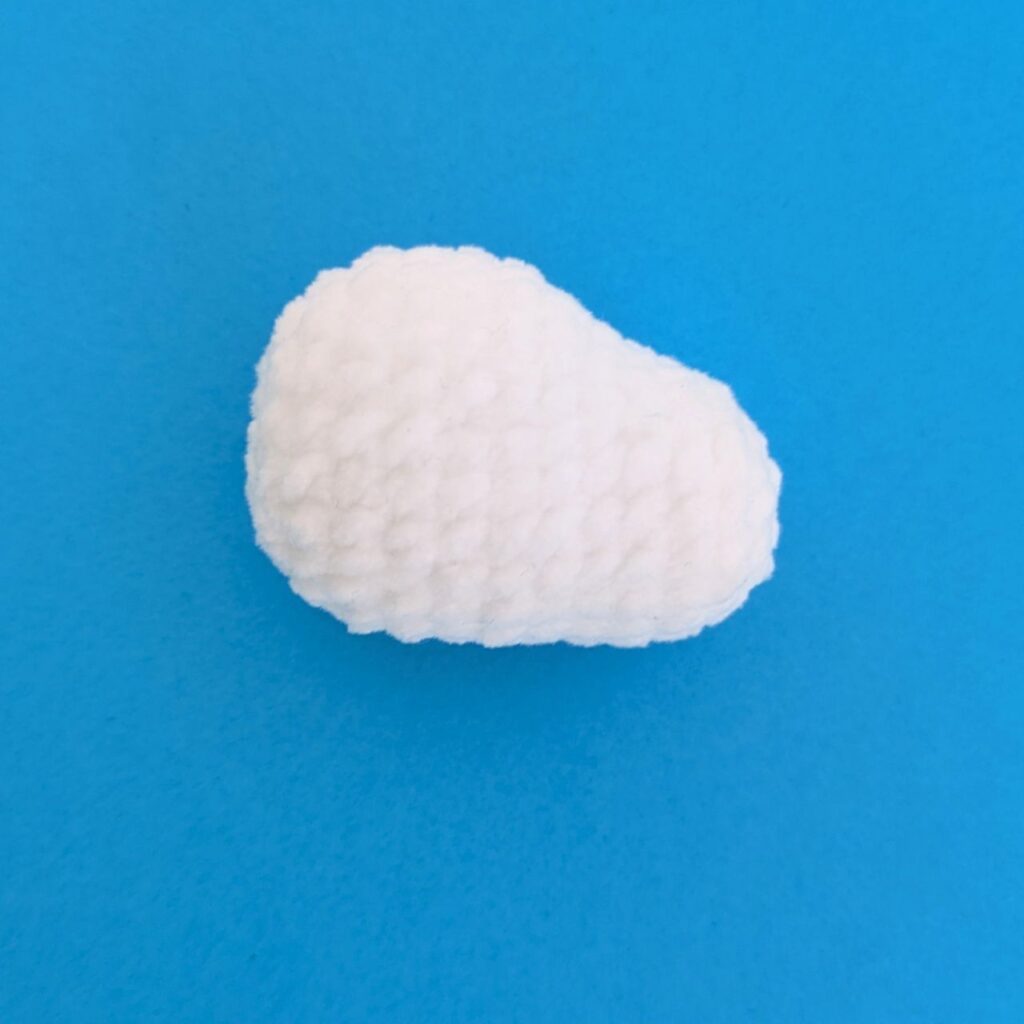
Head
With white yarn:
R1: MR 6sc, slst to join (6)
R2: ch1, inc x6, slst to join (12)
R3: ch1, [sc, inc] x6, slst to join (18)
R4-R5: ch1, 18sc, slst to join (18) (2 rounds)
R6: ch1, 7sc, inc x4, 7sc, slst to join (22)
R7: ch1, 10sc, inc x2, 10sc, slst to join (24)
R8-R11: ch1, 24sc, slst to join (24) (4 rounds)
R12: ch1, [2sc, dec] x6, slst to join (18)
R13: ch1, [sc, dec] x6, slst to join (12)
Stuff
R14: ch1, dec x6 (6)
FO and sew the head close.
Head
Body
With white yarn:
R1: MR 6sc, slst to join (6)
R2: ch1, inc x6, slst to join (12)
R3: ch1, [sc, inc] x6, slst to join (18)
R4: ch1, [2sc, inc] x6, slst to join (24)
R5-R8: ch1, 24sc, slst to join (24) (4 rounds)
R9: ch1, [2sc, dec] x6, slst to join (18)
R10: ch1, 18sc, slst to join (18)
R11: ch1, [sc, dec] x6 (12)
FO and leave a tail for sewing.
Stuff and shape body
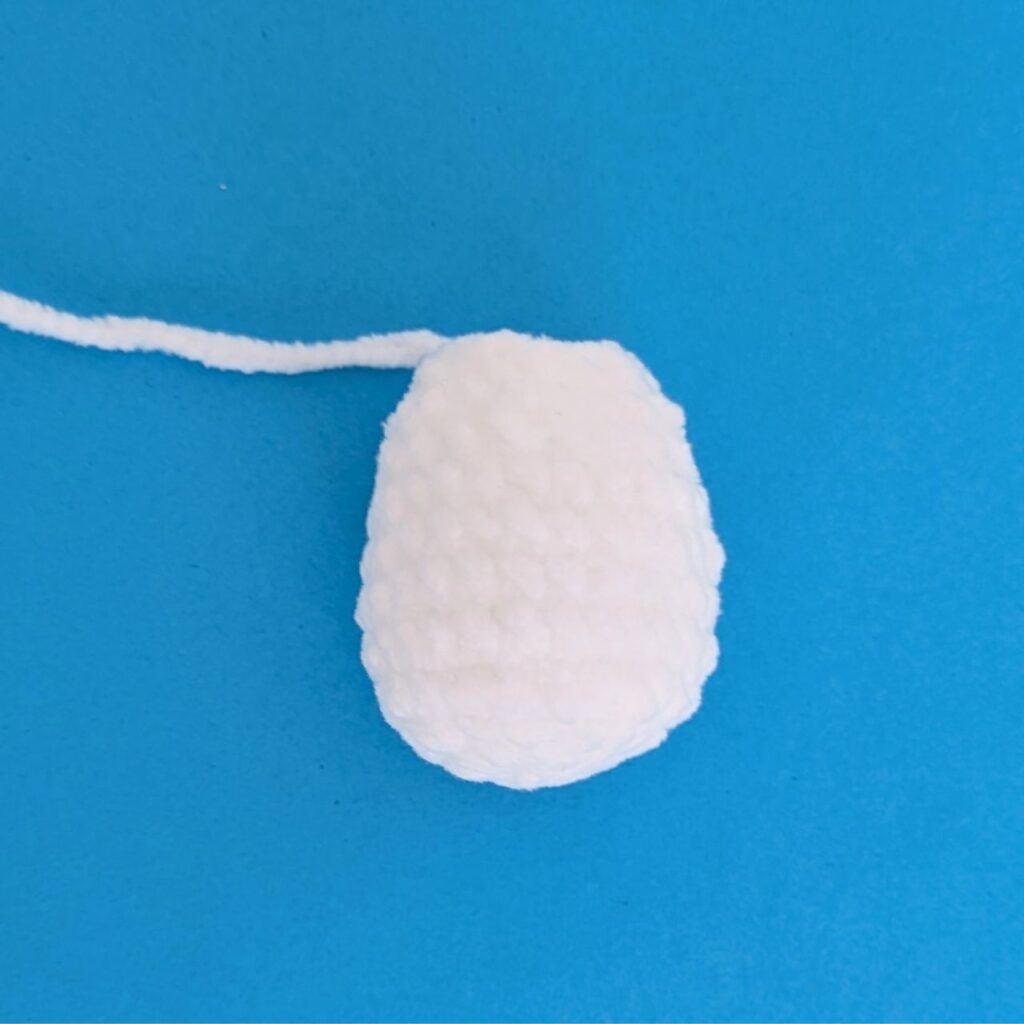
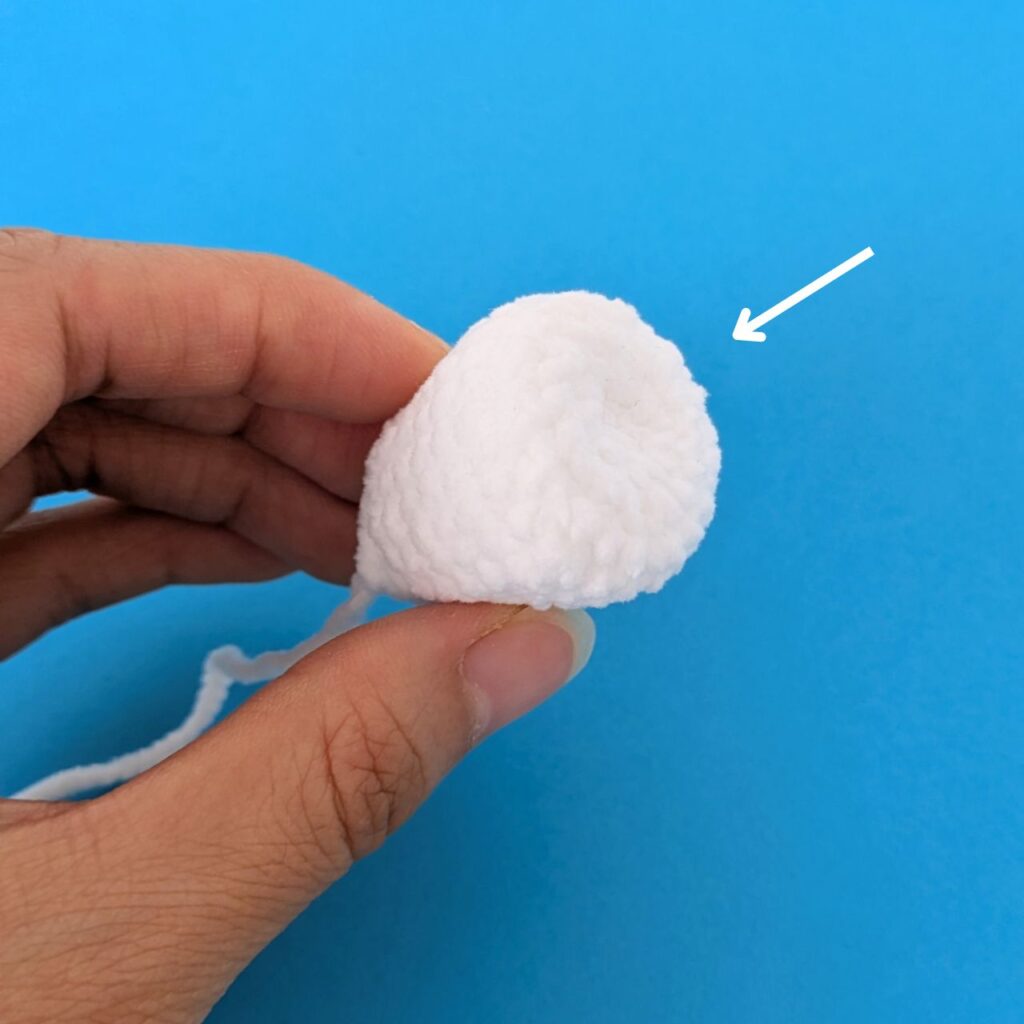
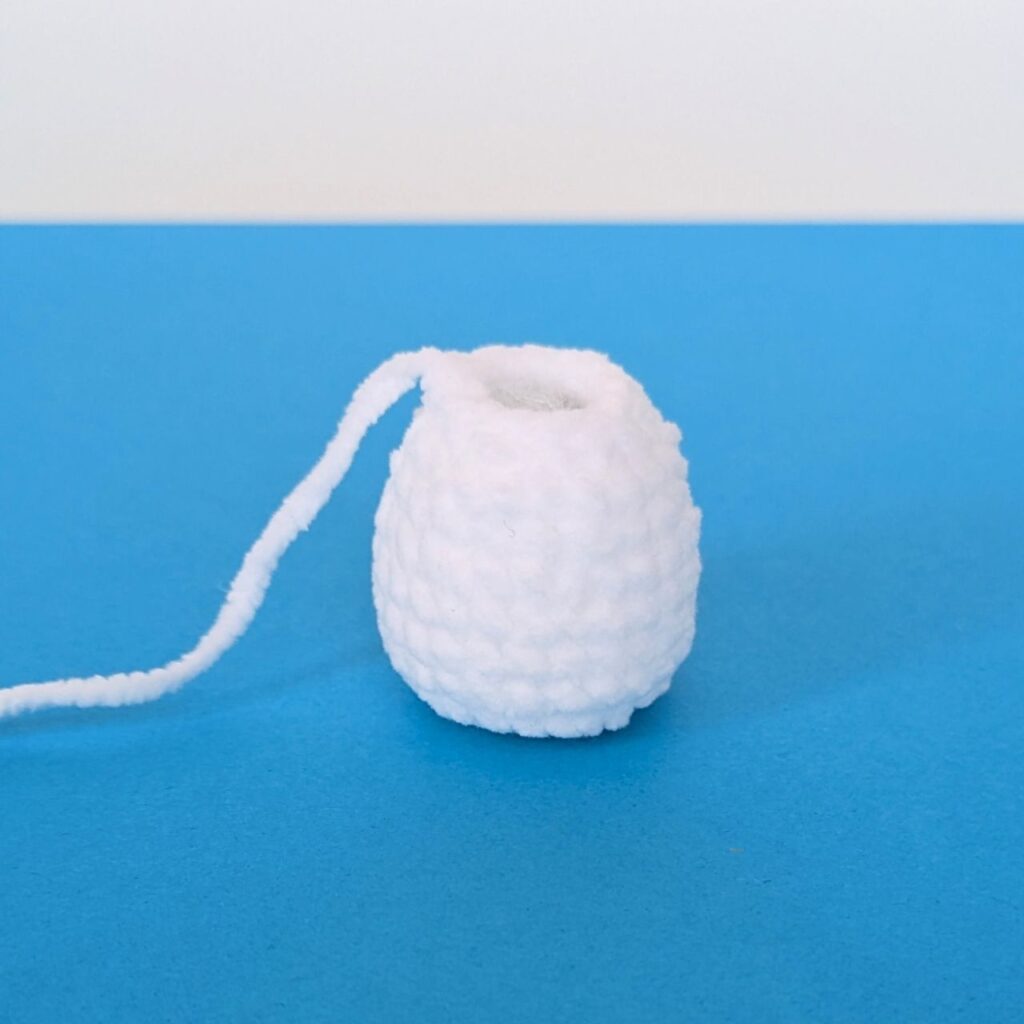
Body sewing guide
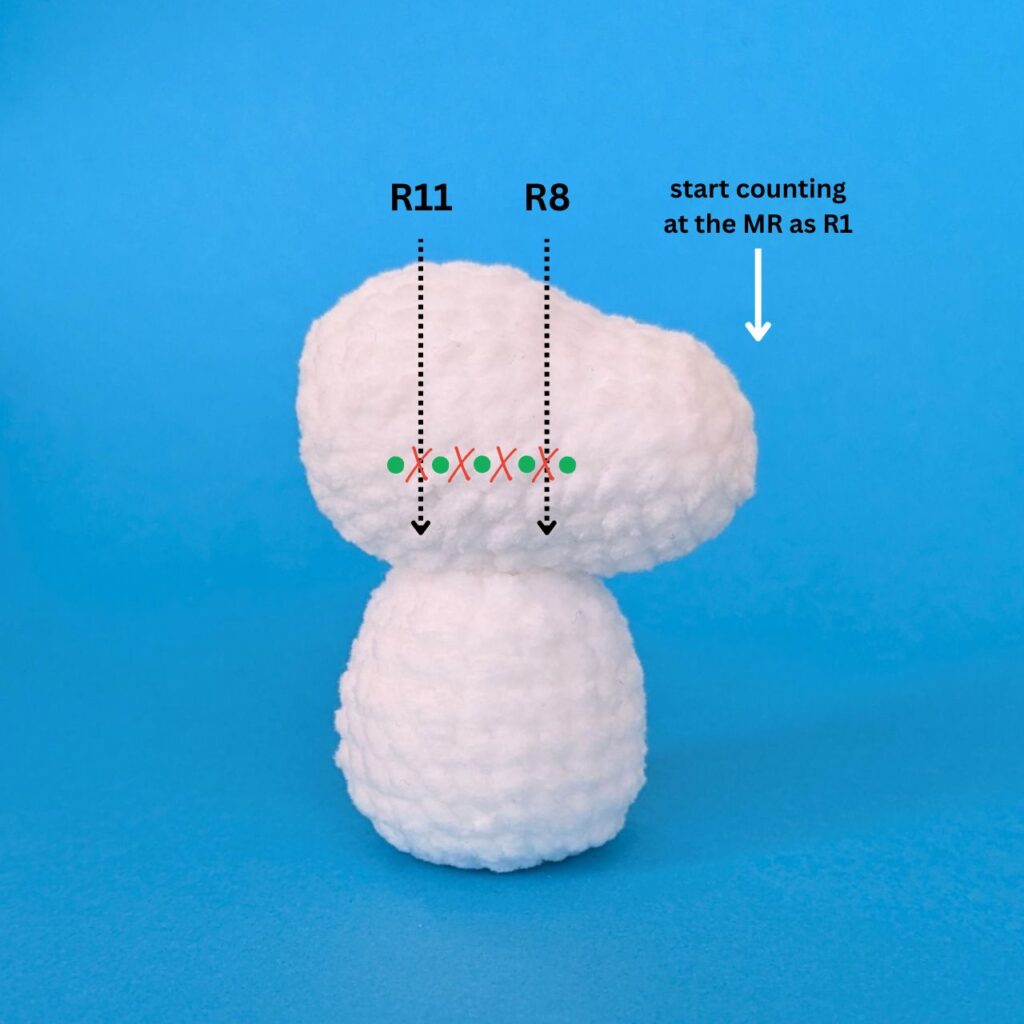
Sew the open top of the body onto rounds 8 – 11 of the head.
Arms (Make 2)
With white yarn:
R1: MR 6sc, slst to join (6)
R2: ch1, [2sc, inc] x2, slst to join (8)
R3-R4: ch1, 8sc, slst to join (8) (2 rounds)
R5: ch1, [2sc, dec] x2, slst to join (6)
Before we continue, let’s learn how to single crochet the opening of pieces closed.
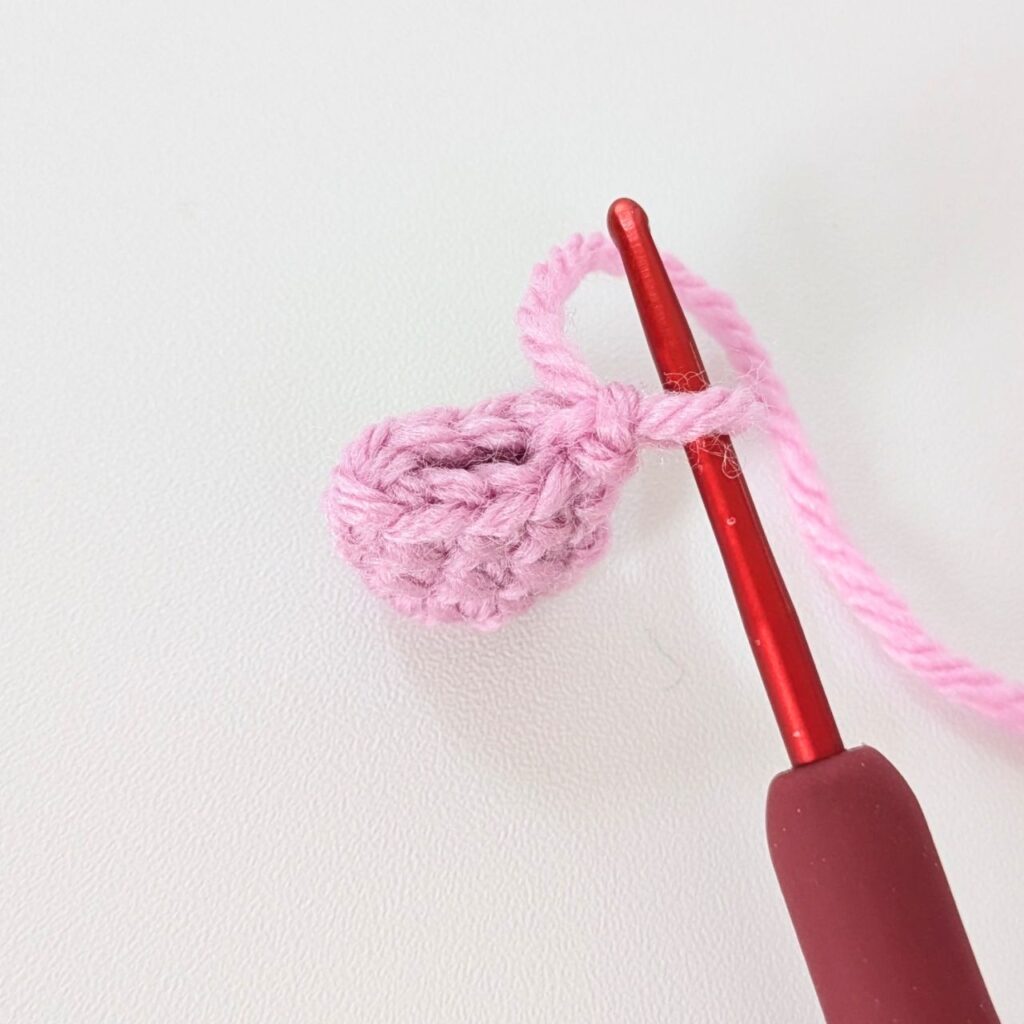
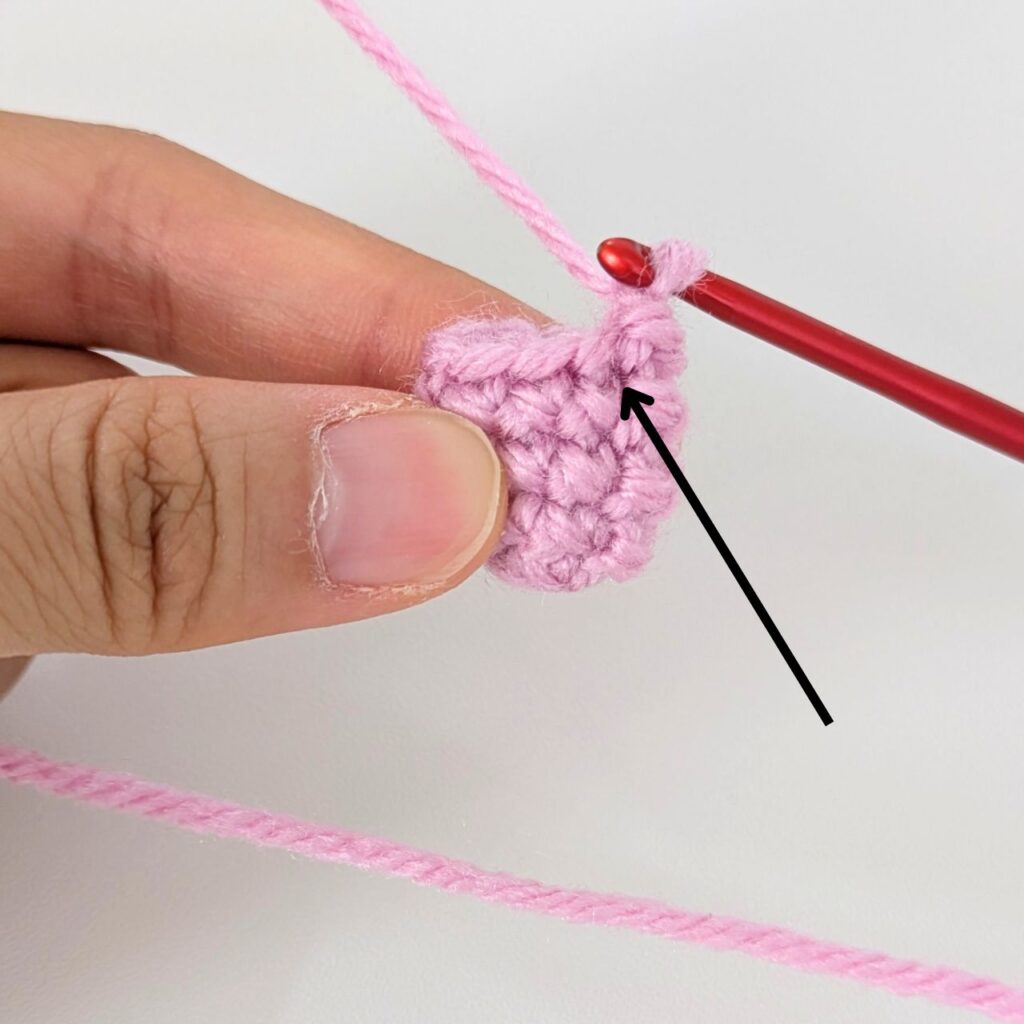
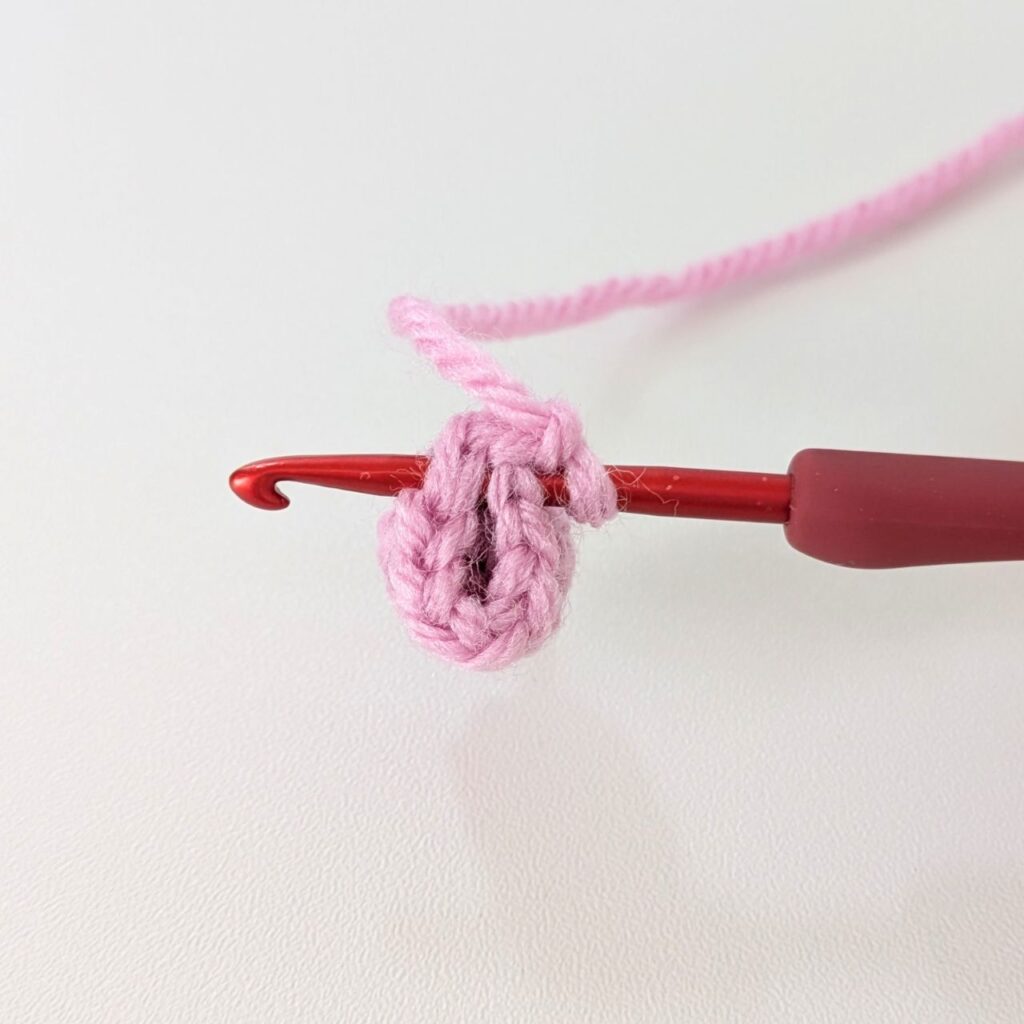
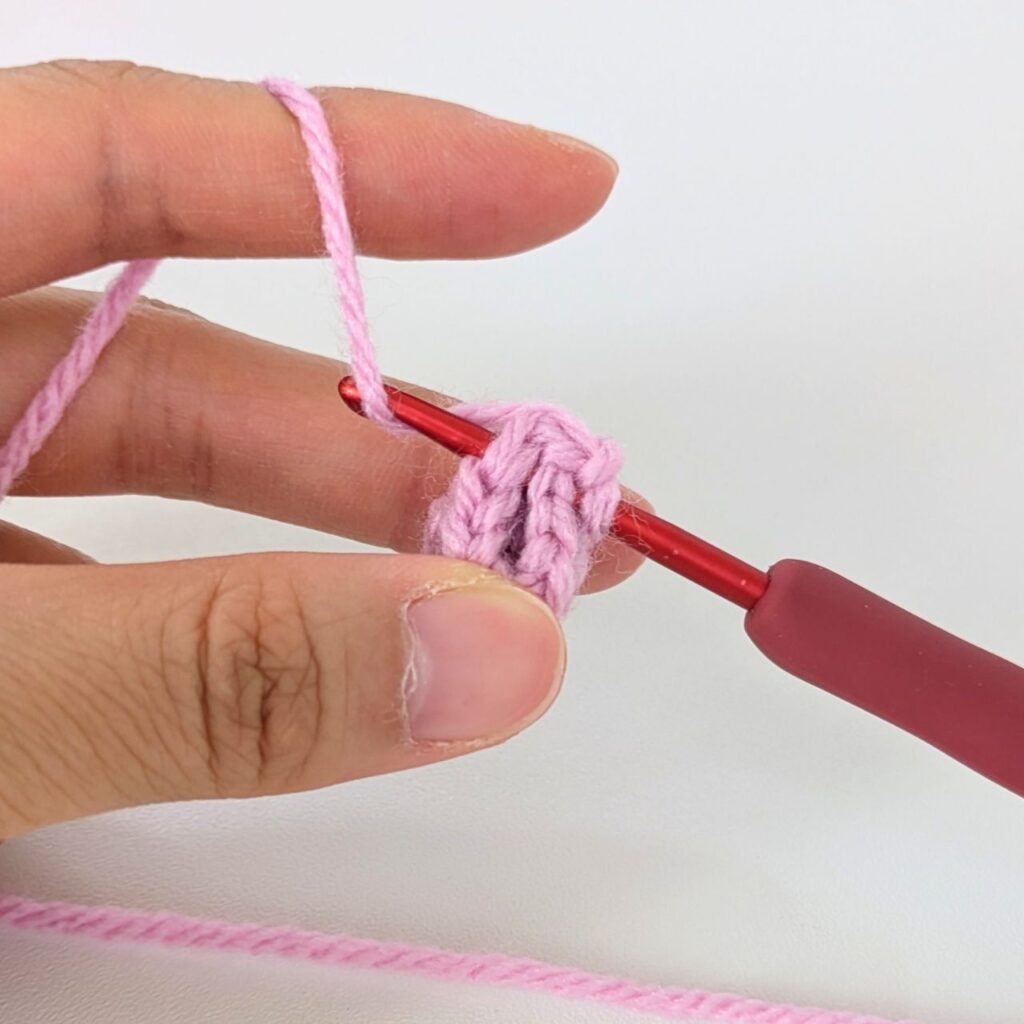
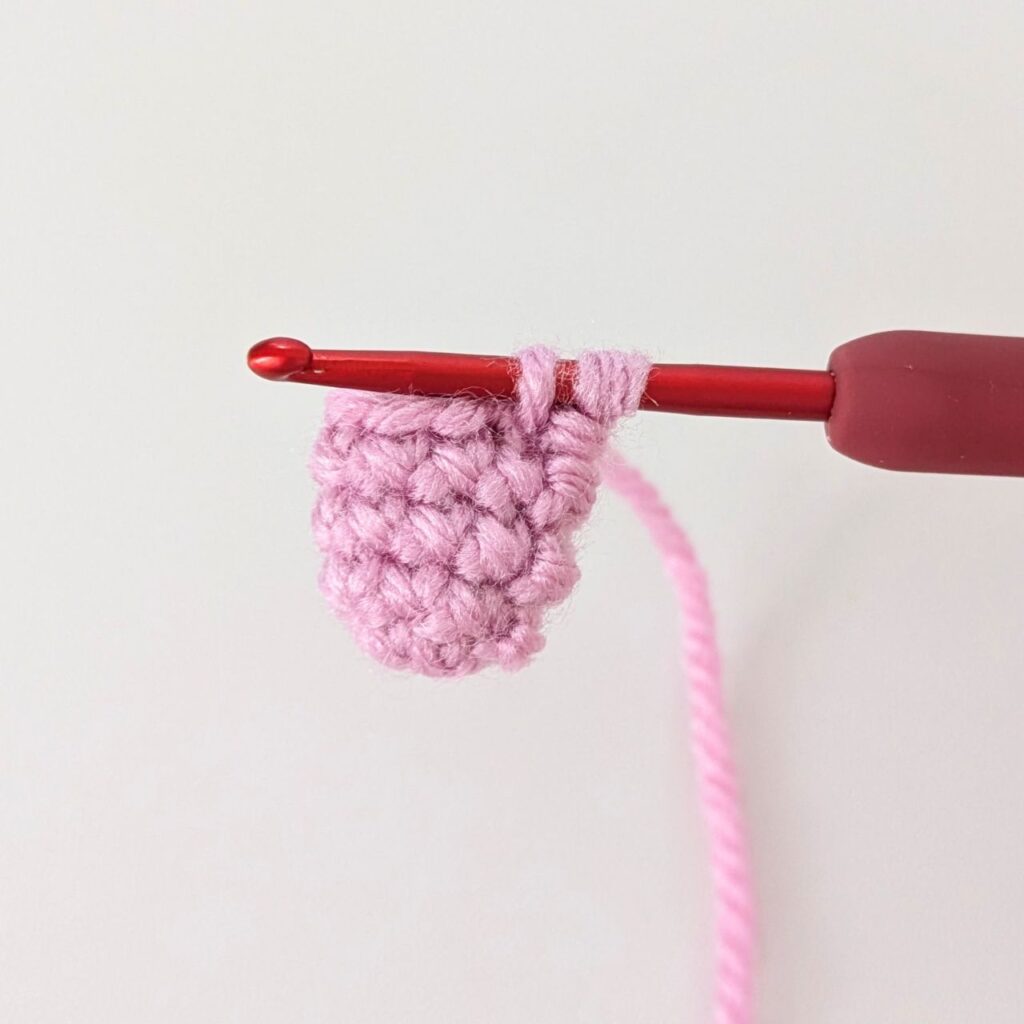
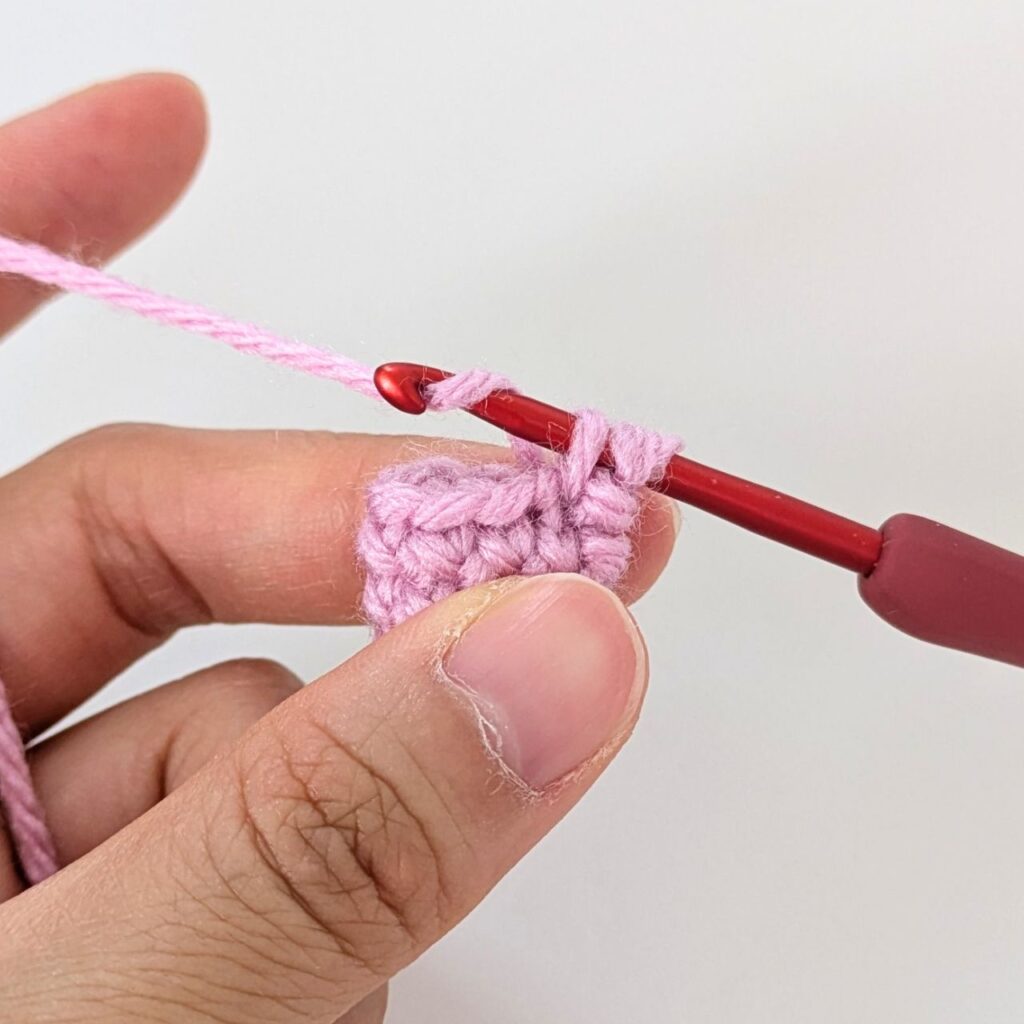
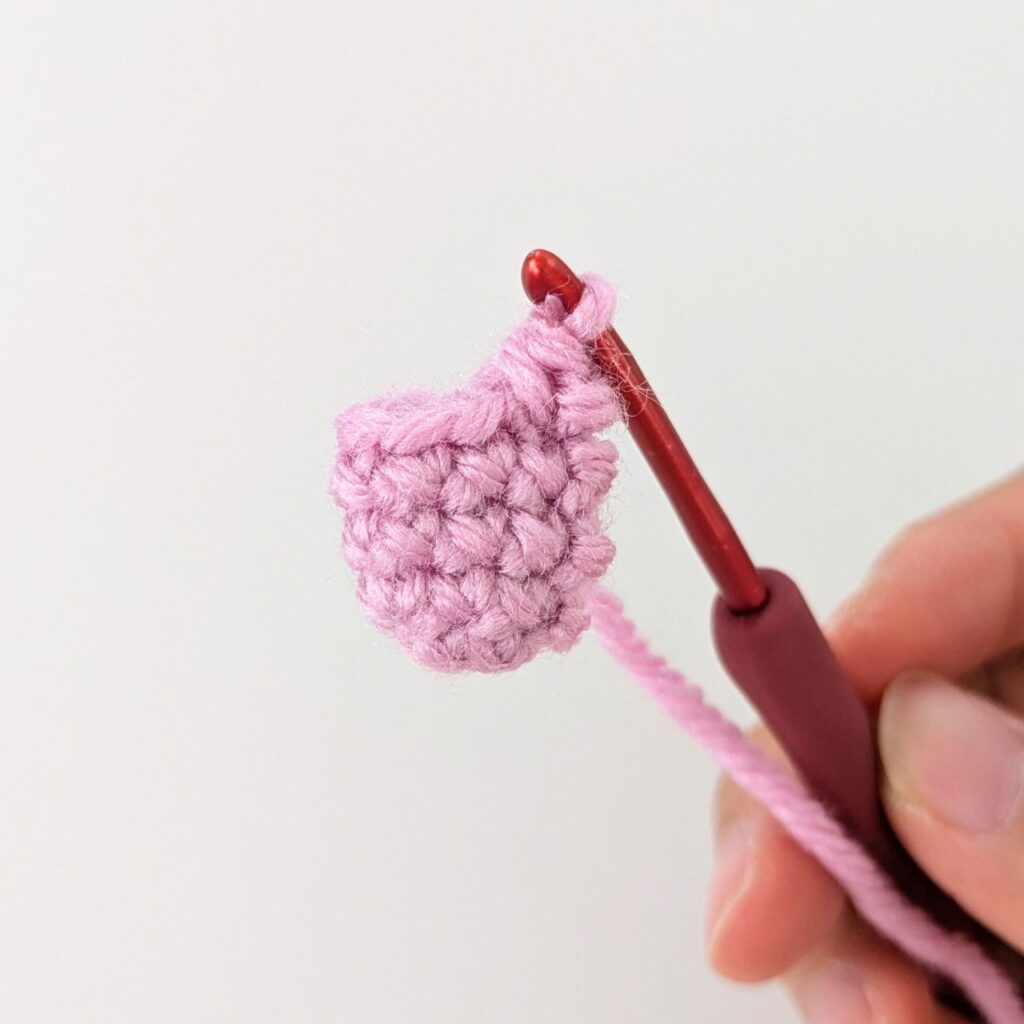
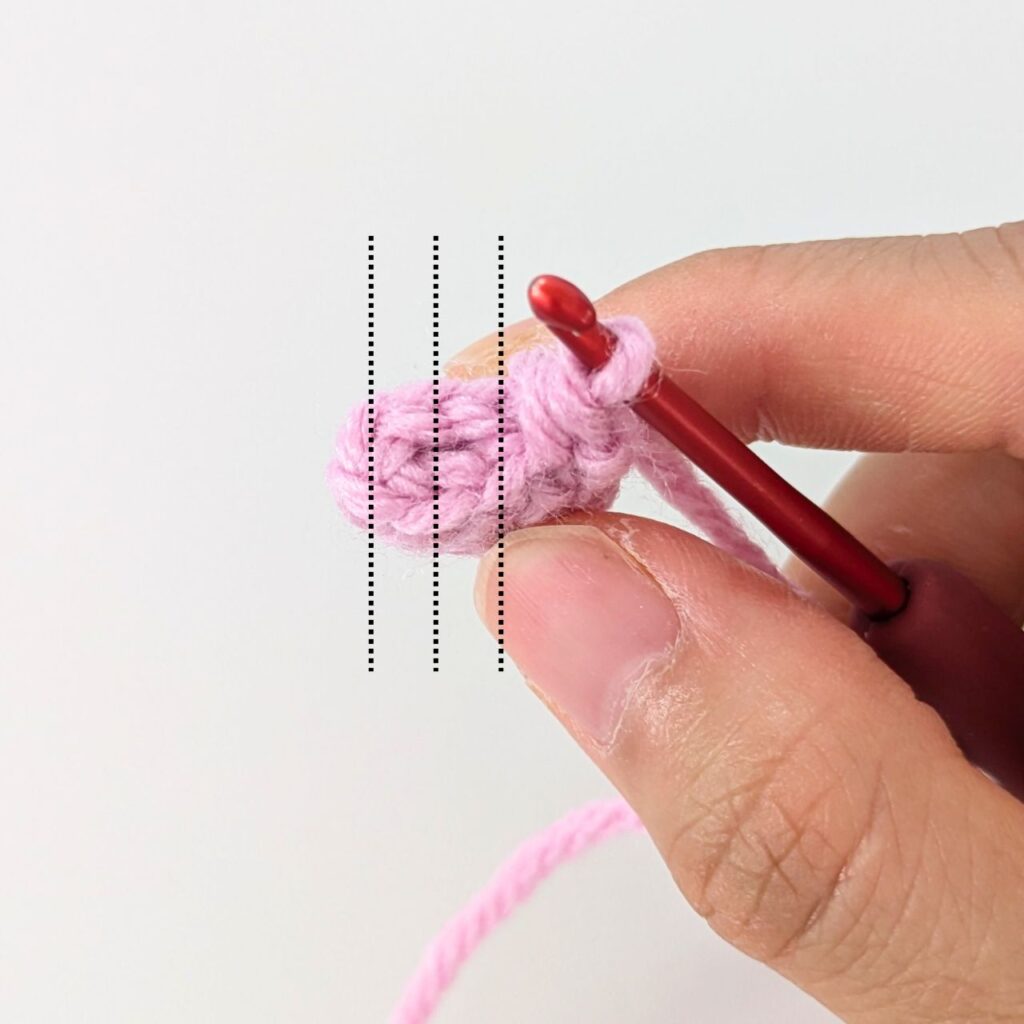
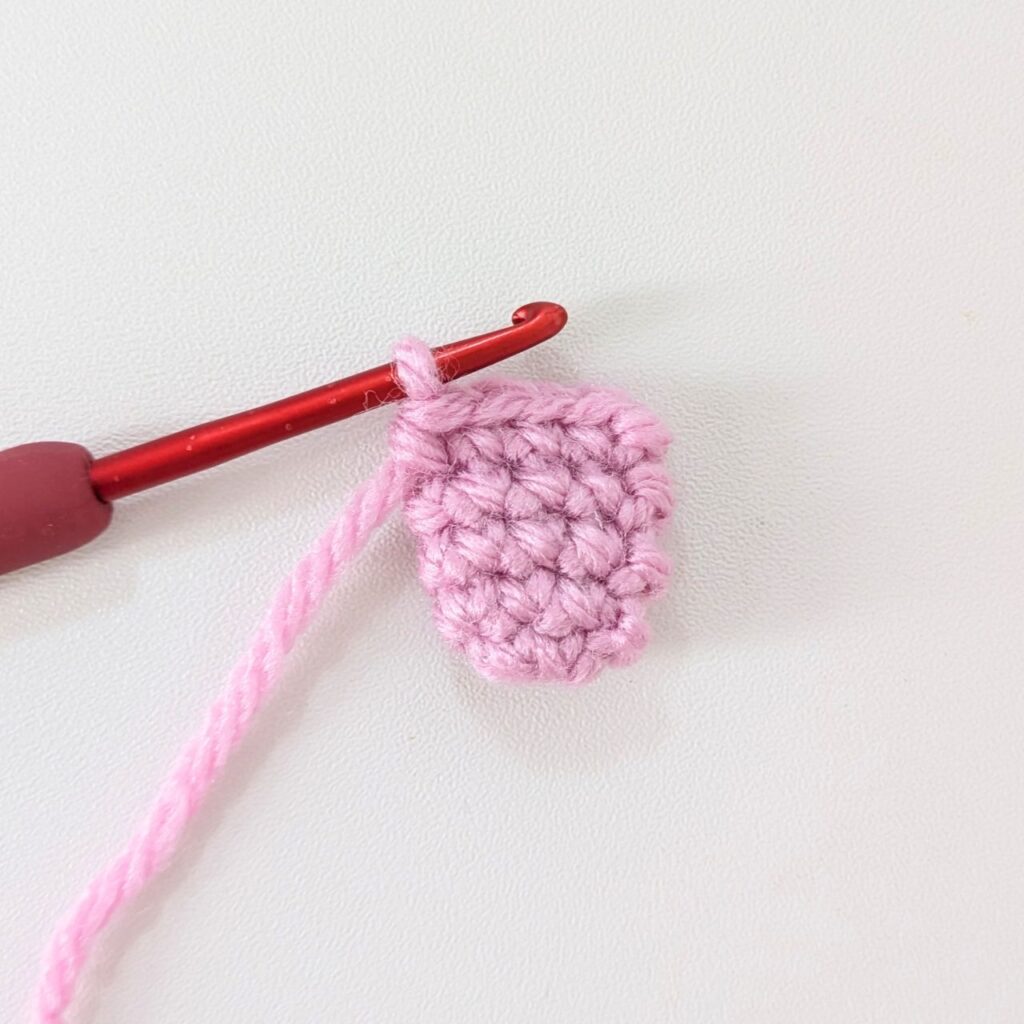
R6: ch1. Fold the opening in half and single crochet the opposite stitches together to get 3sc across. (3)
FO and leave a tail for sewing. Set aside.
Arms
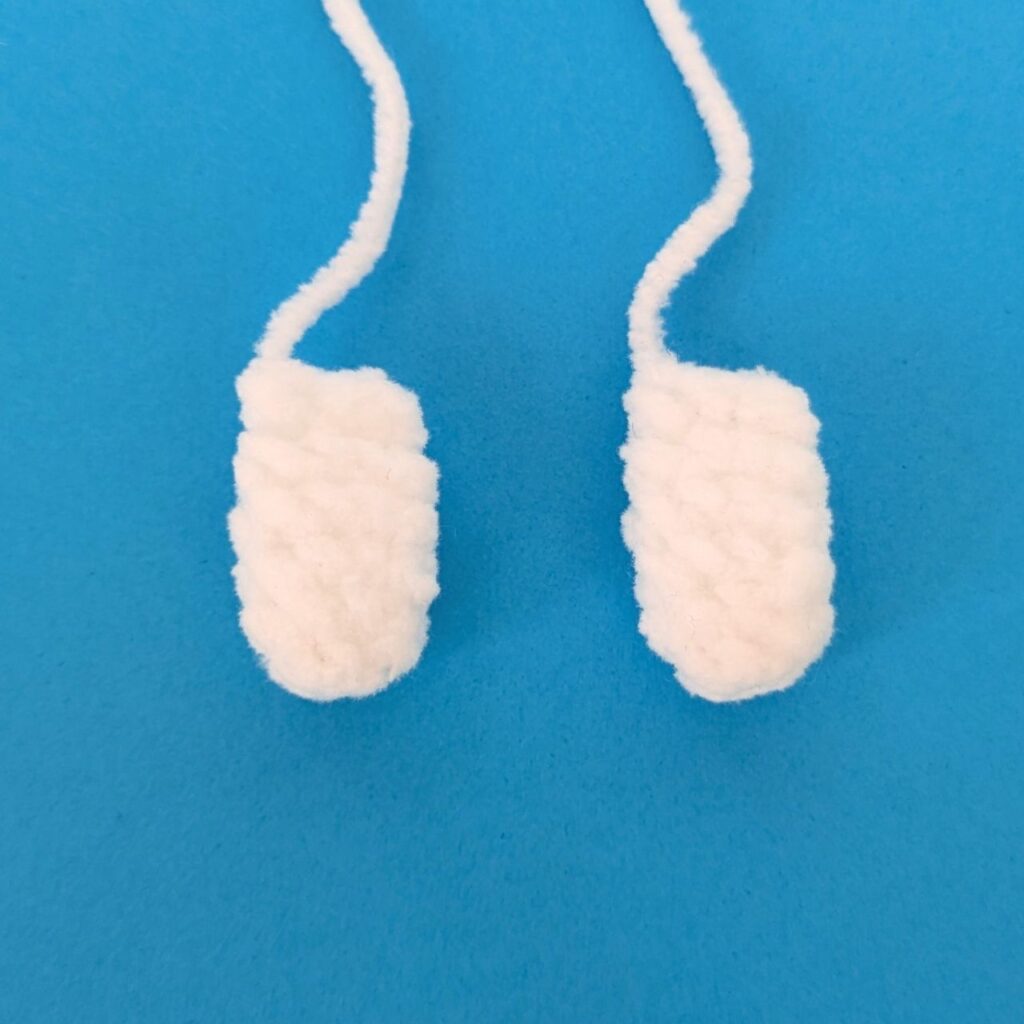
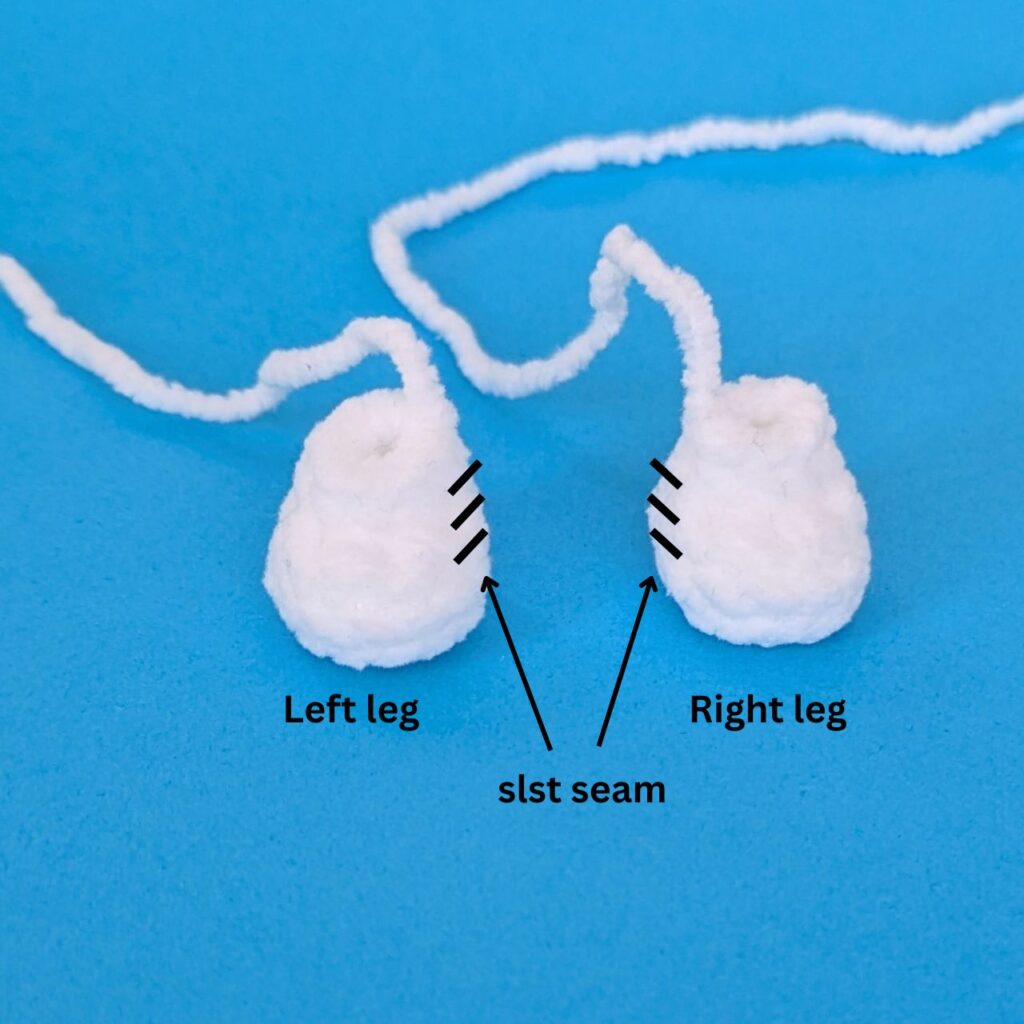
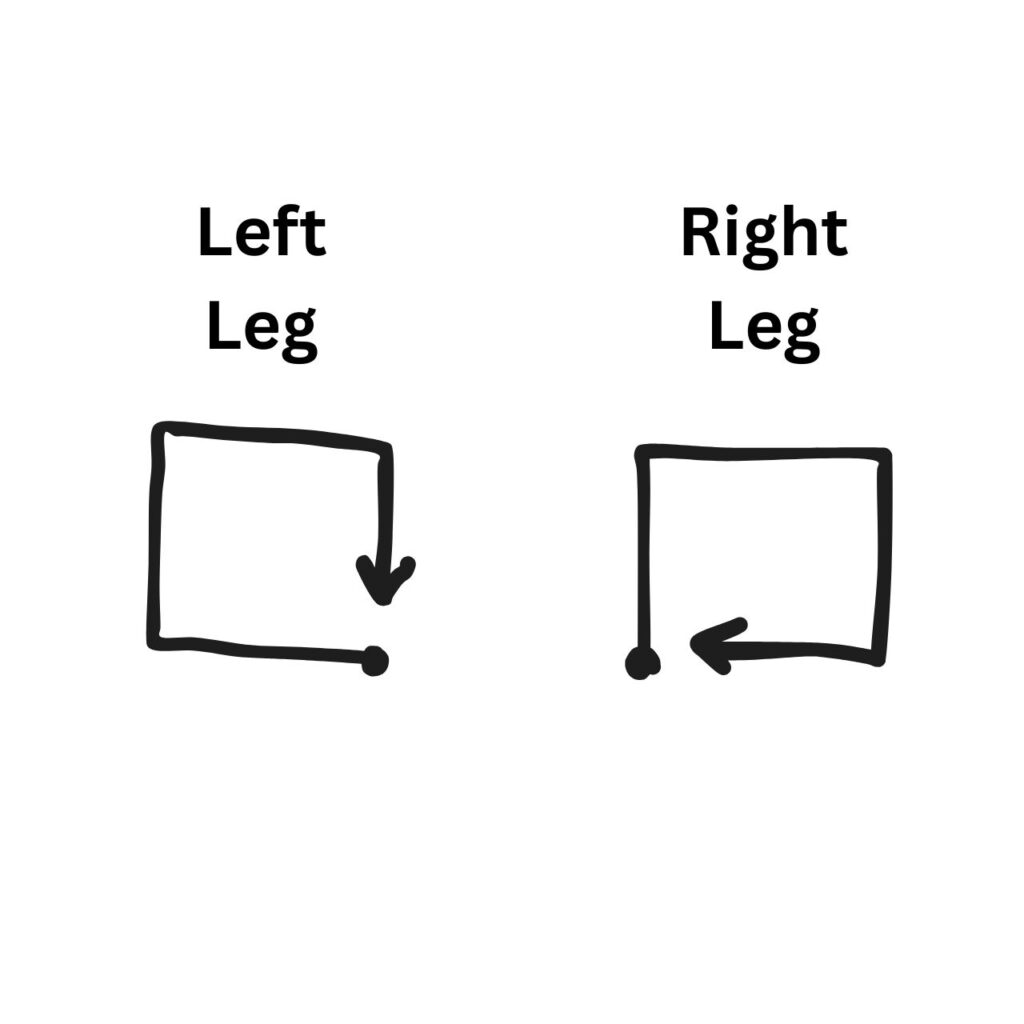
Right Leg
With white yarn:
R1: MR 6sc, slst to join (6)
R2: ch1, [(3sc into the same st), inc, sc] x2, slst to join (12)
R3: ch1, BLO just for this part: 12sc. Slst to join (12)
R4: ch1, 4sc, sc2tog x4, slst to join (8) *You can do an invisible decrease here, but I find it easier to do a regular decrease aka a sc2tog.
R5: ch1, 8sc, slst to join (8)
FO and leave a tail for sewing. Set aside.
Left Leg
With white yarn:
R1: MR 6sc, slst to join (6)
R2: ch1, [sc, inc, (3sc into the same st)] x2, slst to join (12)
R3: ch1, BLO just for this part: 12sc. Slst to join (12)
R4: ch1, sc2tog x4, 4sc, slst to join (8) *You can do an invisible decrease here, but I find it easier to do a regular decrease aka a sc2tog.
R5: ch1, 8sc, slst to join (8)
FO and leave a tail for sewing. Set aside.
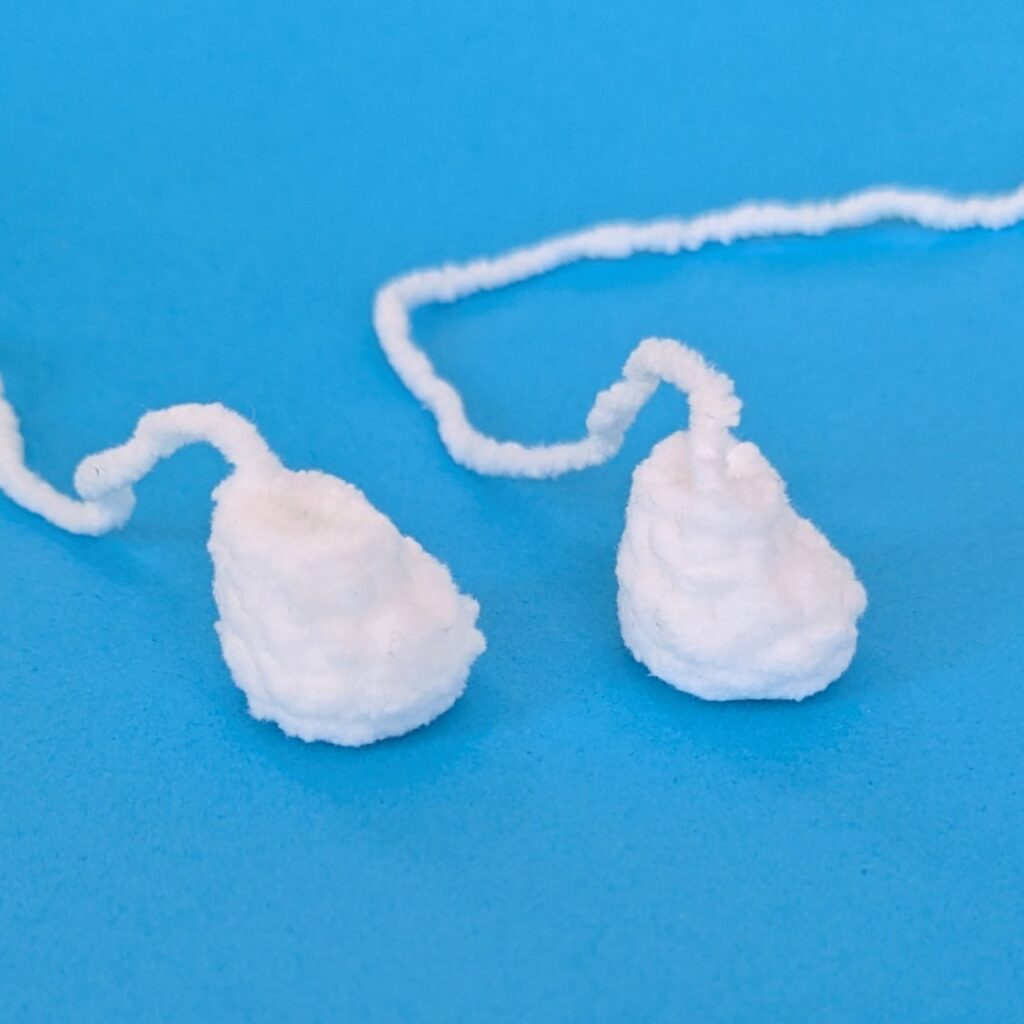
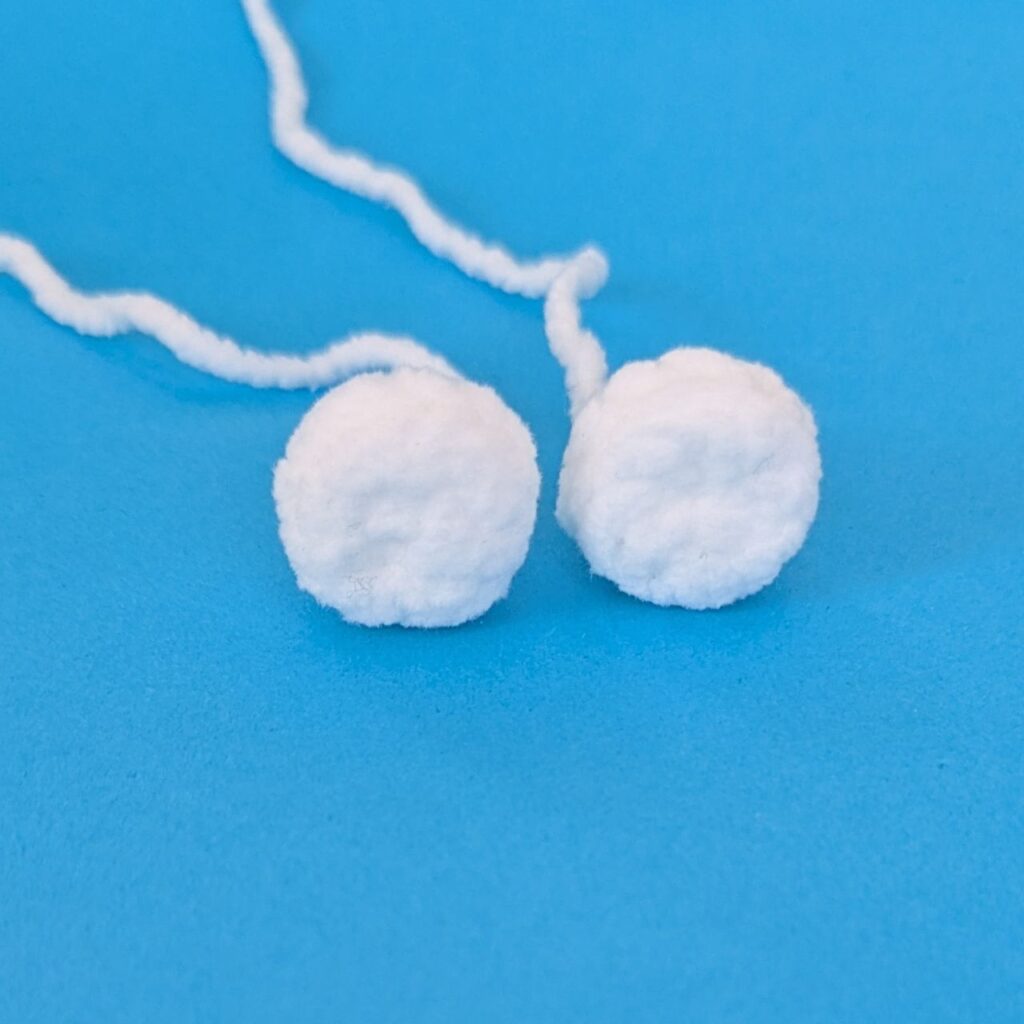
Legs
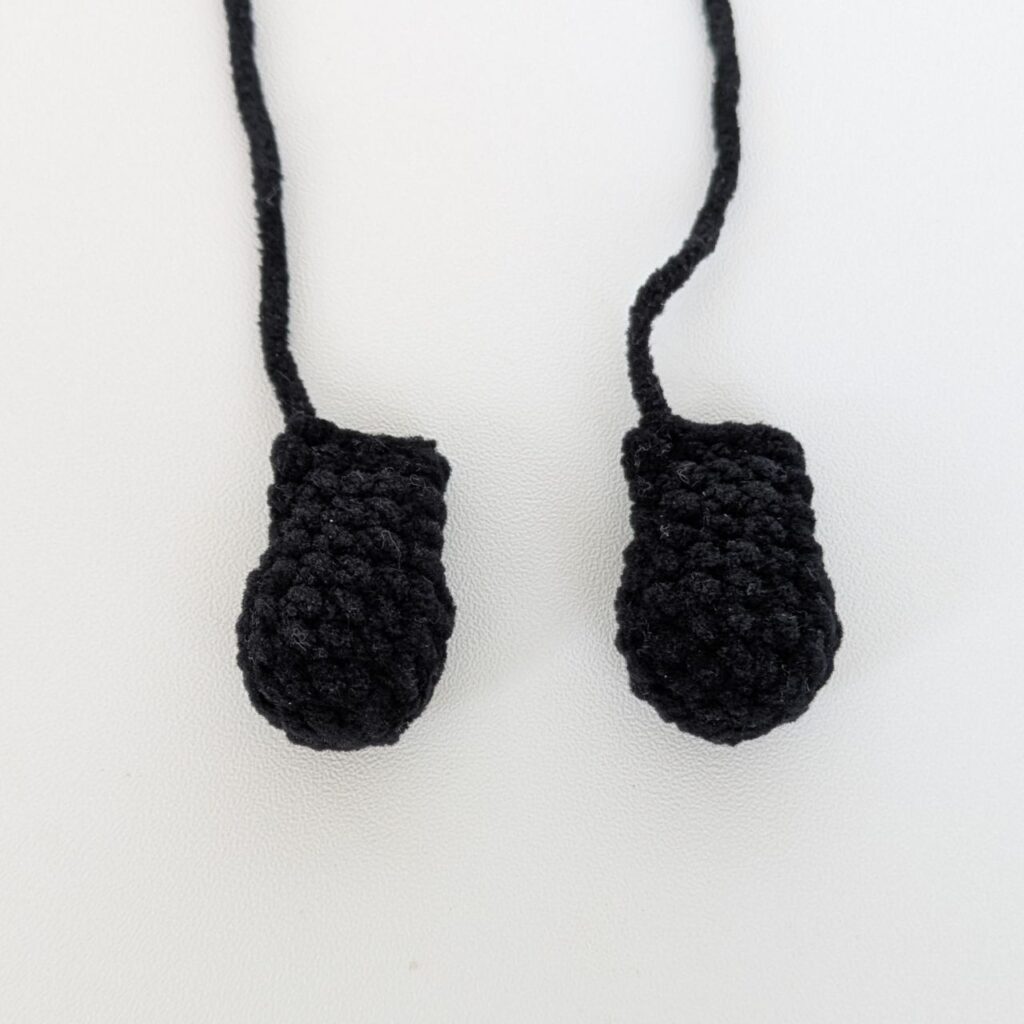
Ears (Make 2)
With black yarn:
R1: MR 6sc, slst to join (6)
R2: ch1, inc x6, slst to join (12)
R3-R5: ch1, 12sc, slst to join (12) (3 rounds)
R6: ch1, [sc, dec] x4, slst to join (8)
R7-R8: ch1, 8sc, slst to join (8) (2 rounds)
A reminder on how to single crochet the opening of pieces closed.
R9: ch1. Fold the opening in half and single crochet the opposite stitches together to get 4sc across. (4)
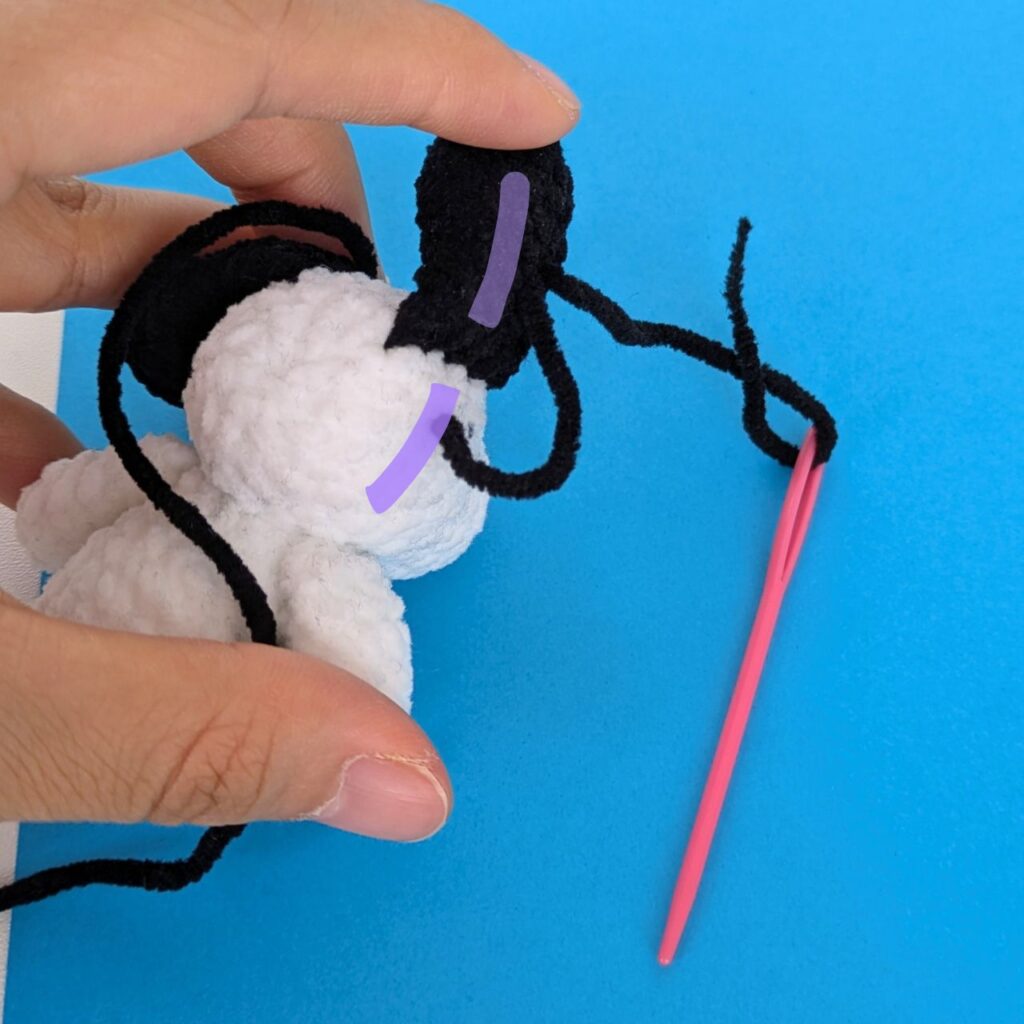
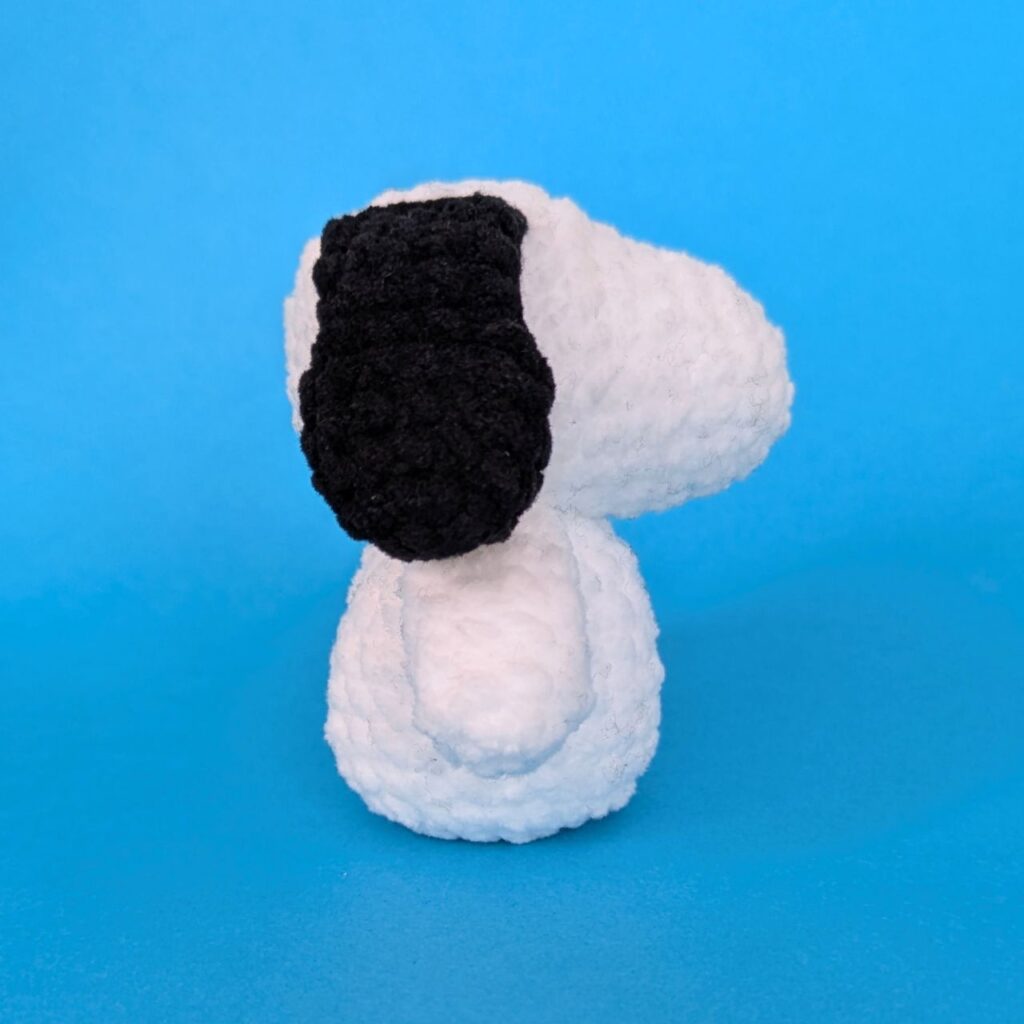
FO and leave a long tail for sewing. We will use the tail to sew the top and the side of the ear to the head. Set aside.
Ears
Nose
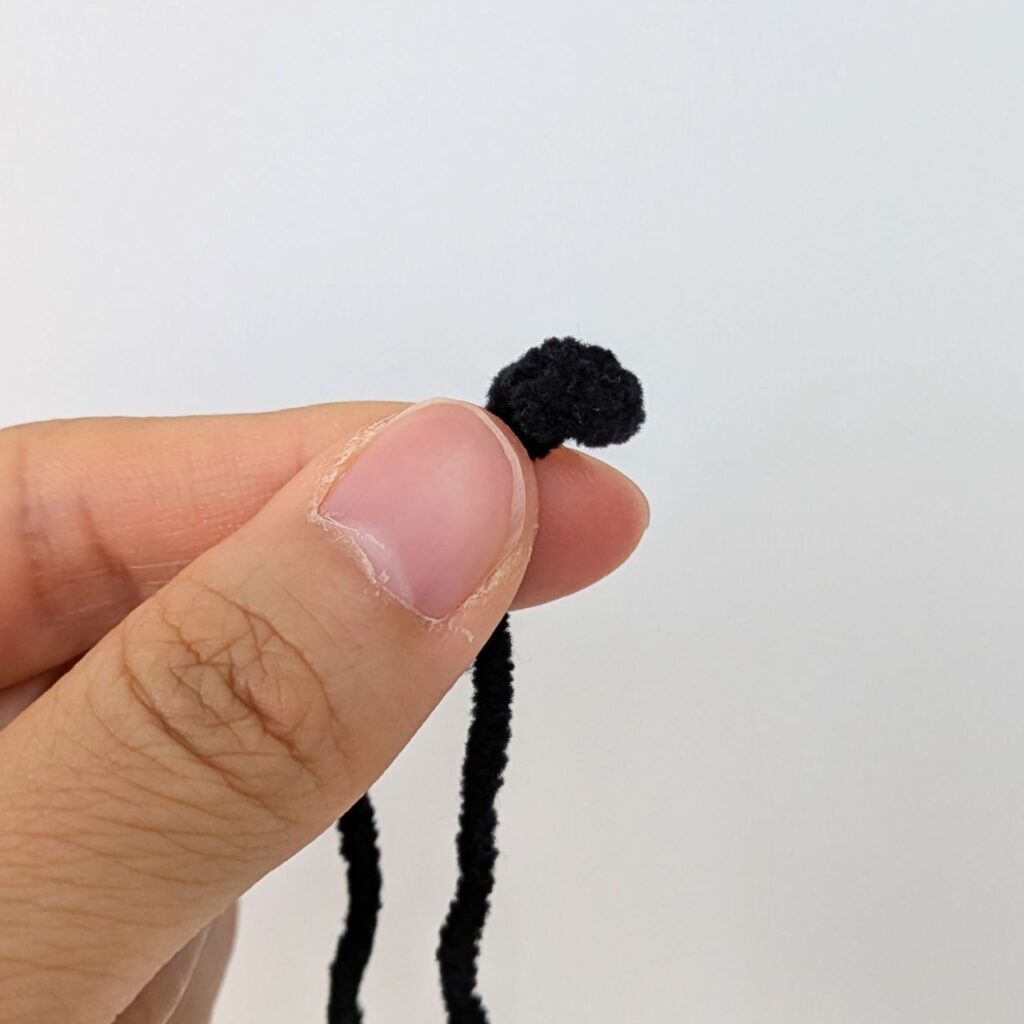
With black yarn:
R1: MR 4sc, slst to join (4)
FO and leave a tail for sewing. Set aside.
Nose
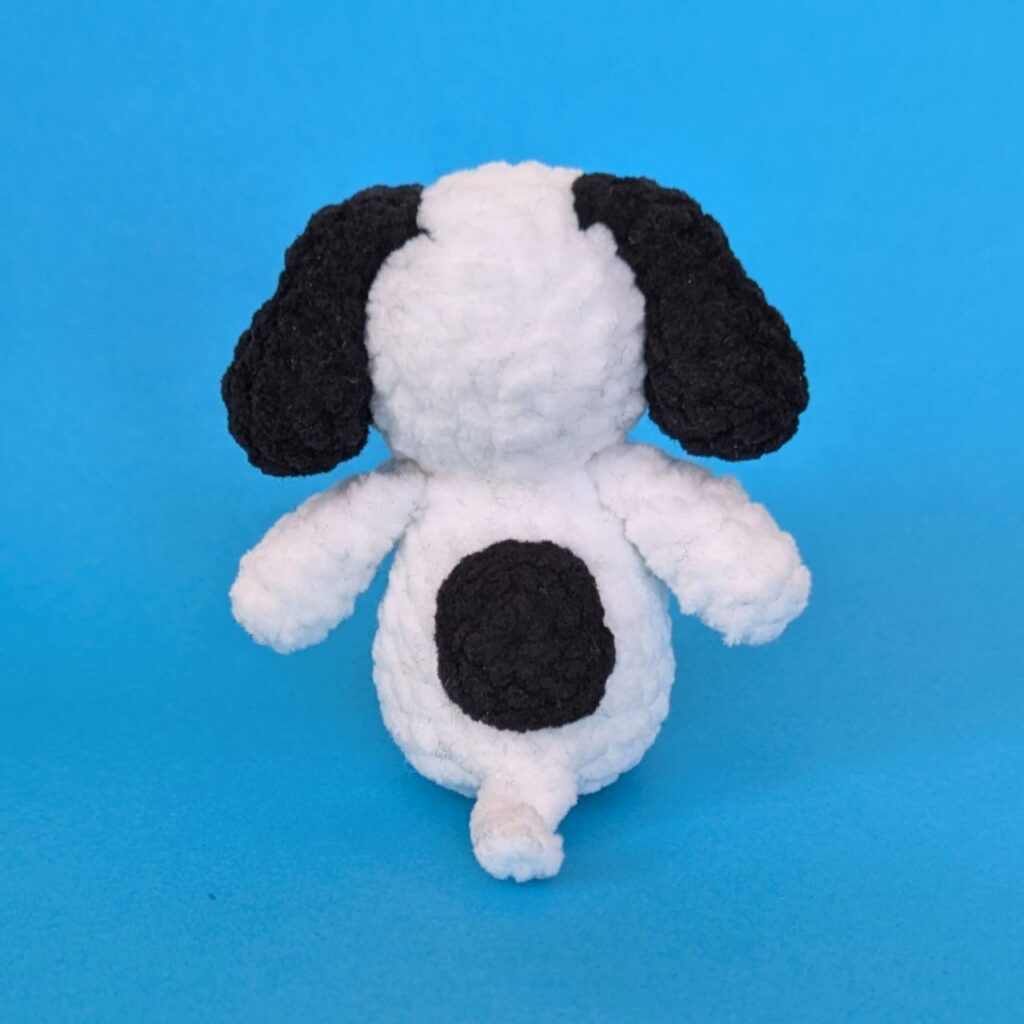
Back Spot
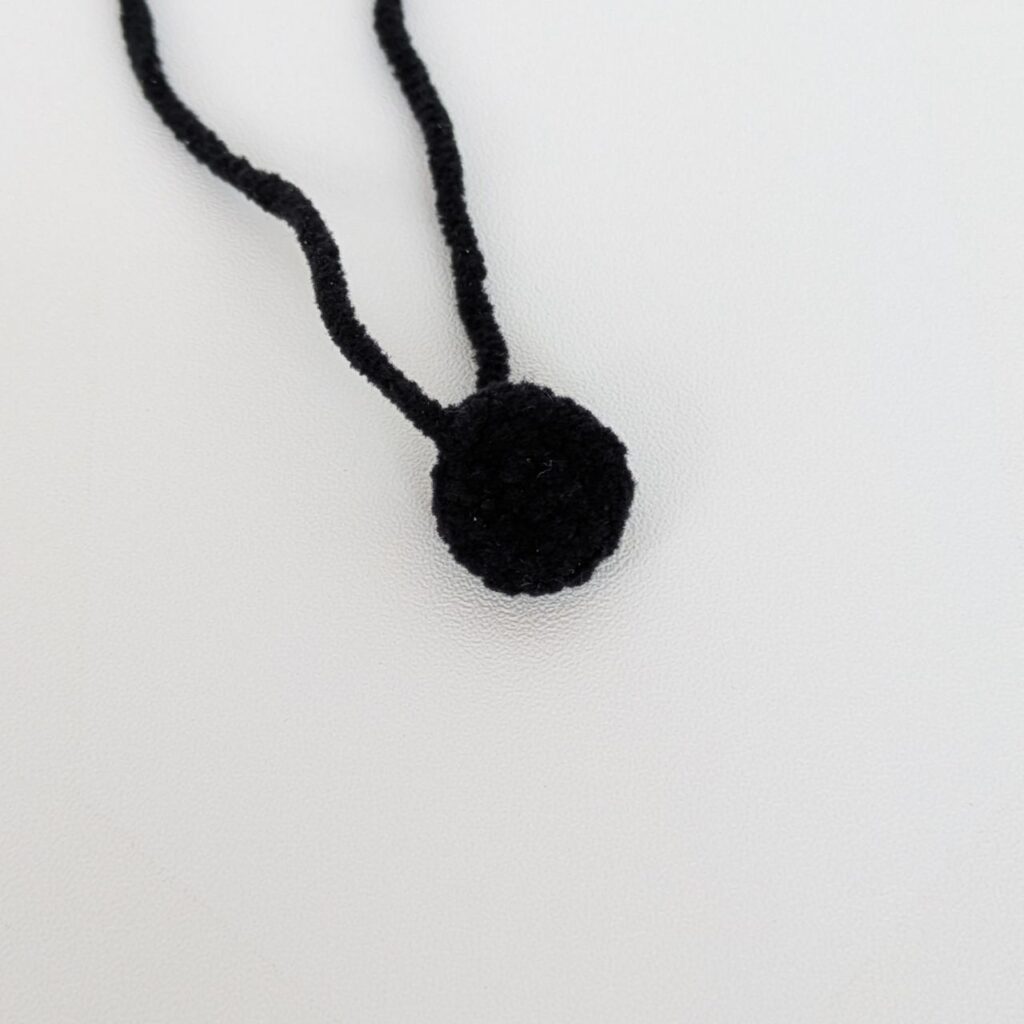
With black yarn:
R1: MR 6sc, slst to join (6)
R2: ch1, [sc, inc, (3sc into the same st)] x2, slst to join (12)
FO and leave a tail for sewing. Set aside.
Back spot
Assembly Guides
– I know this is a lot of sewing, but we’re almost to the end! You got this! 🙌 –
You can sew on the pieces in whatever order you’d like. The following list is the order I sewed them in.
Arms
Ears
Nose
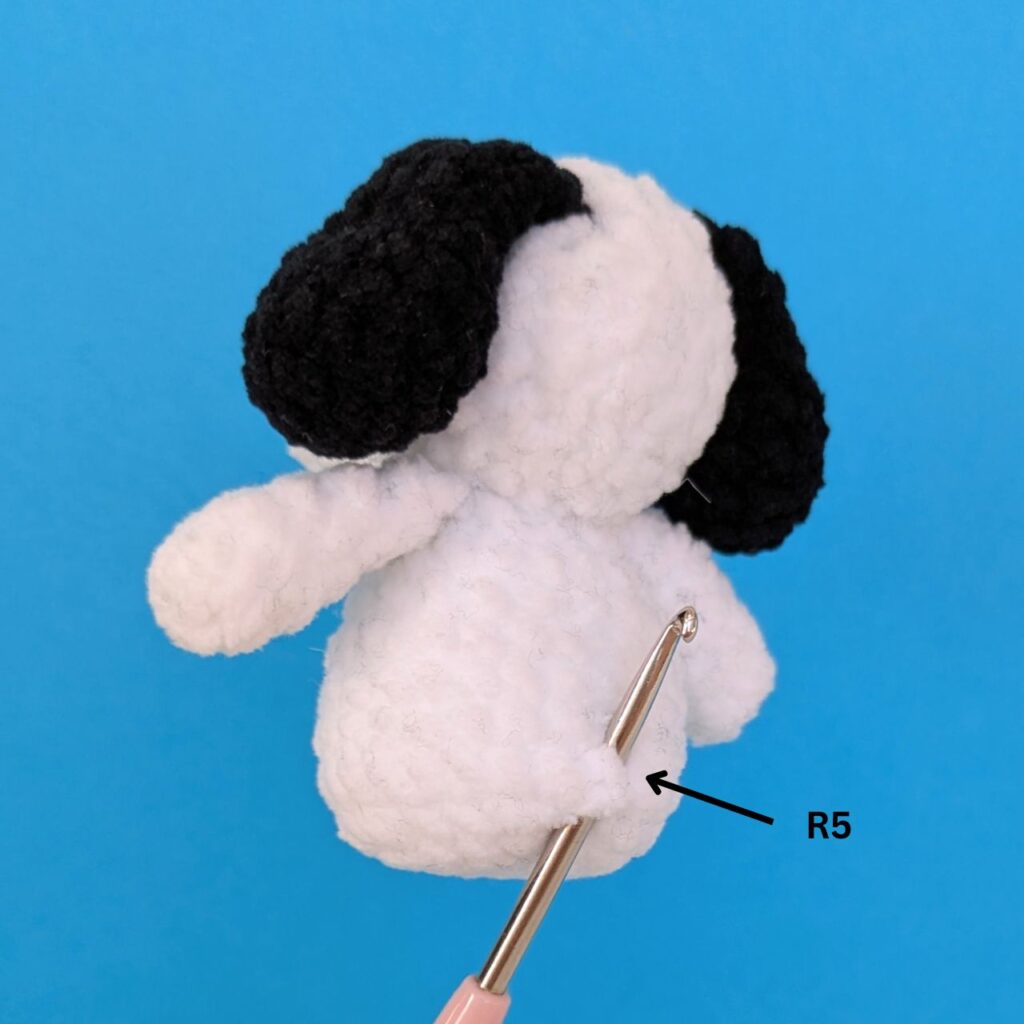
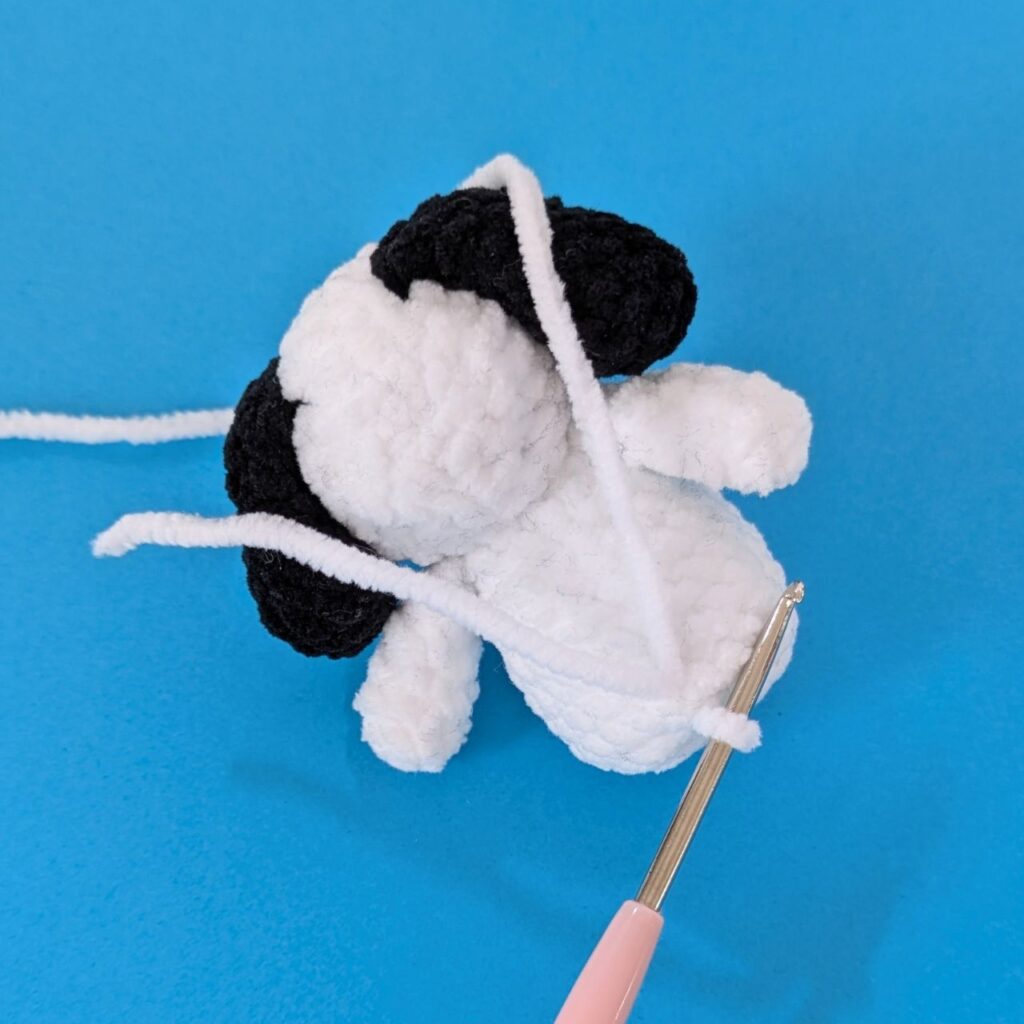
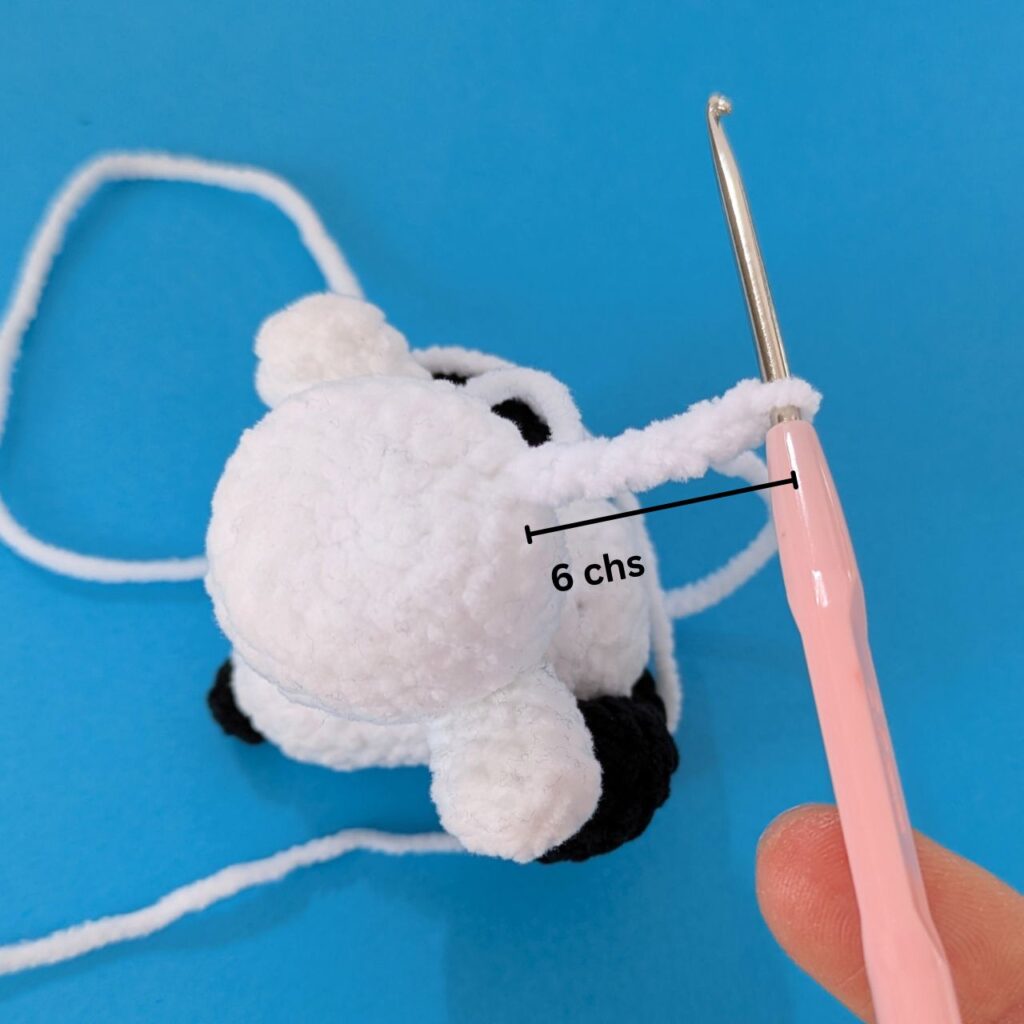
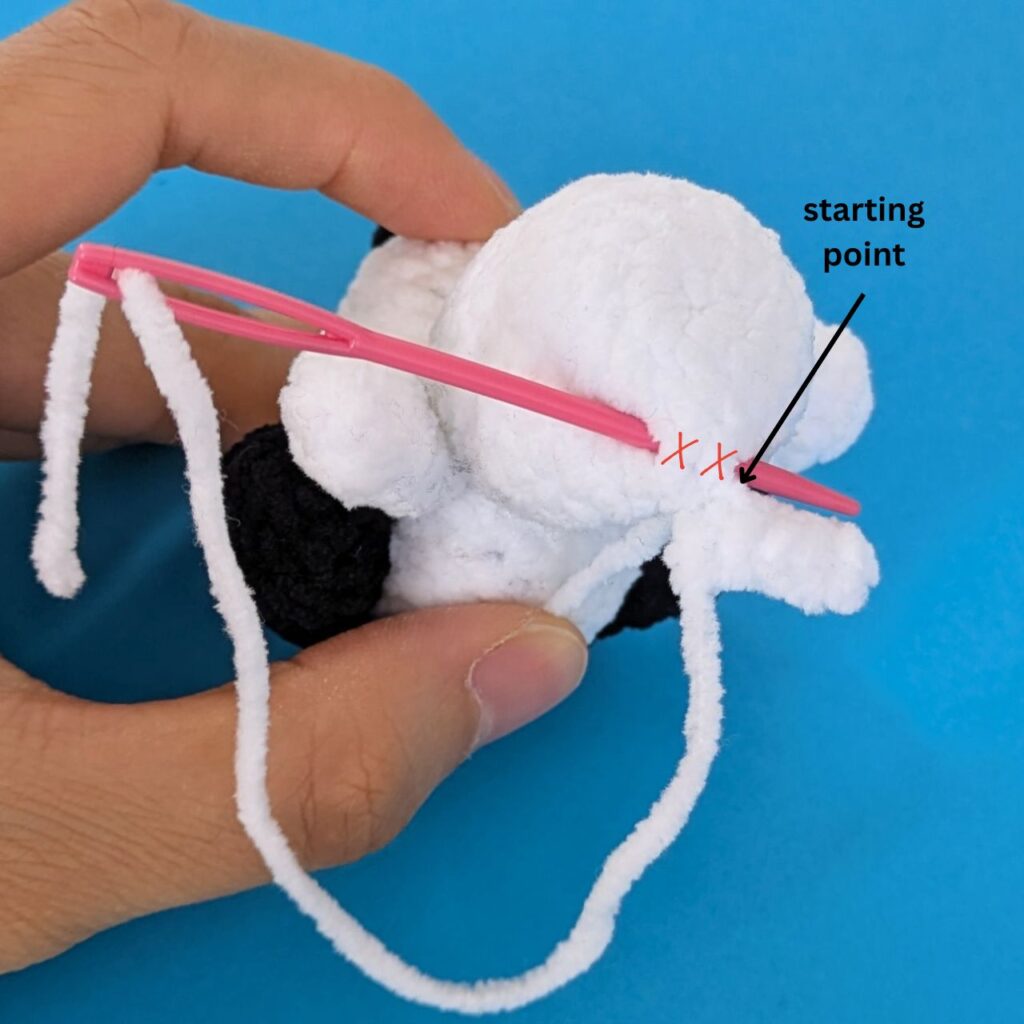
Make the tail
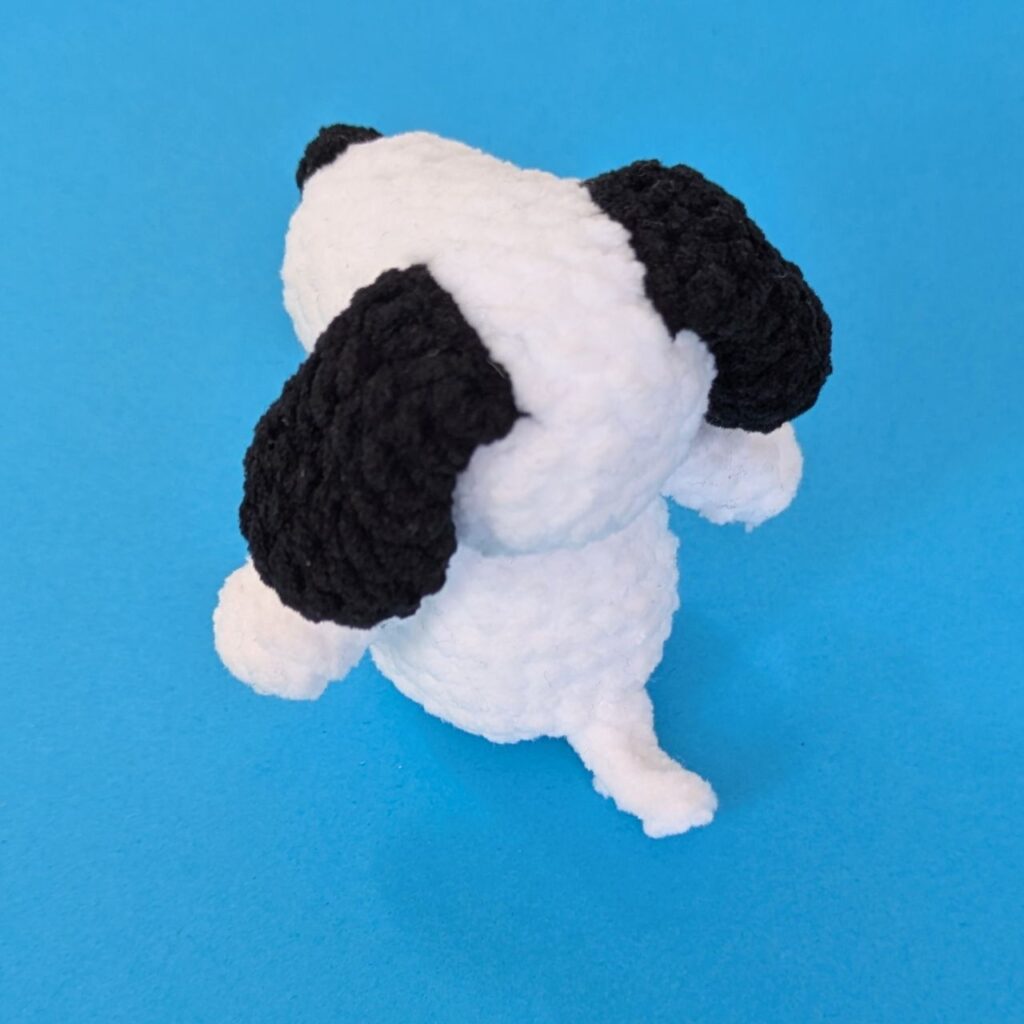
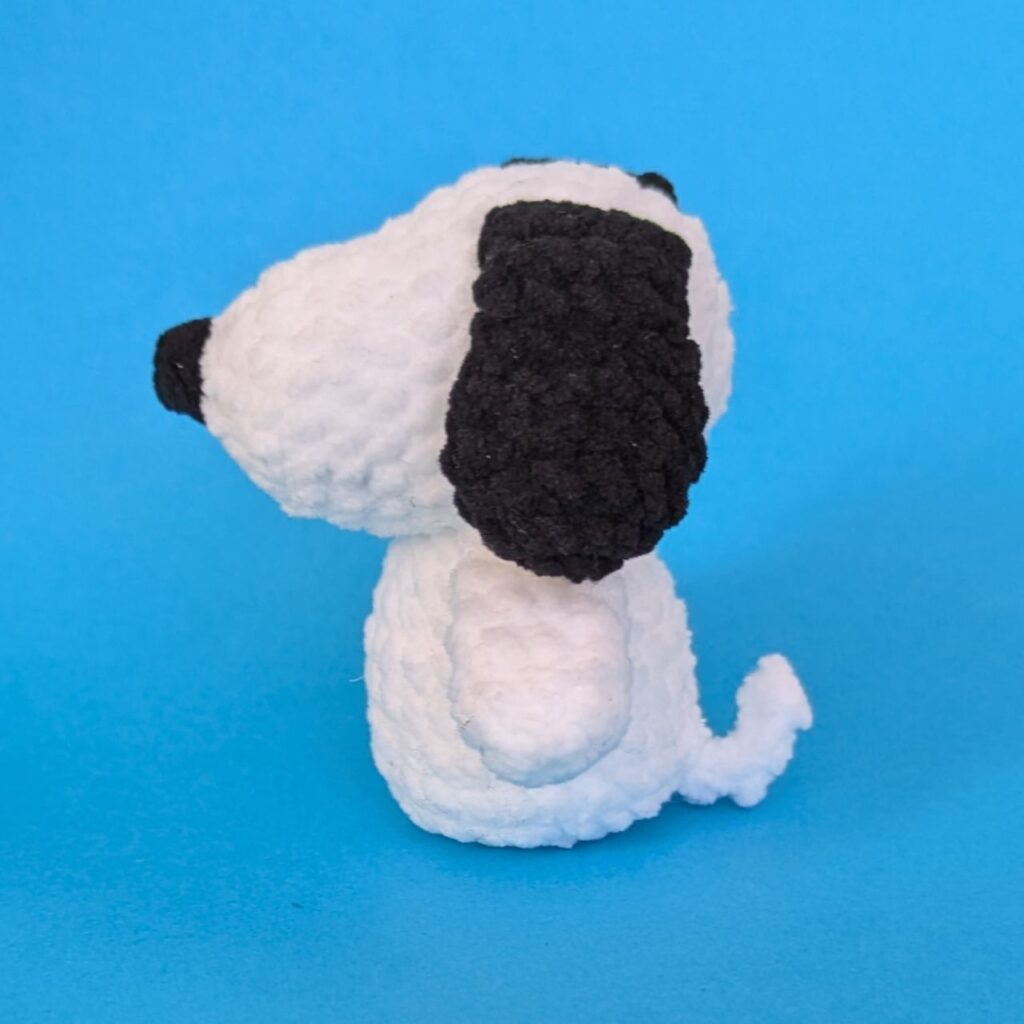
Back spot
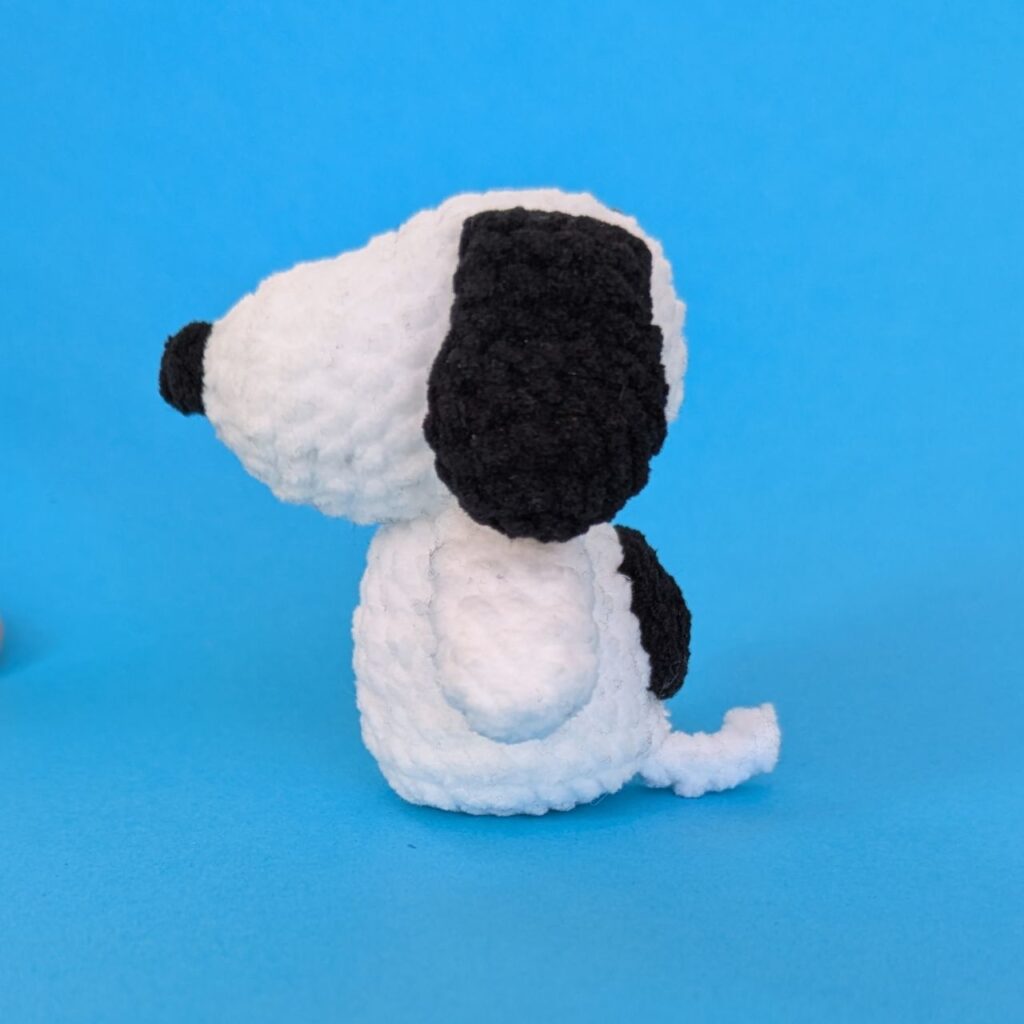
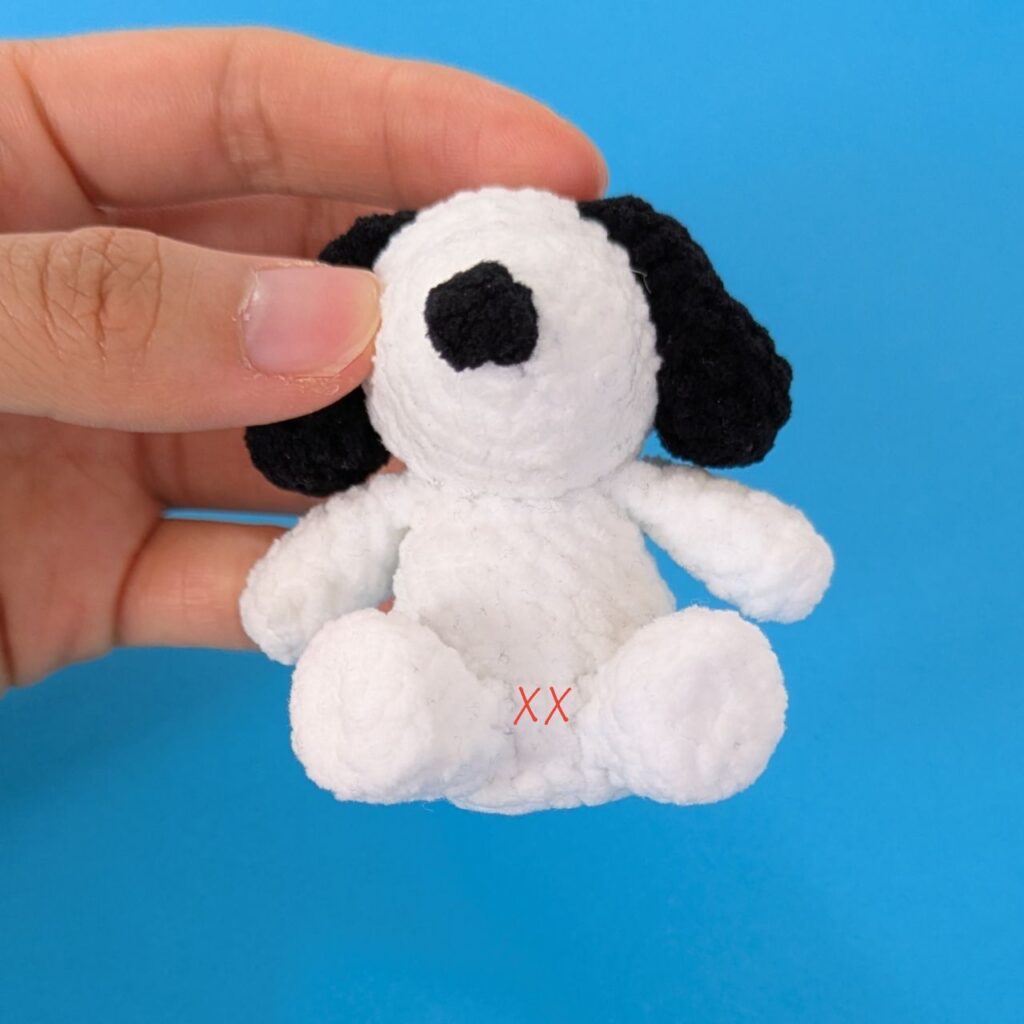
Legs
Face
Face guide
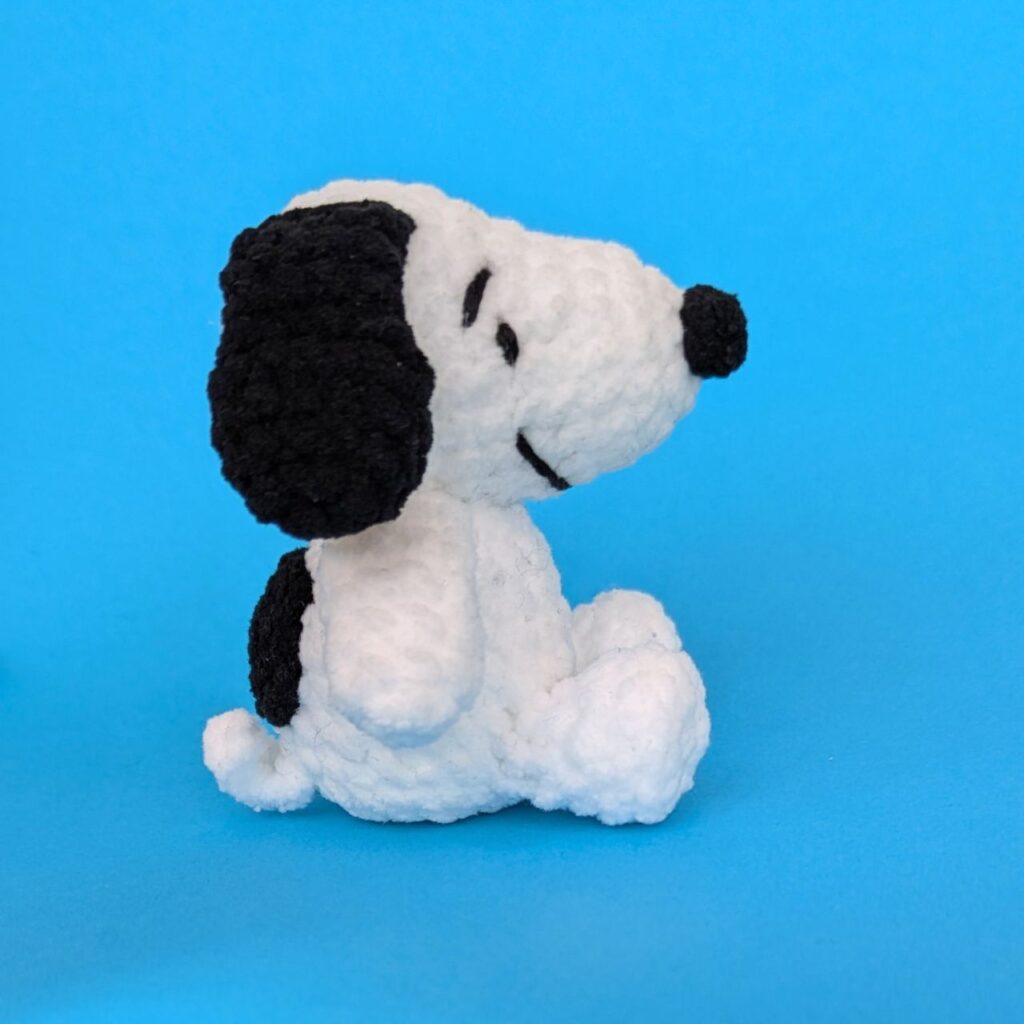
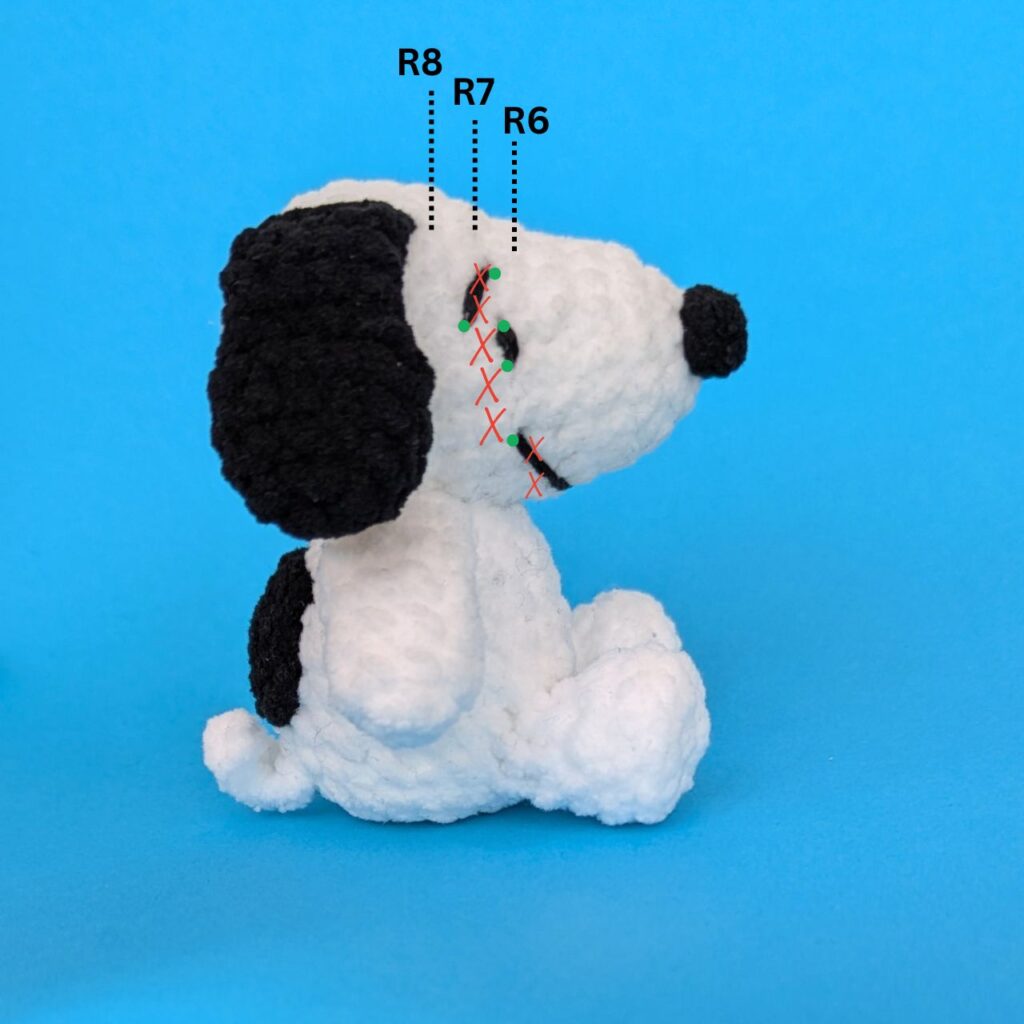
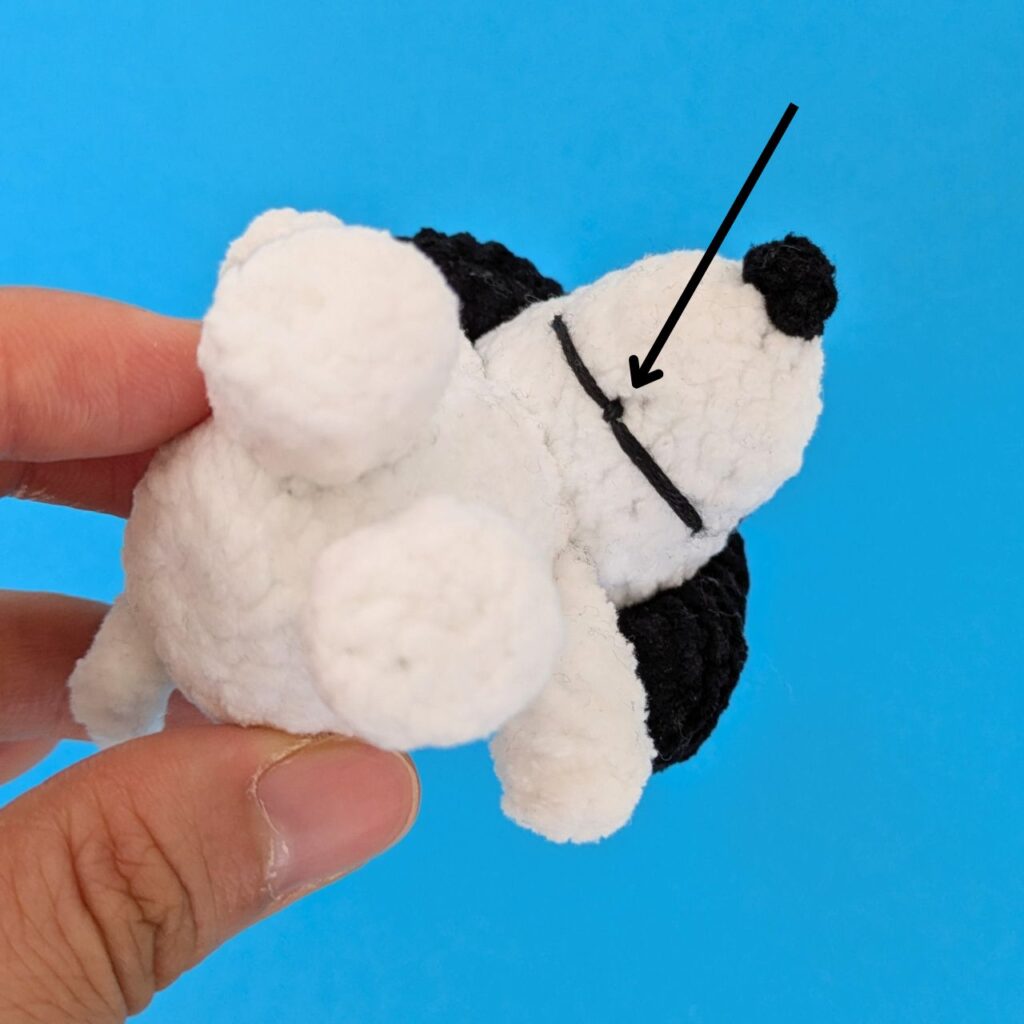
- Eyes
- Sewn between R6 and R7.
- 1 stitch in height
- Eyebrows
- The bottom of the brow is 1 stitch away from the top of the eye between R7 and R8.
- The top of the brow is 2 stitches above the bottom of the brow between R6 and R7.
- Use your finger to slightly curve the eyebrow.
- 2 stitches in height
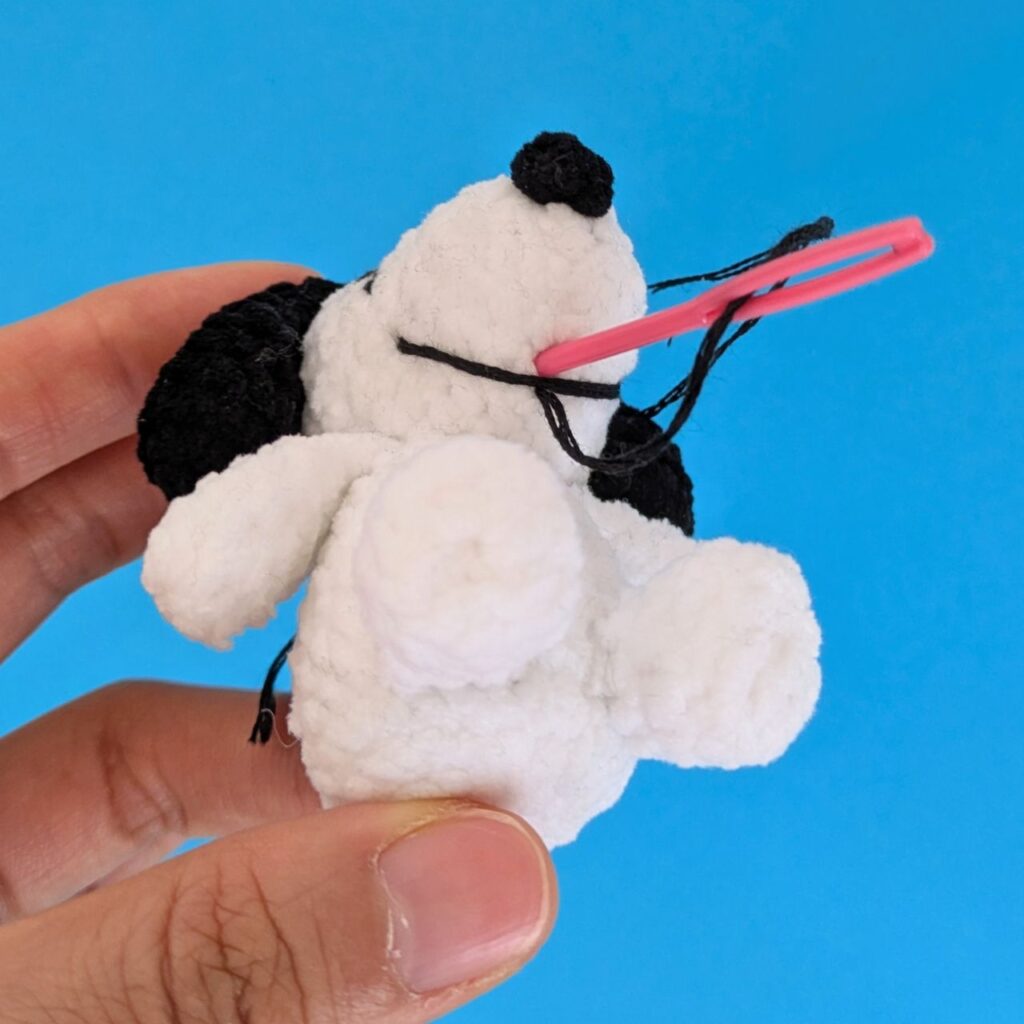
- Mouth
- The top of the mouth is sewn 2 stitches below the bottom of the eye between R6 and R7.
- Stretch the bottom center of the mouth 1 round in front of where the top of the mouth is sewn.
- Secure the center of the mouth by threading your needle through a stitch in the center and then threading it back into the same stitch.
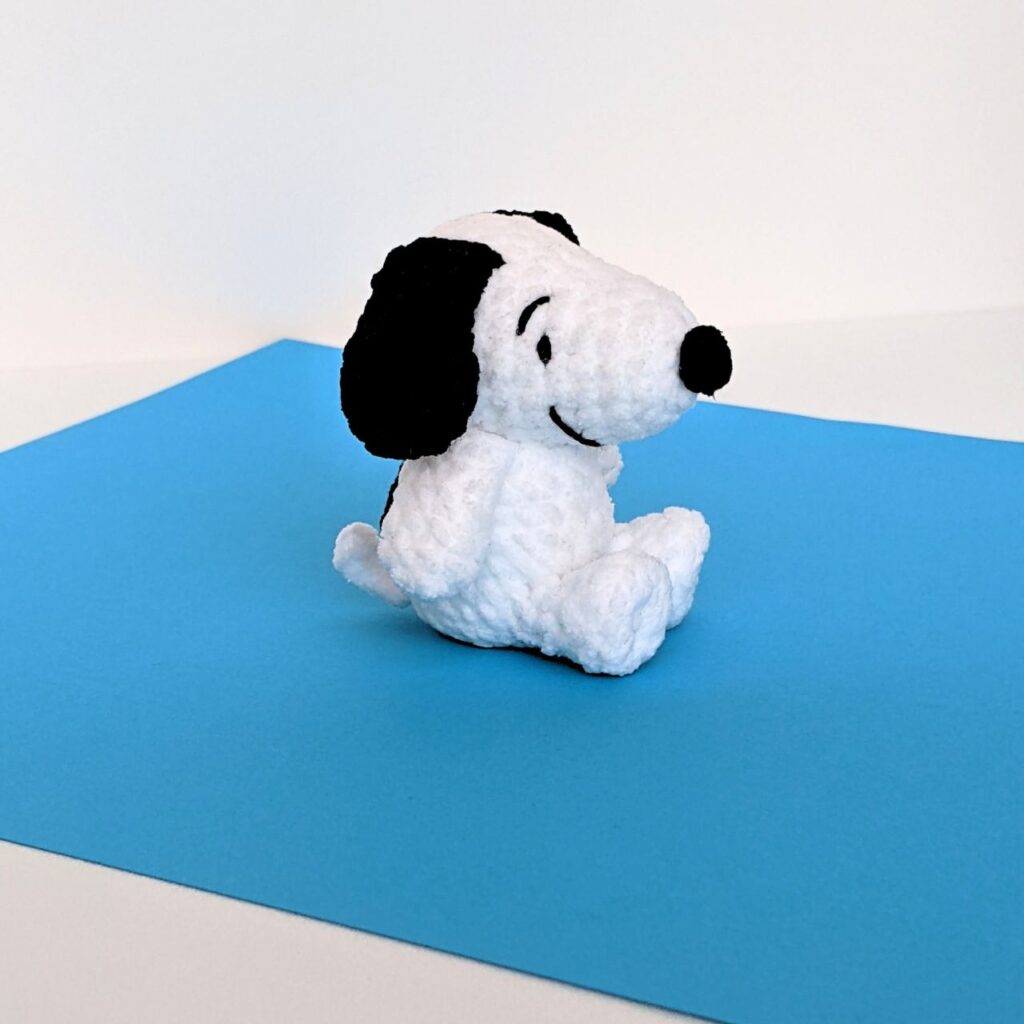
Congrats! You’re done! 🎉
I hope you enjoyed this crochet Snoopy pattern! If you have any questions, leave a comment below or on my socials!
Share your makes with me on Instagram by tagging @mwwcrafts – I’d love to see them!
Leave a Reply